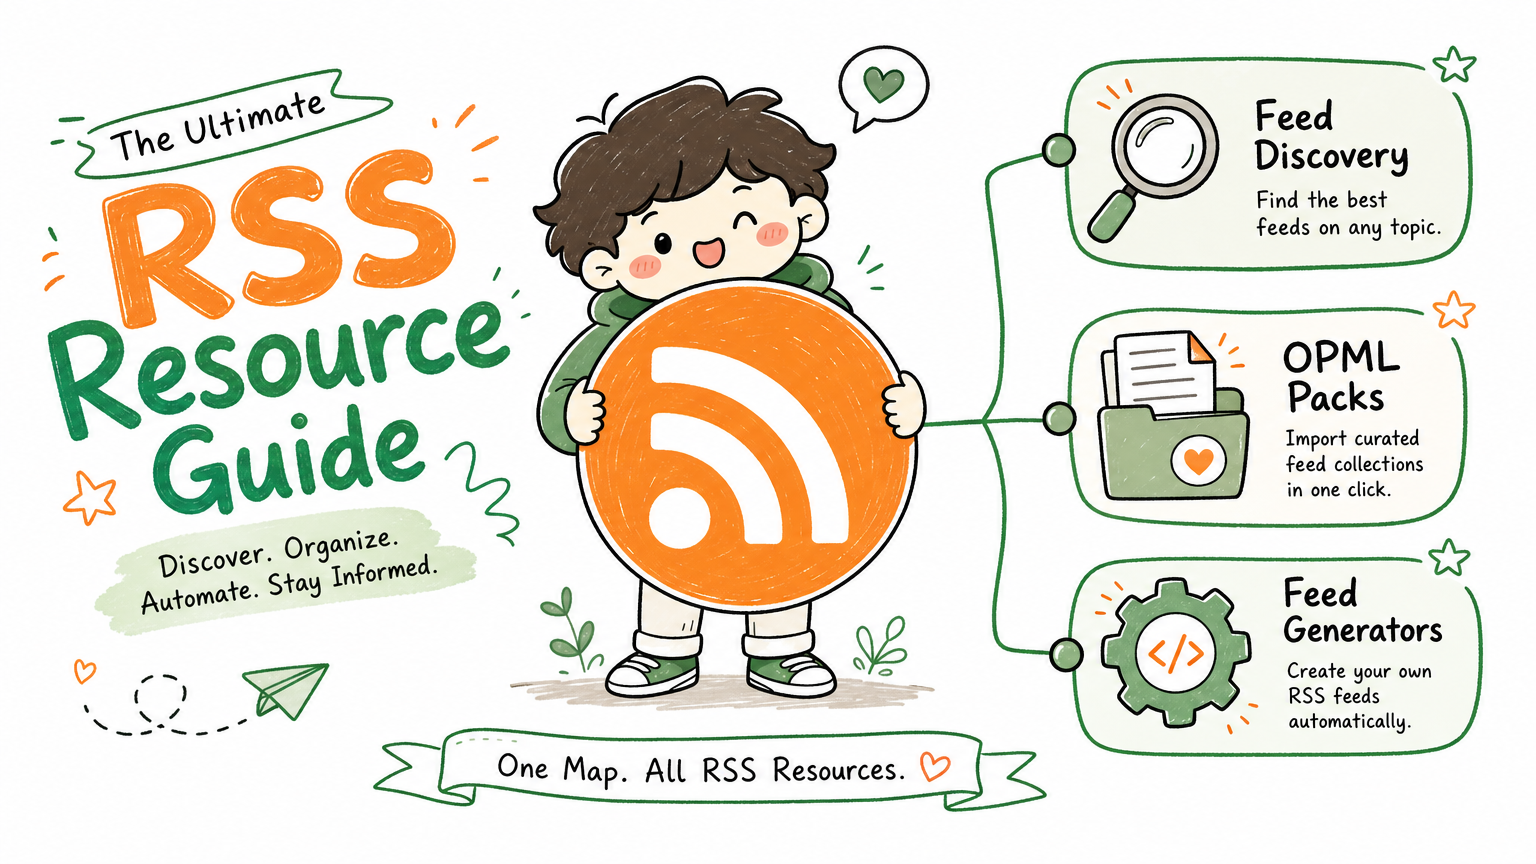
Monitoring a competitor who publishes no feed is the case every RSS guide skips. Twenty-one platforms sorted by which of three jobs they do, and the finished setup is business process automation you own outright, with no seat licence to renew.
Blaming the content is the reflex when a post underperforms, and it is usually the wrong diagnosis. A second reader decides distribution before any human sees the post, and most of what it checks is mechanical enough to automate business processes around, on five platforms at once.
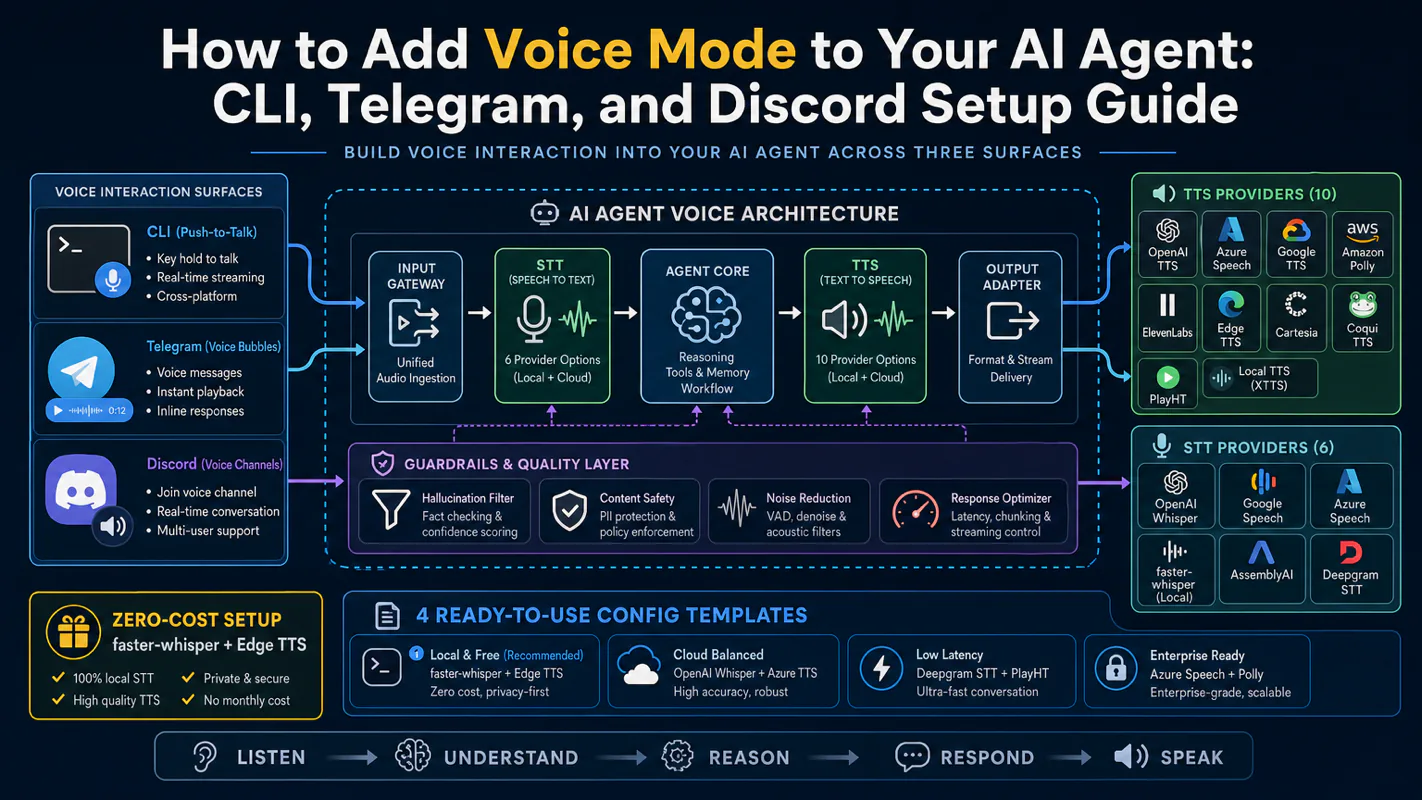
Gloves on, tape measure in hand — nobody types a query. Three voice surfaces for ai automation tools (terminal, Telegram, Discord), 10 TTS and 6 STT providers compared on cost and latency, plus a setup that costs nothing.
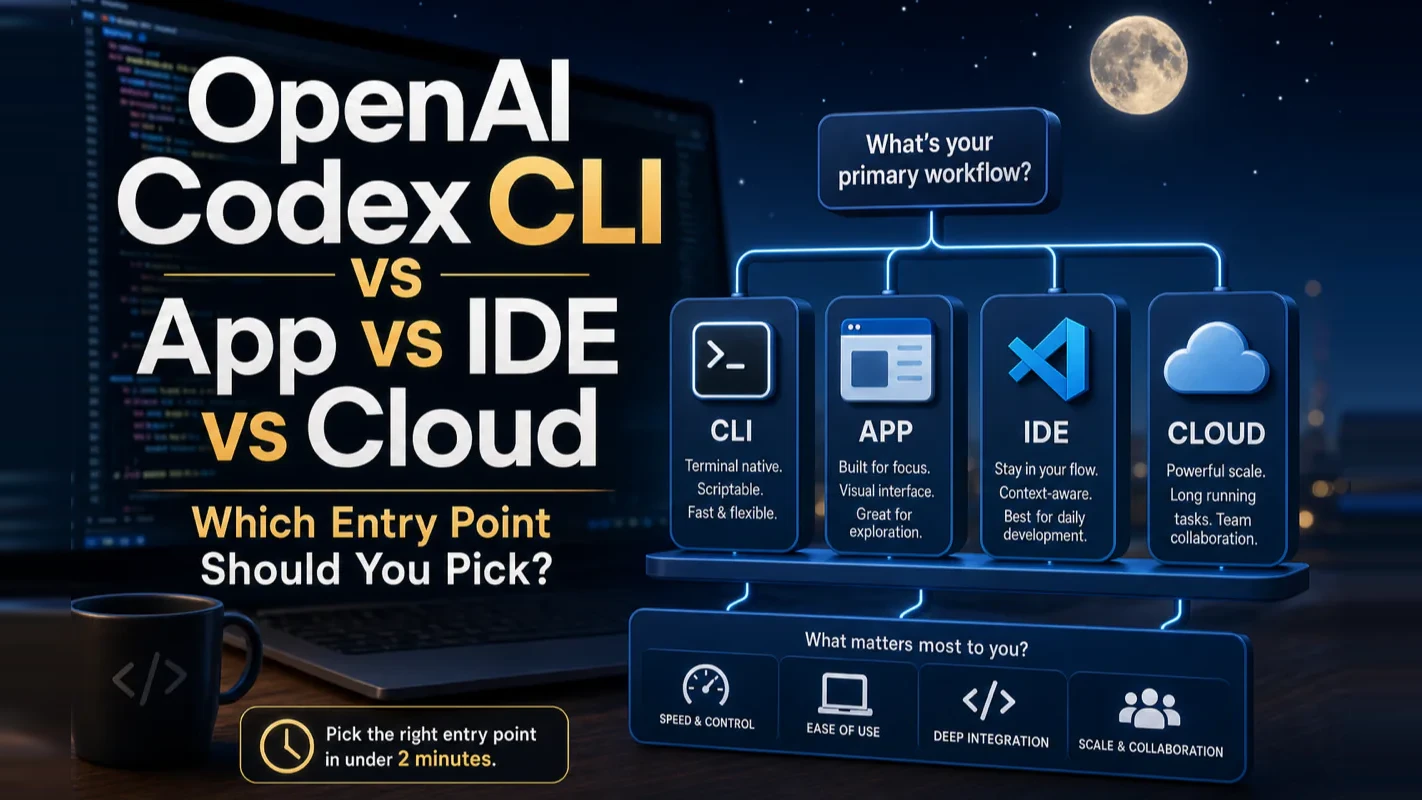
OpenAI Codex CLI vs App vs IDE vs Cloud: Which Entry Point Should You Pick?
Unused seats are rarely a product failure. They are an interface mismatch nobody checked before buying. Four Codex doors run one engine, and fitting ai automation tools to how a person already works beats fitting them to a feature list.
Buy a tool for a team of four and check the login records ninety days later. The pattern repeats almost everywhere: one person uses it daily, one tried it twice, two never signed in. A veterinary practice that bought four seats of a records assistant found exactly that, and the single adopter was the tech who already lived in that screen. Usually the product was fine and the entry point was wrong. Codex ships four entry points on one engine — app, command line, IDE extension, cloud — differing far less in capability than in who they fit. With ai automation tools, the common waste is the right product handed through the wrong door.
OpenAI Codex gives you four ways in: CLI, Desktop App, IDE Extension, and Cloud. They all share one engine. Pick the wrong entry point and you waste a week wrestling with setup instead of shipping code. Pick the right one and you start building in five minutes.
This guide maps your role to the correct entry point, walks through the real feature gaps between them, and flags the five mistakes that trip up every new Codex user.
Which Codex Entry Point Matches Your Role?
Here is the one table that answers the question most people search for:
Your role
Recommended entry point
Why
Never used a terminal before
Desktop App
OpenAI's official beginner recommendation — graphical UI, zero terminal friction
Engineer / comfortable with the command line
CLI
Broadest feature set, scriptable, fastest startup
Live inside VS Code or Cursor 6+ hours a day
IDE Extension
No window switching, drag-and-drop context, @filename references
Team with GitHub PR workflows / need background tasks
The most common rookie mistake: installing all four. They share one engine — install one, use it for two weeks, then add another only when a specific pain point demands it.
What Is OpenAI Codex and How Does It Differ from ChatGPT?
OpenAI positions Codex as a coding agent — an AI that reads your project, edits files, runs commands, and verifies results. ChatGPT gives you a code snippet to paste. Codex opens your repository, locates the bug, patches multiple files, runs the test suite, and reports back.
Think of it this way: ChatGPT hands you a repair manual. Codex sends a technician who diagnoses the problem, replaces the part, and confirms the fix.
Does Codex Require a Paid Plan?
Codex ships bundled with ChatGPT subscriptions — there is no separate Codex plan. The free tier gives you a limited trial. The Plus tier covers most individual developers. Pro and Team tiers unlock higher usage ceilings. Exact pricing changes frequently, so check the official pricing page for current numbers. The principle that stays constant: Codex bills by token consumption, so large projects and long tasks burn through allowances faster than small scripts.
Why Does Codex Have Four Entry Points?
Because developers work in fundamentally different environments:
Terminal veterans want keyboard-driven, scriptable interfaces — hence the CLI.
Non-engineers want buttons and panels — hence the Desktop App.
IDE-native developers refuse to switch windows — hence the IDE Extension.
Teams need asynchronous background execution and PR review — hence Cloud.
Four entry points serve four working styles. Choosing the right one means recognizing which style matches yours.
How Do the Four Codex Entry Points Compare Feature by Feature?
All four entry points share the same configuration layers — OpenAI's own documentation states this explicitly. Your AGENTS.md, ~/.codex/config.toml, skills, and login session are the same file read by every entry point. Change a setting in CLI and it takes effect in the App immediately.
This shared architecture means three things:
Configure once. Write your AGENTS.md in the CLI and the App picks it up automatically.
Switch freely. Moving from App to CLI costs zero effort — your project knowledge follows you.
Do not install all four. Their capabilities overlap by roughly 80%. You would just be staring at four dashboards showing the same data.
Despite the shared engine, each entry point has exclusive features. This matrix captures the real differences:
Feature
CLI
App
IDE Extension
Cloud
Plan Mode (full)
Yes
Yes
Yes
Limited
Visual diff panel
Text only
Yes
Yes
Limited
Worktree multi-agent parallelism
Manual
Yes
No
Limited
codex exec (non-interactive)
Yes
No
No
Yes (remote)
Hooks (auto-validation, signing)
Yes
No
No
No
Profiles (multiple config sets)
Yes
Limited
No
No
Background async long tasks
No
Limited
Limited
Yes
GitHub PR auto-review
Limited
Limited
Limited
Yes
No local environment needed
No
No
No
Yes
Fully graphical, no terminal
No
Yes
Yes
Yes
Use this matrix as your decision tool. Find the column where your highest-frequency needs land — that column is your entry point.
What Should a Beginner Install First?
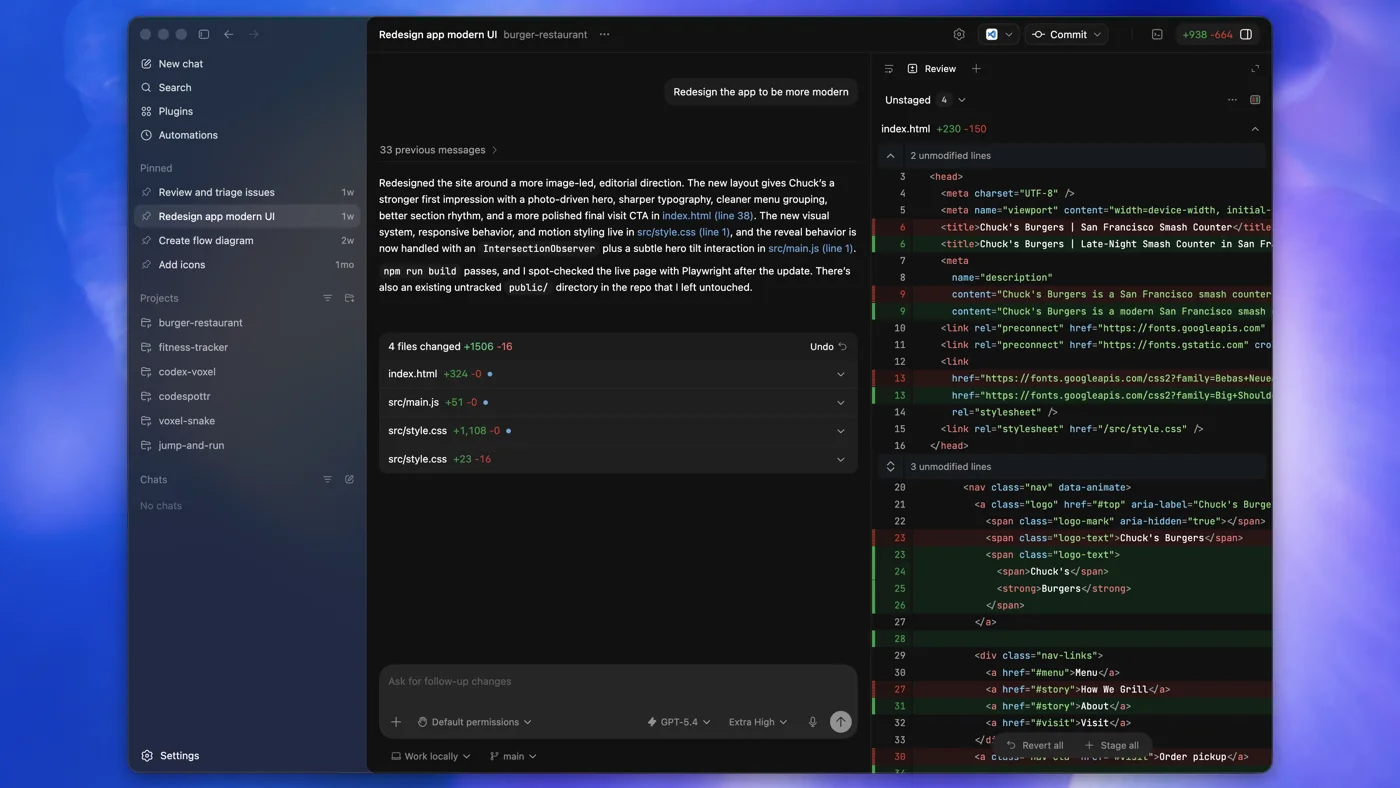
If you have never opened a terminal, install the Desktop App. Download it from openai.com/codex, sign in with your ChatGPT subscription, select a project folder, and start your first conversation. The interface splits into four panels: project list on the left, chat in the center, diff viewer on the right, and a built-in terminal at the bottom (Cmd+J).
Three actions every beginner should learn on day one:
Enable Plan Mode (Shift+Tab or /plan). Codex outlines its plan before touching any file. You approve or reject before it acts. OpenAI calls this "the easiest and most effective option for most users."
Use Local mode, not Worktree. Worktree isolates work on a separate Git branch — a branch-isolation technique that requires understanding Git worktrees, setup scripts, and merge strategies. Start with Local mode (Codex edits your current branch directly) and revisit Worktree after two weeks.
Commit before every task. Run git add . && git commit -m "checkpoint" before sending a new prompt. If Codex produces an unwanted change, git reset --hard HEAD~1 reverts instantly. This is your cheapest safety net.
From my own experience running Codex daily for over a year: the App covers about 90% of everyday tasks. Several content creators and product managers I work with have never touched the CLI and ship everything through the App. "Desktop App first" is not a beginner crutch — it is a rational default.
When Should You Choose the Codex CLI Instead?
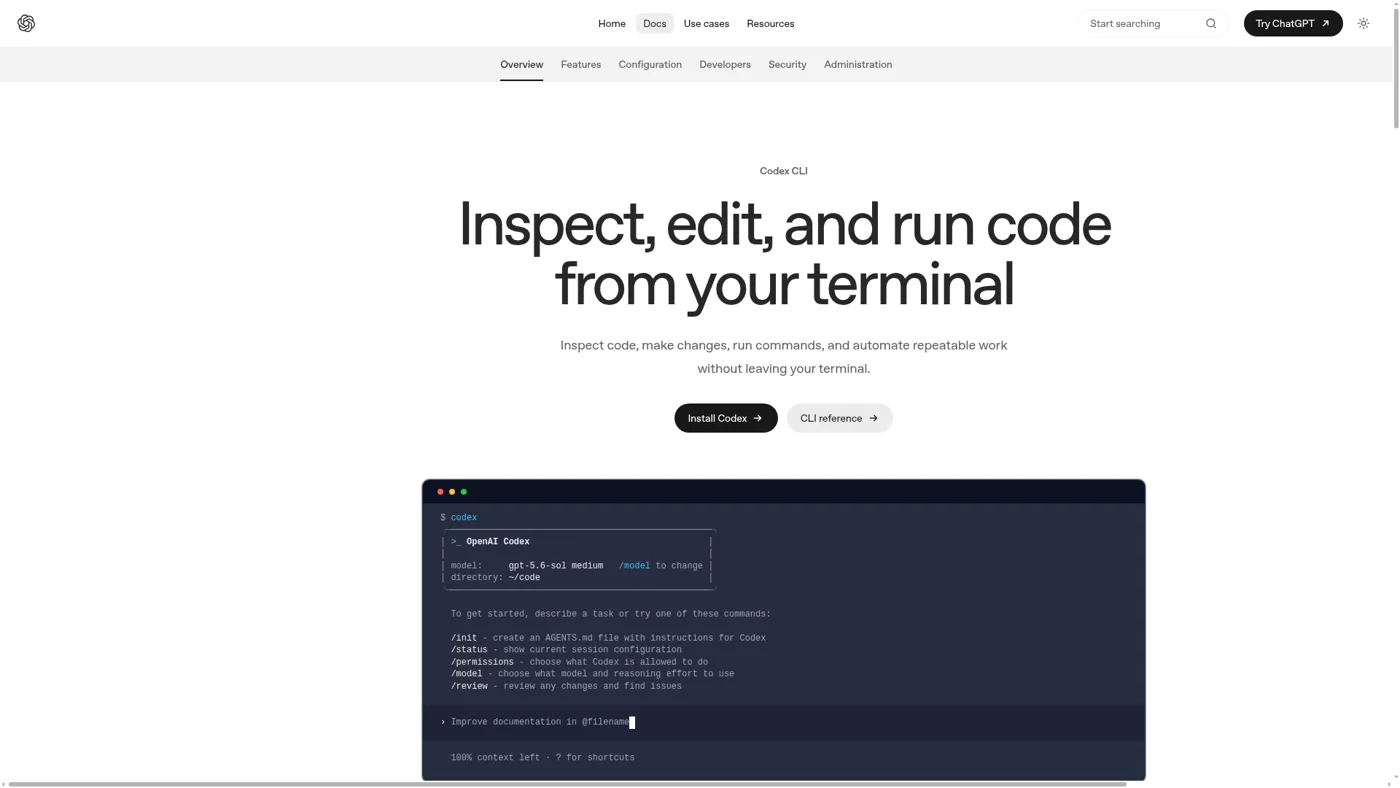
Install the CLI if you already live in the terminal. One command gets you started:
All installation methods produce the same binary. The official curl script bundles its own runtime, so beginners who have never installed Node.js get the smoothest path.
What Makes CLI the Power-User Choice?
The CLI holds four exclusive capabilities that the App and IDE Extension lack:
codex exec — non-interactive mode. Pipe it into cron jobs, GitHub Actions, or Makefiles. I run roughly 5-10 codex exec sessions a day, each lasting 5-10 minutes.
Hooks — custom scripts that fire before or after Codex modifies a file or runs a command. Define them in ~/.codex/hooks.json.
Profiles — multiple configuration sets in ~/.codex/config.toml. Launch with --profile staging to switch between production, development, and cost-saving configs.
Remote TUI mode — run Codex on a VPS and control it from your local terminal. Code never leaves the server.
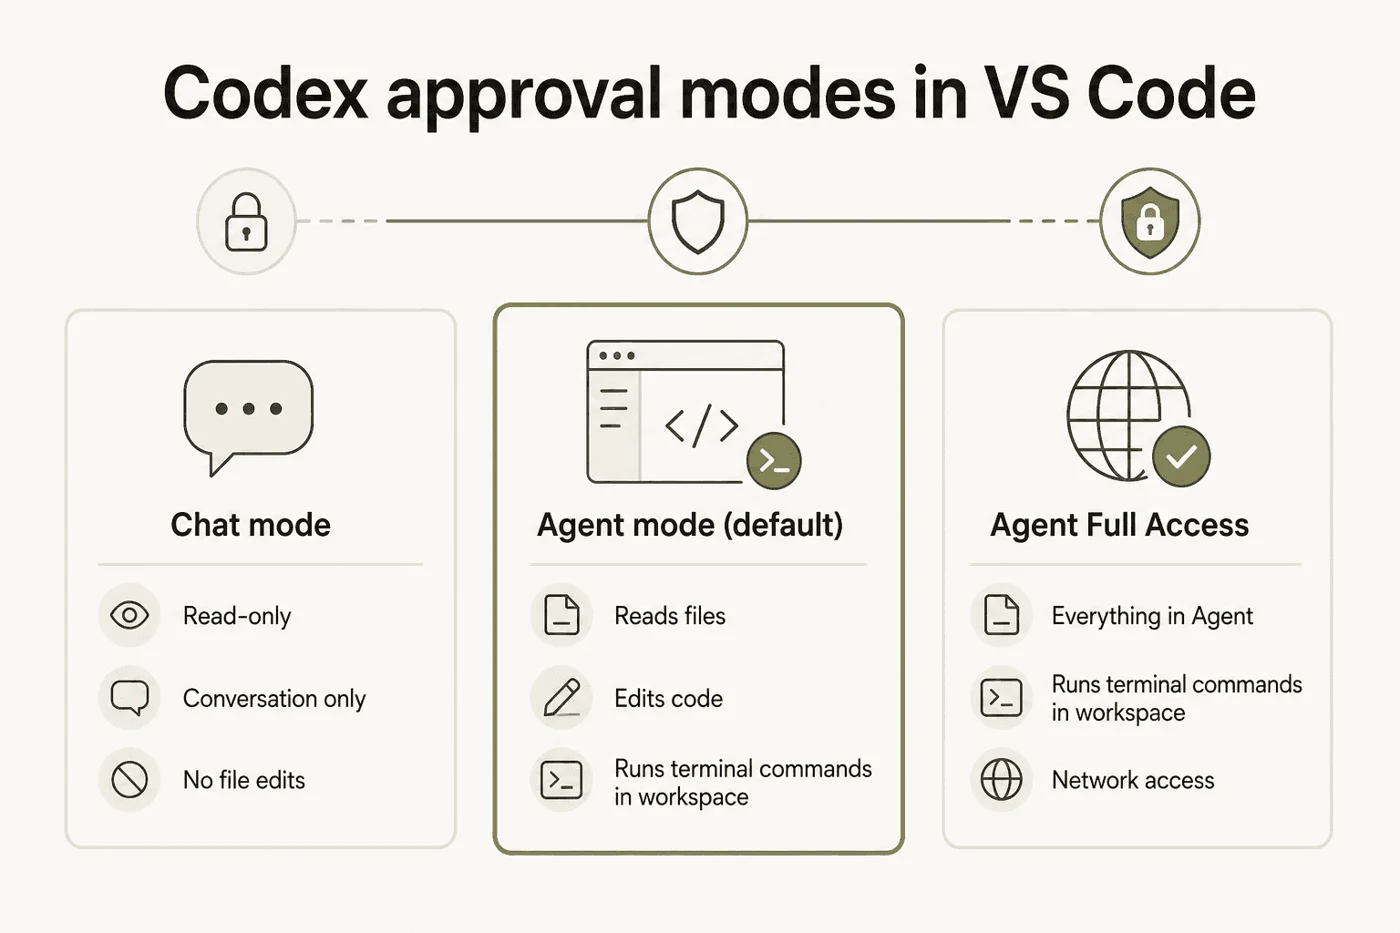
One safety warning: the default approval policy (on-request) asks you to confirm every action. That is intentional. Do not enable --full-auto during your first two weeks. Understand the sandbox and approval model first, then loosen restrictions gradually.
When Does the IDE Extension Make Sense?
Install it if you spend six or more hours a day inside VS Code, Cursor, or a JetBrains IDE and switching windows breaks your flow.
VS Code / Cursor / Windsurf: Search "OpenAI Codex" in the extension marketplace, install, and sign in. A Codex panel appears on the right side.
JetBrains (IntelliJ, PyCharm, WebStorm, Rider): Update to a recent IDE version, install the AI Assistant plugin, and select Codex from the agent picker inside JetBrains AI Chat.
Three concrete advantages:
@filename context injection. Type @auth.ts in the chat box and the entire file loads into context — ten times faster than copy-paste.
Active tab awareness. Whatever file you have open, Codex uses it as implicit context without you explaining anything.
Drag-and-drop images. UI bugs, design mockups, error screenshots — drop them directly into the panel.
One Cursor-specific pitfall: Cursor's horizontal activity bar hides the Codex icon in an overflow menu. Switch the activity bar orientation to vertical, drag the Codex icon to the right sidebar, then switch back. The official IDE docs document this workaround.
The IDE Extension currently lacks hooks, profiles, codex exec, and mid-task interruption. If any of those is a daily need, skip the extension and use the CLI.
One update that many older articles miss: the IDE Extension now supports Cloud Delegation. You can send a long-running task to OpenAI's servers directly from VS Code and review the diff when it finishes — no browser switch required. The old claim that "IDE Extension cannot run long tasks" is outdated.
When Do You Actually Need Codex Cloud?
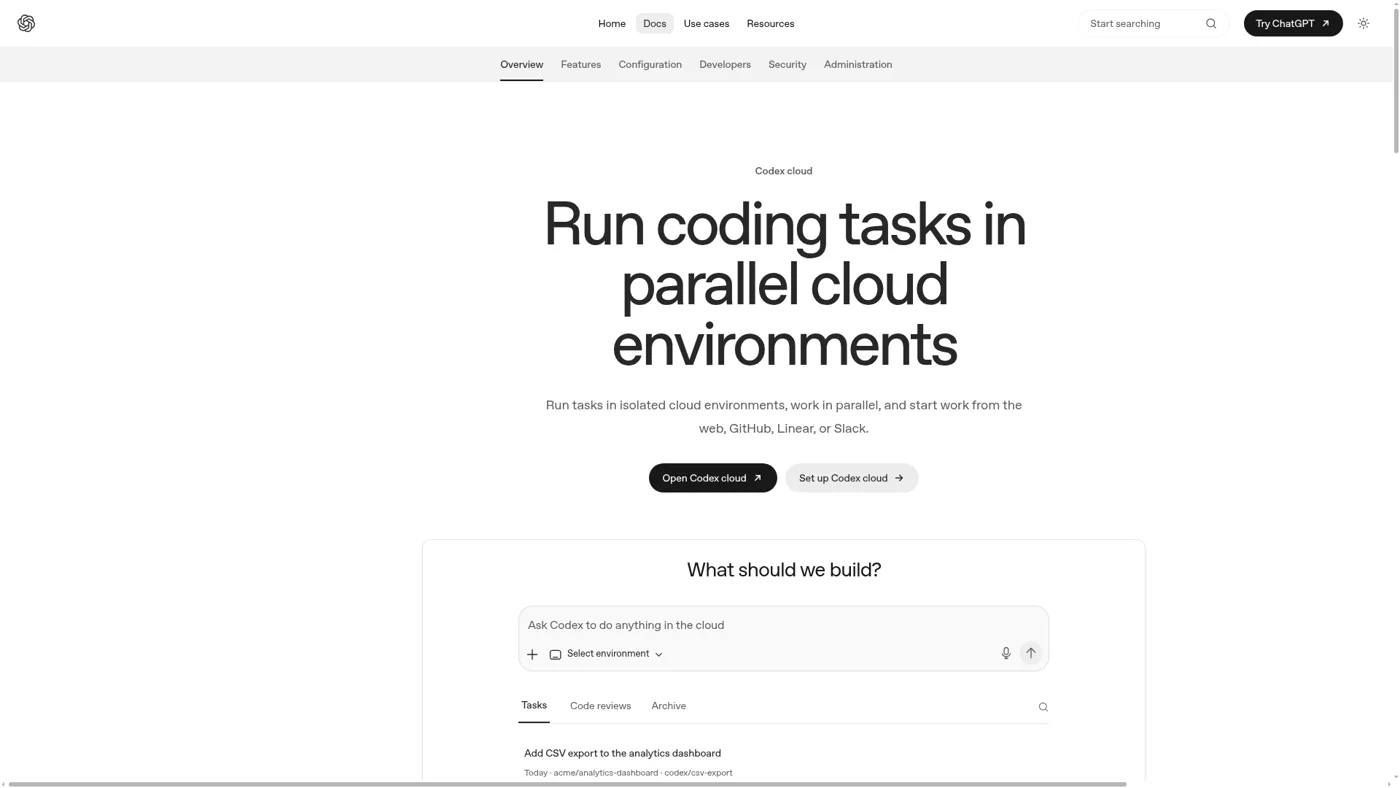
Cloud is not a standalone product — it is an add-on that complements any local entry point. Access it at chatgpt.com/codex or trigger tasks from Slack, Linear, or GitHub comments.
Three Scenarios Where Cloud Delivers Real Value
Scenario
Why Cloud beats local
GitHub PR auto-review
@codex review triggers background code review with P0/P1 severity comments
Tasks longer than 30 minutes
Large refactors, dependency upgrades, cross-service integration tests — no local CPU/memory impact
Multi-attempt runs
--attempts 3 runs the same task three times and picks the best result
Three Signals That Cloud Is Not for You
Signal
Reason
Solo developer, no team
Half of Cloud's features target PR review workflows
A common misconception: "Cloud = stronger model." The opposite is true. Local entry points access newer, more capable model tiers. Cloud's advantage is infrastructure (background execution, parallelism), not intelligence.
How I Route Tasks Across Entry Points After a Year of Daily Use
After running Codex every day for over a year, I settled on CLI + App as a dual-track setup:
CLI as the engine. All automation — cron jobs, batch edits, CI pipelines — runs through codex exec. Roughly 5-10 executions per day, 5-10 minutes each.
App as the control tower. Tasks that need visual diff review or parallel execution go here. I keep three active conversation threads and review completed diffs from a board view.
I dropped the IDE Extension because my coding stack already runs Cursor plus Claude Code. Adding a third AI panel inside the editor created decision overhead — "which AI handles this?" — that cost more time than any of them saved. My split: Cursor for inline completion, Claude Code for long-context knowledge exploration, Codex CLI + App for sandboxed batch work and multi-agent parallelism.
I dropped Cloud because I operate as a solo builder. My knowledge base lives in a local Git repo with no PR review pipeline. Cloud's team-oriented features produced zero return for my workflow. Colleagues who run SaaS engineering teams, however, report that Cloud's automated PR review alone justifies the credit premium.
Your routing table will differ. The point is not to copy mine — it is to recognize that the right combination depends entirely on your role, team structure, and daily workflow.
What Are the 5 Most Common Codex Mistakes Beginners Make?
Mistake 1: Installing All Four Entry Points
They share one engine. Install one. Use it for two weeks. Add another only when you hit a wall that the first one cannot solve.
Mistake 2: Starting with Worktree Mode on Day One
Worktree requires understanding Git branch isolation, setup scripts, and merge strategies. Use Local mode for your first two weeks. Switch to Worktree when you want to run parallel agents on separate branches.
Mistake 3: Enabling `--full-auto` Immediately
OpenAI designed --full-auto for experienced users running batch jobs. Beginners who enable it hand unrestricted write access to the AI before understanding the sandbox model. Keep the default on-request approval mode for at least two weeks.
Mistake 4: Skipping the AGENTS.md File
Every new Codex conversation starts with a blank context. Without an AGENTS.md file at your project root, you repeat the same project rules in every session. Run /init to generate a template, then spend ten minutes customizing it. Every entry point reads the same file — write it once, benefit everywhere.
A minimal AGENTS.md that covers the essentials:
# Project AGENTS Guide

## What this project is
A Next.js + Tailwind + Prisma SaaS application.

## How to run tests
npm test (all tests must pass before a task is considered complete)

## Code style
- TypeScript strict mode
- camelCase function names
- Functional components only, no classes

## Critical files
- src/lib/db.ts — Prisma database entry point
- src/app/api/* — API routes
- Do NOT modify src/generated/* — auto-generated, changes get overwritten
Mistake 5: Opening Cloud Before You Need It
Cloud credits cost significantly more than local usage. Without a team, a PR review pipeline, or long-running background tasks, Cloud burns through your allowance with no return. Wait until a genuine need surfaces.
What Has Changed in 2026 That Outdated Guides Miss?
Codex iterates every few weeks. Many comparison articles written six months ago contain stale claims. Here are the corrections:
Outdated claim
Current reality (2026)
"CLI requires Node.js"
OpenAI now ships a one-line installer script (curl ... install.sh) that bundles its own runtime. No Node.js prerequisite.
"IDE Extension cannot run long tasks"
The IDE Extension supports Cloud Delegation — send a task to OpenAI's servers from inside VS Code, review the diff when it finishes.
"Cloud uses a stronger model"
Local entry points access newer model tiers. Cloud locks you to a fixed tier. Cloud's strength is infrastructure, not model quality.
"The four entry points are independent"
They share configuration, login, skills, and AGENTS.md. The IDE can delegate to Cloud. The App embeds a browser and Computer Use capabilities. Cross-session memory (Memories) is landing.
A quick freshness test for any Codex guide: does it mention the one-line installer and Cloud Delegation? If not, it was likely written before these features shipped.
What Should You Do After Your First Two Weeks?
What you feel after two weeks
Next action
Codex keeps making the same mistake
Write or refine your AGENTS.md
You want Codex to run a daily automated task
Add the CLI and use codex exec with a cron job
You want two independent tasks running at once
Try Worktree mode in the App
You keep typing the same prompt across projects
Create a Skill in ~/.codex/skills/
You want Codex to call external tools
Set up an MCP server connection
Your team uses GitHub PRs
Enable Cloud and install the GitHub integration
Every step builds on the shared-config foundation. Your AGENTS.md, skills, and MCP settings follow you across all entry points.
Quick Self-Check Before You Decide
Do you know whether you are a "never used a terminal" / "engineer" / "IDE-native" / "team with PRs" type?
Have you decided on a ChatGPT plan or will you start with the free trial?
Will you use Plan Mode for your first week?
Will you git commit before every Codex task?
Will you write your AGENTS.md in the first week?
Do you understand that Cloud is not a beginner requirement?
Do you understand that Worktree is a week-three feature, not a day-one feature?
Do you understand that --full-auto is not a beginner switch?
If any answer is "not sure," re-read the matching section above.
One-Line Summary
OpenAI Codex CLI vs App vs IDE vs Cloud is not a four-way choice — they are four faces of one engine. Install one, run it for two weeks, and add another only when a real limitation demands it.
Ready-to-Use Prompt: Pick Your Codex Entry Point and Route Tasks Across All Four
What this does: Matches your role to one of four Codex entry points (CLI, App, IDE, Cloud), scores all four on fit, builds a daily-use task router, flags the five rookie mistakes, and lays out your first week — so you start building in five minutes instead of wrestling setup for a week. Based on: OpenAI Codex CLI vs App vs IDE vs Cloud: Which Entry Point Should You Pick? — https://aiworkflowpro.com/codex-cli-app-ide-cloud/ Time to run: ~4 minutes
Copy this prompt into Claude Code, ChatGPT, or any AI assistant:
ROLE: You are a Codex onboarding advisor. Your job: match a person's role to one of four Codex entry points (CLI, App, IDE, Cloud), then build a daily-use task-routing plan across entry points and flag the five rookie mistakes.

CONTEXT — CODEX ENTRY POINT SELECTOR:
OpenAI Codex has four entry points sharing one engine — CLI, Desktop App, IDE Extension, Cloud — and picking the wrong one wastes a week wrestling setup. The role match is the whole decision: terminal-newcomers → Desktop App (GUI, zero terminal friction); CLI-comfortable engineers → CLI (broadest features, scriptable, fastest startup); editor-native devs in VS Code/Cursor 6+ hours → IDE Extension (no window switch, drag-drop context, @filename); team or heavy/long compute → Cloud (browser, shared, scales). After a year of daily use most people route different tasks to different points rather than live in one.

INPUTS (fill in before running):
- ROLE: YOUR_ROLE_HERE (terminal newcomer / CLI-comfortable engineer / editor-native dev / team lead)
- PRIMARY_EDITOR: YOUR_EDITOR_HERE (VS Code / Cursor / none / other)
- TASK_MIX: YOUR_TASKS_HERE (quick scripts / long refactors / heavy compute / team collaboration)
- NEEDS_UNATTENDED: YOUR_ANSWER_HERE (do you need long runs while away? yes/no)

METHOD — 6 STEPS:

Step 1 — Match role to one entry point
Pick the single starting point: terminal newcomer → Desktop App; CLI-comfortable → CLI; editor-native (PRIMARY_EDITOR = VS Code/Cursor) → IDE Extension; team or heavy compute → Cloud. State the pick + one-line reason. Install only this one first.

Step 2 — Score all four on fit
Rate CLI, App, IDE, Cloud each 0-5 on fit using: terminal comfort, editor match, compute scale, collaboration need. Confirm the step-1 pick has the top score; if not, reconcile.

Step 3 — Confirm beginner-first rule
If ROLE = terminal newcomer, the App is non-negotiable as the first install — do not start with CLI even though it has the broadest features. Friction kills week one.

Step 4 — Build the daily-use task router
For TASK_MIX, assign each task type to its best entry point (quick local script → CLI; in-editor edit → IDE; long/heavy or NEEDS_UNATTENDED → Cloud; casual no-terminal → App). Daily users rarely live in one point — route by task.

Step 5 — Flag the 5 rookie mistakes
Check and warn: (1) installing all four at once; (2) a non-terminal user forcing the CLI; (3) running long/heavy jobs locally instead of Cloud; (4) ignoring IDE affordances (@filename, drag-drop); (5) treating Codex like ChatGPT with no AGENTS.md or project context. Mark which the reader is at risk of.

Step 6 — First-week plan
For the chosen entry point: install → add an AGENTS.md → first real task → (later) add a second point only when a task type demands it. One concrete action per step, not a feature tour.

RULES:
- Install one entry point first — never all four on day one.
- Terminal newcomers start on the App, not the CLI, regardless of feature breadth.
- Route long, heavy, or unattended runs to Cloud — do not stall the laptop on big jobs.
- Codex needs project context (AGENTS.md) — it is not ChatGPT; bare prompts underperform.

OUTPUT FORMAT:
Output six sections:
1. **Entry-point pick** — the one chosen point + one-line reason.
2. **Fit scores** — markdown table with columns: Entry point | Terminal fit | Editor fit | Compute scale | Collaboration | Total (0-5).
3. **Beginner-first check** — pass/fail on the newcomer→App rule.
4. **Daily-use task router** — markdown table with columns: Task type | Routed entry point | Why.
5. **Rookie-mistake check** — markdown table with columns: Mistake | At risk? (Y/N) | Avoidance.
6. **First-week plan** — markdown table with columns: Day | Action.
Save as @templates/codex-cli-app-ide-cloud.md and run when you first install Codex, then re-run when your role or task mix changes or you add a second entry point.
Monitoring a competitor who publishes no feed is the case every RSS guide skips. Twenty-one platforms sorted by which of three jobs they do, and the finished setup is business process automation you own outright, with no seat licence to renew.
Blaming the content is the reflex when a post underperforms, and it is usually the wrong diagnosis. A second reader decides distribution before any human sees the post, and most of what it checks is mechanical enough to automate business processes around, on five platforms at once.
Gloves on, tape measure in hand — nobody types a query. Three voice surfaces for ai automation tools (terminal, Telegram, Discord), 10 TTS and 6 STT providers compared on cost and latency, plus a setup that costs nothing.
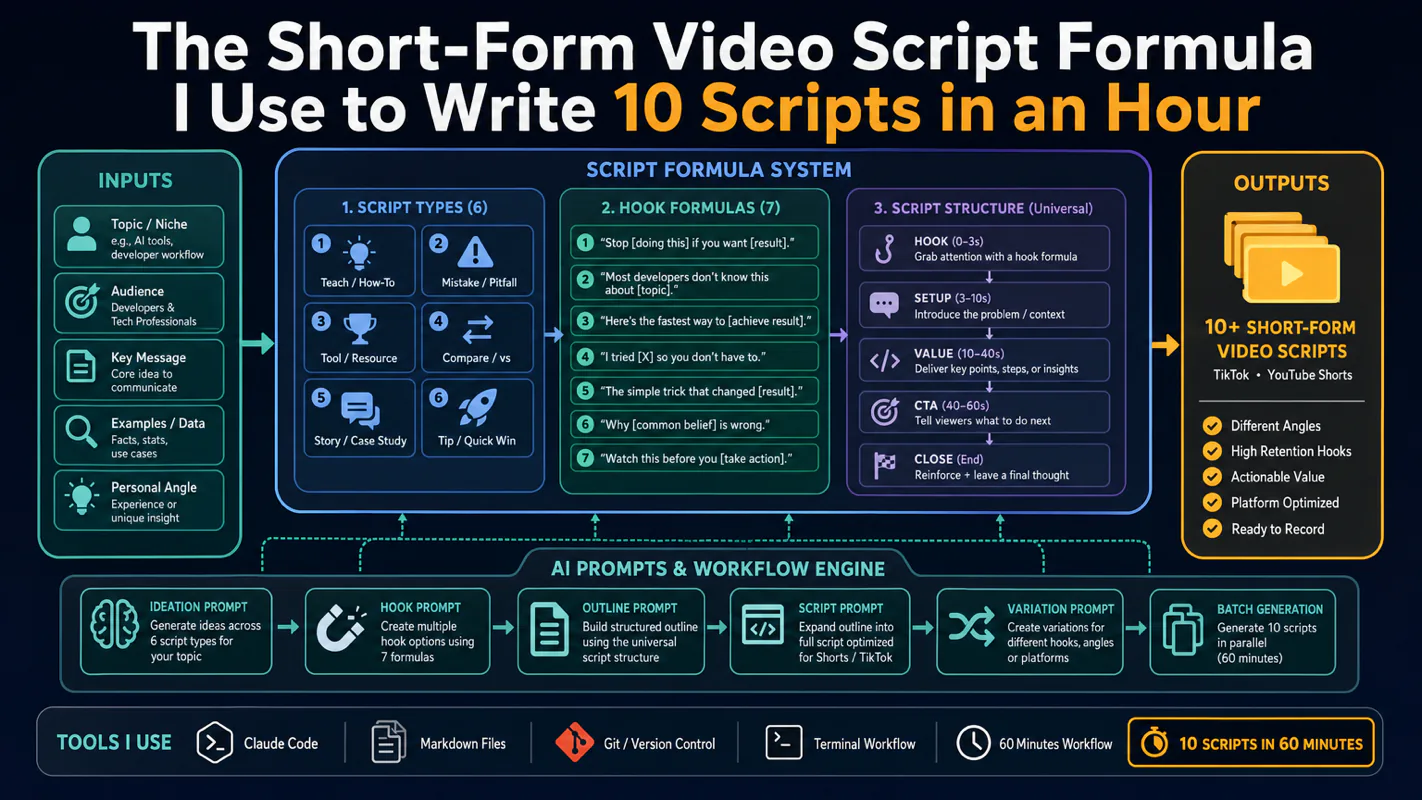
Thursday afternoon, fourteen product ideas, a Monday filming slot, no scripts. Six script shapes and seven hook formulas turn that hour into finished drafts — and the business rule stays: rewrite at least 30% before anything ships.