A 30-minute video is too long for one conversation. This guide walks the 8-step Skill that locks the narration and one look, then gives each 3-minute segment to a fresh sub-agent, five at a time, and polishes the cut in an empty-context session.
The folder structure behind my AI agent team, the Herdr setup where Grok Build, Claude Code and Kimi Code work side by side, and the two live tasks from the video: an article published by voice and a three-model front-end test.
Eight folders of plain Markdown, a CLAUDE.md index in each, and seven prompts that make your agent interview you. Every prompt, template and command from the video, in order.
PixVerse Video Prompt Tutorial: Framework, Templates, and Real Examples
An unused feature bills you in wasted renders, one hopeful attempt at a time. Constraining a request turns output from a lottery into a process, which is why the cheapest place to automate business processes is inside software you already pay for.
Version note: This tutorial covers PixVerse across multiple releases, from V4.5 up to the current V6. The five-element prompt framework applies to all of them.
The gap between a good AI video and a mediocre one is rarely about the model. It is about the prompt.
I learned this the hard way. My first fifty PixVerse generations looked like random stock footage. Same model, same credits, same interface. The problem was that I was writing image prompts for a video tool. Video prompts need to describe motion, not just appearance. Once I figured out the structure, the hit rate jumped from maybe 1 in 10 to 3 or 4 in 8.
This tutorial breaks down the framework I use for every PixVerse generation. It covers the five structural elements of a video prompt, eight scene templates you can copy and modify, the Transition mode that most guides skip, and seven mistakes that consistently produce garbage output.
TL;DR
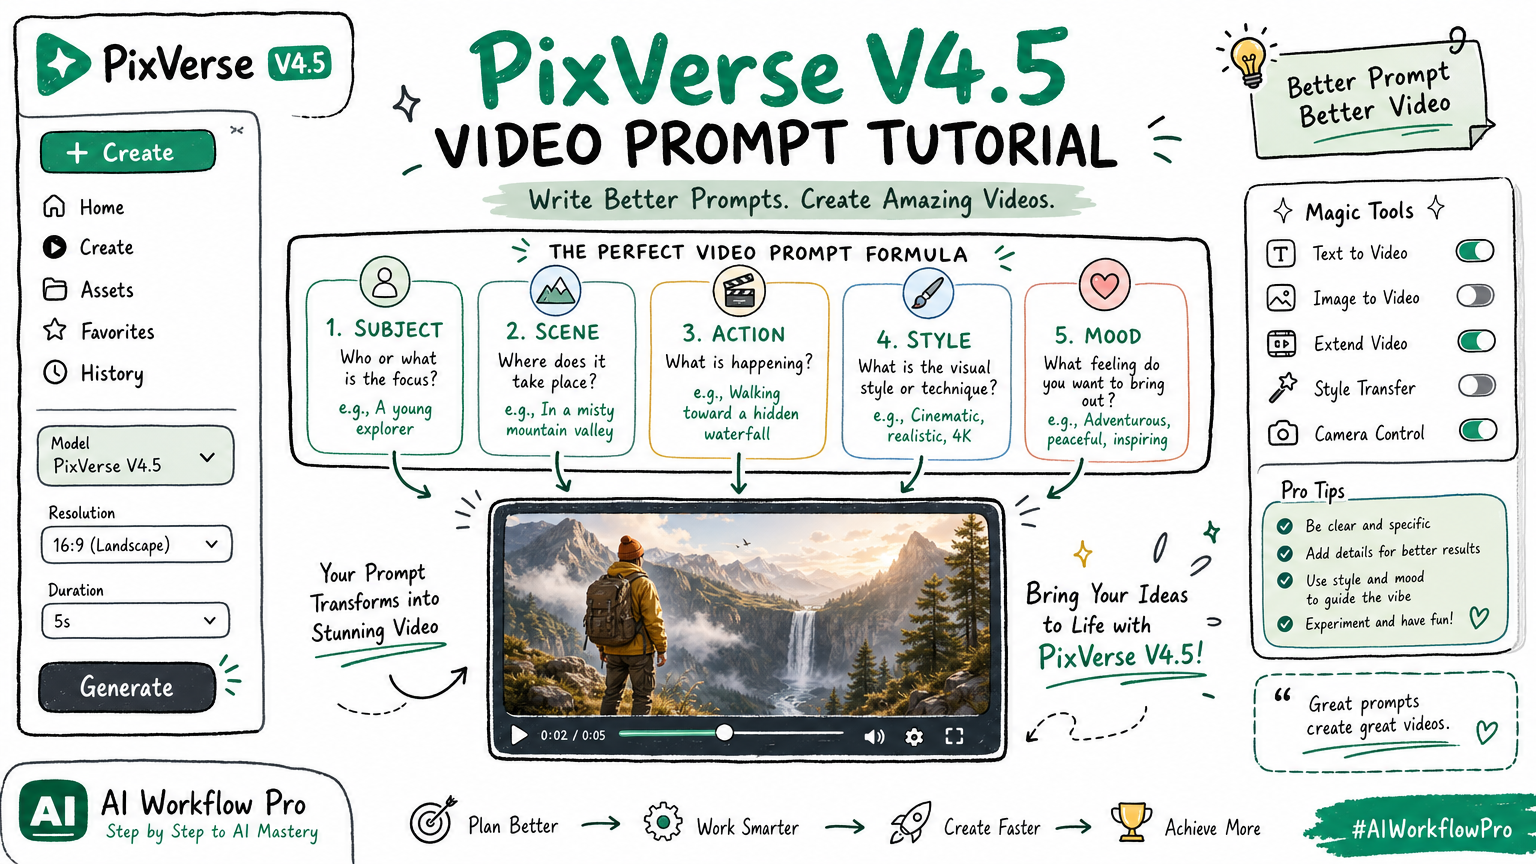
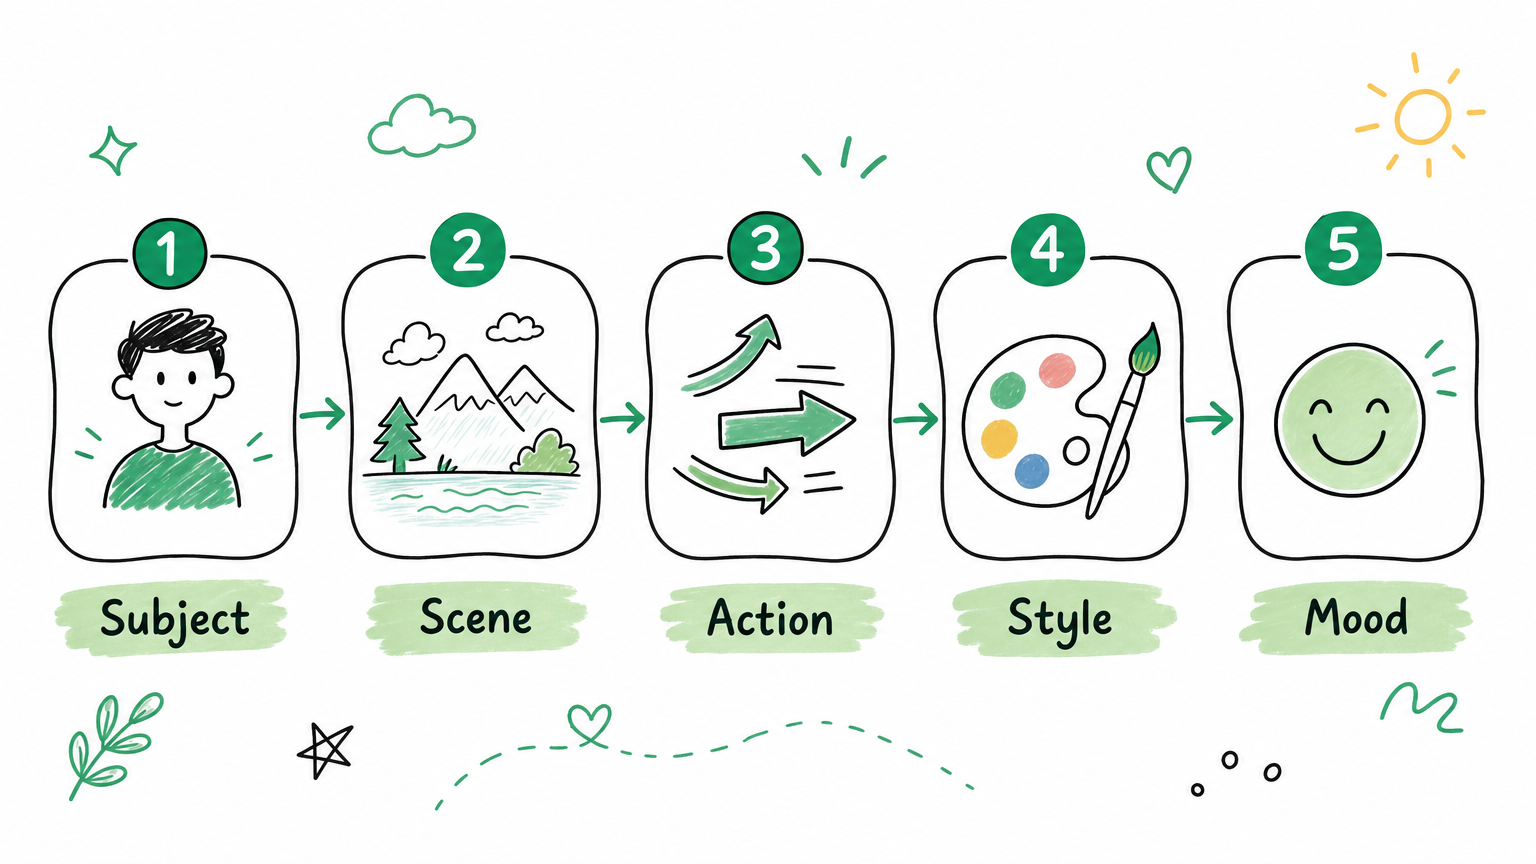
Video prompts need five elements: subject, scene, action, style, and mood. Skip one and the AI fills the gap with generic defaults.
The optimal prompt length is 30-80 words. Shorter lets the model guess too much; longer causes it to drop details.
PixVerse Transition mode (start frame + end frame + prompt) is the most underused feature on the platform.
One action per prompt. Multi-action prompts produce multi-failure results.
Every tool a company pays for has a feature nobody switches on. In PixVerse it is Transition mode: you supply a start frame, an end frame, and the model fills the middle. Skipping it is how a social team ends up generating clip after clip hoping one lands, when the two frames that mattered were already sitting in a folder. The five elements below, the thirty-to-eighty word range and the one-action-per-prompt rule all point the same way — constrain the request and the output stops being a lottery. Anyone who sets out to automate business processes learns this eventually: much of the gain sits in features already bought and never configured.
PixVerse Video Prompt Interpretation
The model does not read your prompt word by word. It breaks your text into tokens, maps them to visual patterns it learned during training, then generates a sequence of frames that satisfies those patterns while maintaining temporal coherence. That last part matters: every frame must connect smoothly to the next, which means your prompt affects not just what appears on screen but how it moves and transitions.
Three principles follow from this:
Specificity beats poetry. The model cannot interpret metaphors. "The river of time" will produce a literal river. "A clock face with hands spinning rapidly, close-up, dramatic lighting" produces what you actually want.
Structure beats length. A 50-word prompt with clear subject, scene, action, style, and mood outperforms a 150-word paragraph every time.
PixVerse rewards literal description. Vague prompts produce average results. Structured prompts produce professional output. This is not a quirk; it is how diffusion-based video models work.
What Is the Right Prompt Length for PixVerse?
I was wrong about prompt length for months. I assumed longer meant more control. It does not.
After testing hundreds of prompts across different lengths, here is what actually happens:
Prompt Length
What You Get
Best For
10-30 words
Correct general direction, random details
Quick concept tests, finding inspiration
30-80 words
Best balance of control and coherence
Most production work
80-120 words
Rich detail but possible conflicts
Complex scenes, expect 2-3 iterations
120+ words
Model drops parts of the description
Not recommended
According to fal.ai's benchmark data, PixVerse performs most consistently in the 40-80 word range. Start at 30 words, then add specific details one at a time to see what moves the needle.
What Are the Five Elements of a Strong PixVerse Video Prompt?
Every effective video prompt I have written contains these five components. Missing any one of them forces the model to guess, and guessing means generic.
Element 1: Subject
The core object or character in your frame. The more specific the description, the less the model improvises.
Category
Weak Prompt
Strong Prompt
Person
A woman
A young woman with shoulder-length black hair, wearing a red leather jacket, confident expression
Animal
A cat
A fluffy orange tabby cat with green eyes, curled up on a velvet cushion
Object
A car
A vintage 1967 Ford Mustang, cherry red, chrome bumpers catching sunlight
Setting
A street
A narrow cobblestone alley in an old European town during golden hour
The detail most beginners miss is state. Describing appearance without posture, expression, or energy level produces stiff, mannequin-like characters. Adding "relaxed posture" or "looking directly at camera with a slight smile" makes the output feel alive.
For character consistency across multiple clips, keep the exact same physical description in every prompt and add the keyword consistent character. Record the seed value when you get a good result.
Element 2: Scene
The environment around your subject. Include location, time of day, weather, and lighting.
Neon-lit Tokyo street at night, rain-soaked asphalt reflecting colorful lights, steam rising from food stalls
Quiet library with tall wooden bookshelves, afternoon sun streaming through arched windows, dust particles floating in light beams
Scene descriptions work on three layers:
Layer
What to Describe
Example
Foundation
Location type
Coffee shop, forest path, rooftop
Atmosphere
Time + weather + light
Rainy afternoon, warm lamplight
Detail
Environmental elements
Steam from cups, bookshelf in background
Write at least to the atmosphere layer. Foundation-only descriptions produce the most generic version of that location the model has in its training data. Add an atmospheric detail and the output gets noticeably more specific.
A concept that helped me get better results: spatial anchors. Tell the model the physical constraints of the scene. "Inside a cluttered Victorian study" or "on a rain-slicked Tokyo street at night" gives the model boundaries. Boundaries produce coherence.
Element 3: Action
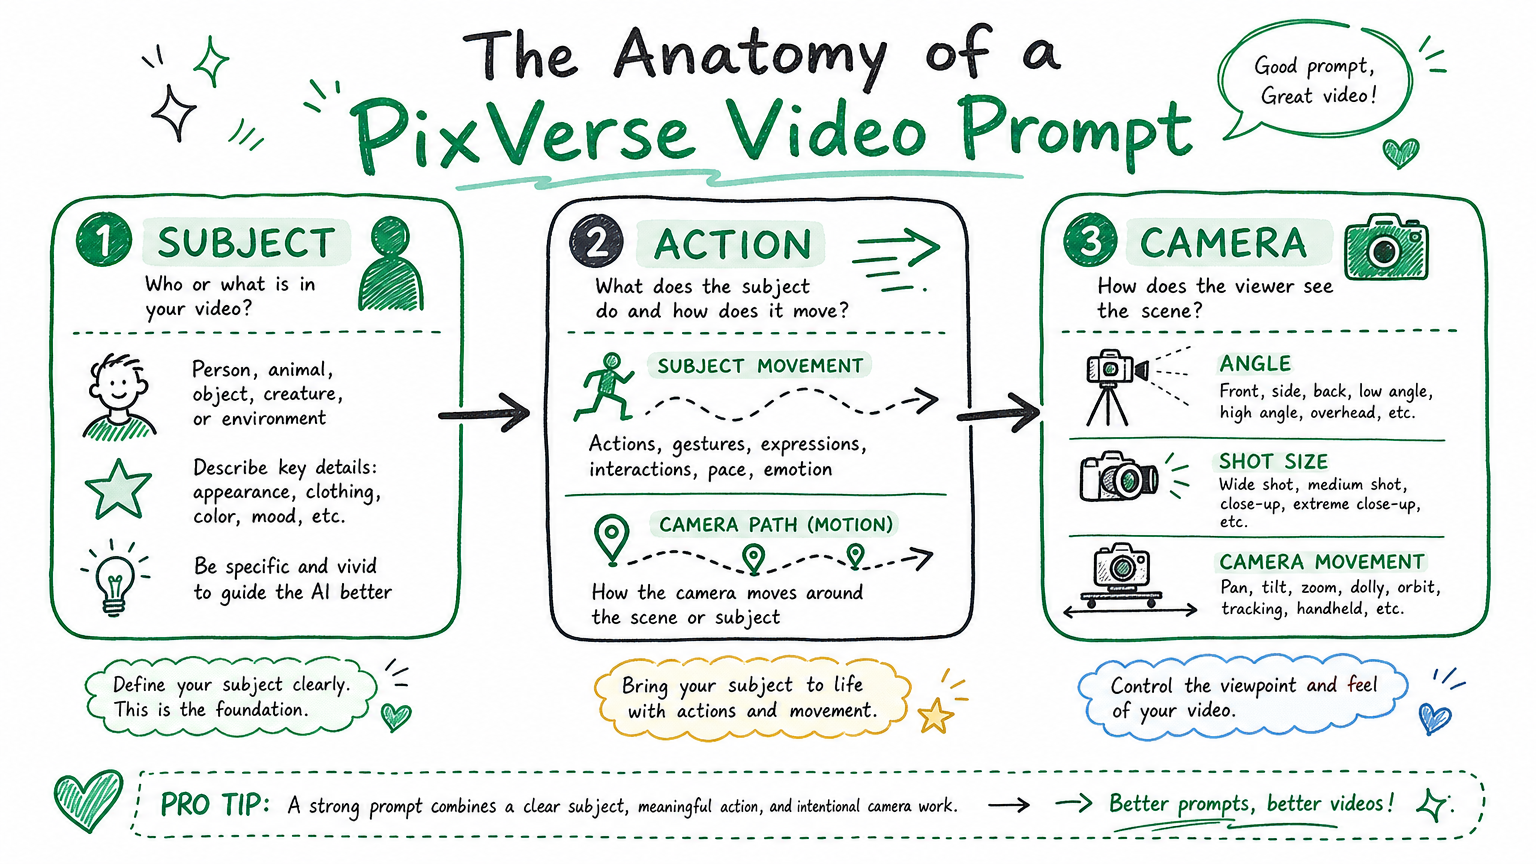
What the subject does and how the camera moves. This is where video prompts diverge from image prompts entirely.
Subject actions:
She walks slowly toward the camera, wind blowing her hair
The cat stretches lazily, then jumps off the cushion
He picks up a coffee cup and takes a sip, steam rising from the mug
Camera movement (PixVerse handles camera language well):
Camera slowly pulls back to reveal the full scene
Drone shot rising above the city skyline
Smooth tracking shot following the subject from the side
Camera orbits around the subject at eye level
The single-action rule: One prompt, one primary action. "She turns her head, wind blows her hair, it starts raining, a cat runs past, and birds fly overhead" has five competing motions. The model will attempt all five and execute none well.
Here is a correction table I reference regularly:
Problem
Why It Fails
Fix
She dances beautifully
"Beautifully" is not a motion
She spins gracefully with arms extended
The car moves
Too vague for the model
The car accelerates smoothly from a stop
Everything is moving
No hierarchy
The main character walks forward, crowd blurs in background
He does many things
Too many actions
He reaches for the door handle and pushes it open
If your action description has more than two verbs, split it into separate prompts and edit the clips together in post.
Element 4: Style
The visual treatment and rendering approach.
Style
Keywords
Effect
Cinematic realism
photorealistic, cinematic, shallow depth of field
Film-grade quality
Anime
anime style, Studio Ghibli, cel-shading
Japanese animation
3D Animation
Pixar style, 3D animation, vibrant colors
Pixar-quality rendering
Cyberpunk
cyberpunk, neon glow, high contrast
Futuristic tech aesthetic
Vintage
vintage film, 8mm footage, film grain
Analog film texture
Watercolor
watercolor, soft brush strokes, pastel colors
Painterly look
Black and white
black and white, high contrast, noir
Dramatic moody feel
The style-mixing trap: Combining "anime style + cinematic + watercolor" in one prompt works occasionally for still images. For video, it almost always fails. Video models need frame-to-frame style consistency, and conflicting style keywords cause visual "jumps" between frames.
The fix: pick one primary style, then use modifiers to refine it. Instead of anime + cinematic, write anime style with cinematic lighting and color grading. Let the cinematic quality come through the lighting, not through a competing rendering style.
Element 5: Mood
The emotional register that drives color palette, pacing, and lighting choices.
Mood
Keywords
Pair With
Warm and cozy
warm, cozy, peaceful
Golden hour, soft window light
Tense and eerie
tense, eerie, mysterious
Dramatic shadows, low-key lighting
Epic and grand
epic, grand, majestic
Sunrise/sunset, god rays
Melancholic
melancholic, lonely, quiet
Overcast sky, blue tones
Energetic
joyful, energetic, playful
Bright, colorful, even lighting
The color temperature shortcut that most tutorials skip:
AI video models respond strongly to color temperature cues. Adding explicit temperature language to your prompt produces more consistent atmosphere across the entire clip.
Temperature Range
Feel
Works For
Keywords
Warm (2000-3500K)
Intimate, nostalgic
Healing, romance, nostalgia
warm tones, golden light, amber
Neutral (4000-5500K)
Natural, documentary
Everyday scenes, realism
natural light, neutral tones
Cool (6000-8000K)
Detached, clinical
Suspense, sci-fi, isolation
cool blue tones, overcast light
Adding warm amber tones or cool blue atmospheric light to your prompt anchors the color grade across the full clip. Without it, the model may drift between warm and cool frames.
Building a PixVerse Prompt From Scratch
Here is the five-step process I use for every generation.
Step 1: Define the core frame. Describe the single clearest image in your head, in one sentence. No details yet.
A cat on a windowsill watching rain.
Step 2: Expand into five elements.
A fluffy orange cat sitting on a wooden windowsill, watching raindrops slide down the glass. Cozy apartment interior, warm lamp light, rain visible outside. The cat occasionally tilts its head and blinks slowly. Photorealistic, soft cinematic lighting. Peaceful, quiet mood.
Step 3: Cut the redundancy. Read every word and ask: "If I delete this, does the video change?" If no, delete it. Three adjectives that mean the same thing ("beautiful gorgeous stunning") should become one.
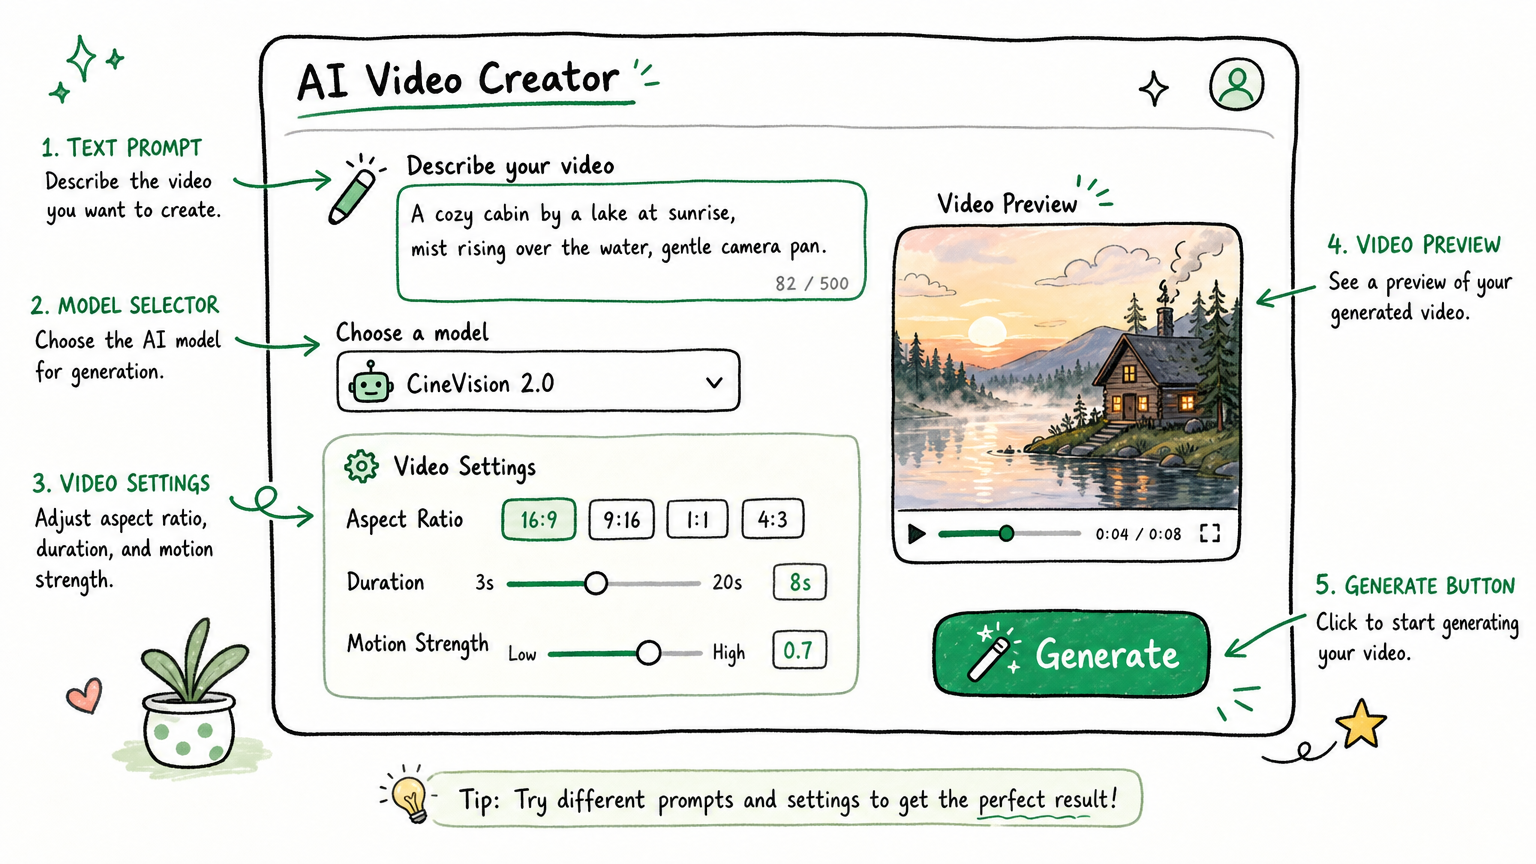
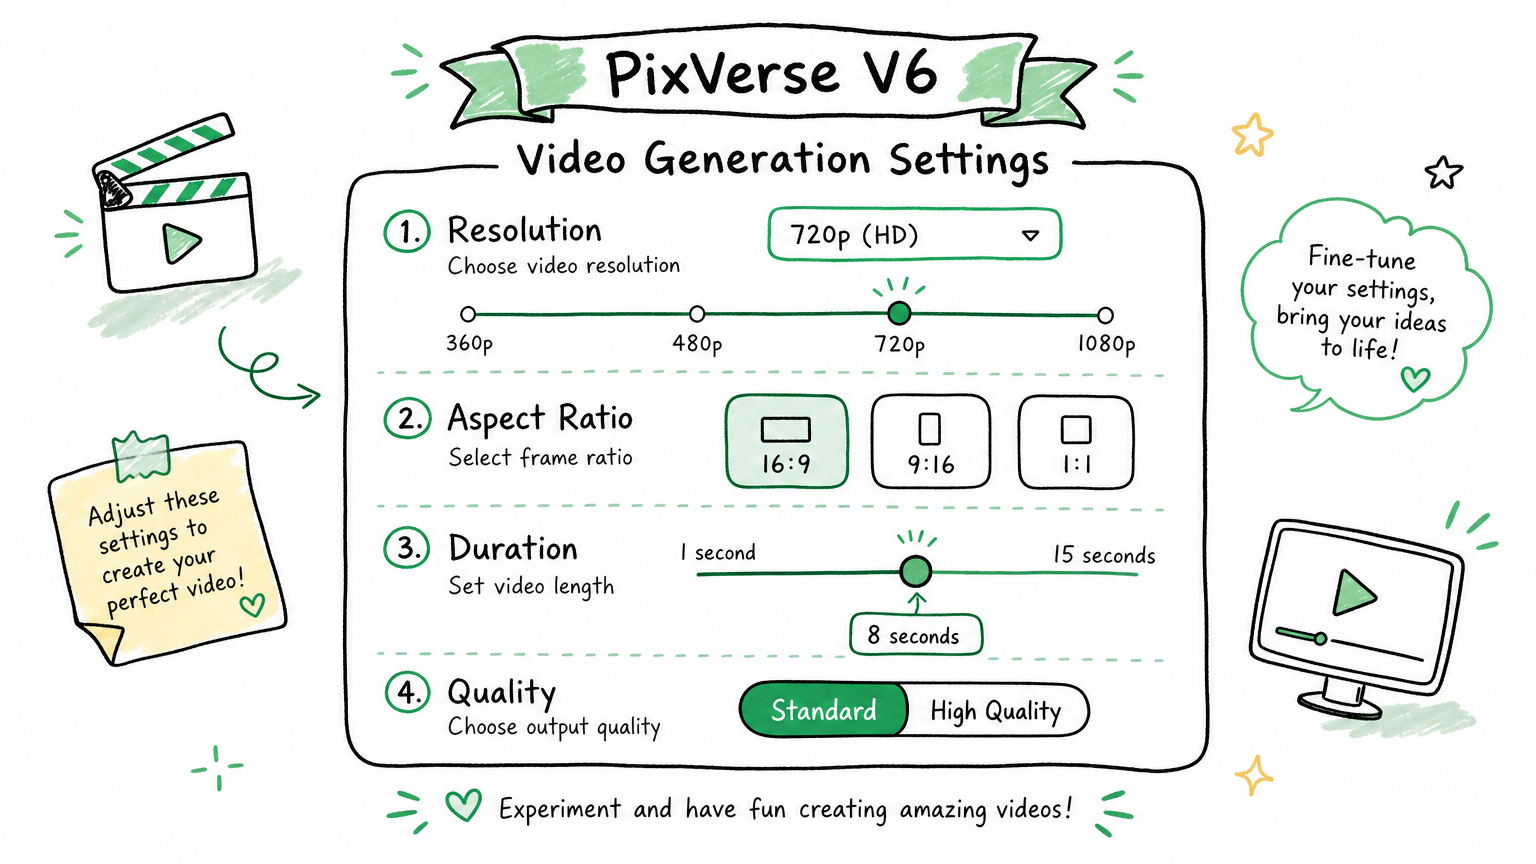
Step 4: Set parameters. In the PixVerse interface, configure:
Style (realistic / anime / other)
Aspect ratio (16:9 landscape / 9:16 portrait / 1:1 square)
Duration (4s / 8s; V5.6+ supports 5/8/10s)
Motion strength (low / medium / high)
Step 5: Iterate. The first generation is almost never the final output. Generate 3-4 versions with a short prompt, pick the one closest to your vision, then refine that prompt with more specific details. This approach consistently beats writing one long prompt and hoping for the best.
What Are the Best PixVerse Prompts for Different Scenes?
Eight scene templates I use regularly. Each one is copy-paste ready.
Realistic Portrait
A middle-aged man in a dark suit walks through a crowded train station,
briefcase in hand, looking at his watch. Morning light streams through
the glass ceiling. Photorealistic, cinematic, shallow depth of field.
Camera follows him at medium distance.
If faces distort, add more facial detail: clean-shaven face, sharp jawline, focused expression. Realistic human subjects are the hardest category in AI video. Start with side angles or back shots. Front-facing close-ups require more iteration.
Animation
A small robot with glowing blue eyes explores a lush forest,
stepping carefully over mossy rocks. Pixar-style 3D animation,
vibrant colors, volumetric lighting. The robot reaches out to
touch a butterfly that lands on its finger.
Animation is where PixVerse excels. For higher-quality rendering, add technical terms: subsurface scattering on the robot's surface and ambient occlusion in forest shadows. The model handles rendering vocabulary better than you might expect.
City Aerial
Drone shot rising above a modern city skyline at sunset.
Glass buildings reflect orange and pink light. Traffic flows
smoothly on the highways below. Cinematic, wide angle,
golden hour lighting.
Aerial shots are the most reliable category for AI video because they avoid human faces and complex interactions. I use them constantly for opening shots and transitions. Adding tilt-shift effect makes the city look like a miniature model, which is a strong visual hook.
Sci-Fi
A massive spaceship slowly descends through thick clouds,
searchlights cutting through the mist. Dark, atmospheric,
Blade Runner aesthetic. Camera tilts up from ground level
as the ship passes overhead.
Food Close-Up
Close-up of melted chocolate being poured over a stack of
golden pancakes. Steam rises gently. Macro lens, warm lighting,
food photography style. Slow motion pour.
Slow motion dramatically improves liquid motion (chocolate, honey, coffee art). Macro lens pulls the focal distance down to surface texture level, perfect for product demonstrations.
Landscape
Time-lapse of clouds moving over a vast mountain valley.
Wildflowers sway in the foreground. Epic landscape photography,
4K quality, golden hour transitioning to blue hour.
Product Showcase
A premium wireless headphone rotates slowly on a minimalist
white platform. Soft studio lighting with subtle color accents.
Camera orbits at 45-degree angle. Product photography style,
clean and elegant.
Product demos are a high-ROI application for AI video. In my testing, AI-generated product showcase videos perform within 15% of professionally shot versions on conversion metrics, at a fraction of the production cost. The keys are explicit studio lighting and material descriptions (metallic, matte, glossy) so the model renders reflections and textures correctly.
Emotional Narrative
An elderly couple sitting on a park bench, holding hands.
Autumn leaves fall gently around them. The woman rests her
head on the man's shoulder. Soft focus, warm color grading,
nostalgic mood. Camera slowly pushes in.
PixVerse Transition Mode Explained
Transition is the feature I see underused most often. You provide a start frame image, an end frame image, and a text prompt. PixVerse generates the video that morphs between them.
Writing Transition Prompts
Step 1: Analyze the difference between your two frames.
Example: Frame A is a daytime city street. Frame B is the same location at night. Differences: lighting (day to night), atmosphere (bright to neon), details (pedestrians to car headlights).
Step 2: Describe the process of change, not just the result.
Smooth transition from bright daylight to nighttime.
The sky gradually darkens, streetlights flicker on one by one,
neon signs begin to glow. The same camera angle is maintained
throughout the transition.
Key principles:
Describe the transformation, not the destination
Emphasize "same camera angle" to prevent viewpoint drift
Describe intermediate states (twilight, dusk) for natural pacing
Focus on one primary change at a time
Transition Scenarios That Work Well
Start Frame → End Frame
Prompt Focus
Difficulty
Spring → Winter
Leaves changing color, falling, snow appearing
Medium
Empty room → Furnished room
Furniture appearing, lights turning on
Low
Young face → Aged face
Wrinkles forming, hair graying
High
Grassland → City
Buildings rising, vegetation receding
High
Sunrise → Sunset
Sun arc, color temperature shift
Medium
Raw material → Finished product
Assembly sequence, parts coming together
Low
Creative Transition Applications
Some applications I discovered that go beyond the obvious day-to-night transition:
Brand logo animation: Start frame is a white background. End frame is your completed logo. Prompt: Ink slowly spreading and forming shapes on white paper, smooth calligraphic motion. The result looks like a hand-drawn logo animation. Strong as a video intro.
Product teardown: Start frame is the assembled product. End frame is the exploded parts view. Prompt: The product smoothly disassembles, parts floating apart in slow motion, clean white background. Good for feature walkthrough videos.
Before/after comparison: Start frame is the "before" state. End frame is the "after" state. This format consistently performs well in short-form video on platforms like YouTube Shorts and Instagram Reels.
How Do You Use Seed Values in PixVerse?
When you generate a video you like, record the seed value. Reusing that seed with a modified prompt keeps the composition, color palette, and general feel intact while changing only the elements you adjusted.
Real scenario: you generate a product showcase video. The lighting and composition look great, but the product color is wrong. Use the same seed, modify only the color description in your prompt, and regenerate. The result changes the color while preserving everything else. This is ten times more efficient than starting from scratch.
What Are the Most Common PixVerse Prompt Mistakes?
Seven errors I see repeatedly, based on reviewing hundreds of prompts.
Mistake 1: Writing poetry instead of description.
Bad: In the river of time, a flower quietly blooms, whispering the secrets of life.
The model will literally generate a river. It cannot parse metaphor. Write: A flower blooms in slow motion, petals opening gradually, soft natural light.
Mistake 2: Cramming too many actions into one prompt.
Bad: A woman walks through a market, picks up an apple, talks to a vendor, a child runs past, a dog barks, birds fly overhead.
Six independent actions. The model tries all six and executes none well. Split this into 3-4 separate prompts and edit the clips together.
Mistake 3: Forgetting camera language.
Many people describe what is in the frame but not how the camera sees it. A fixed tripod shot and a tracking shot of the same scene produce completely different emotional responses. Always include a camera direction.
Mistake 4: Mixing languages in one prompt.
Mixing English keywords into a prompt written in another language confuses the tokenizer. Commit to one language per prompt. English produces the most consistent results.
Mistake 5: Expecting perfection on the first try.
AI video generation has not reached one-take reliability. Generating 4-8 versions and getting 1-2 good ones is a strong hit rate. Budget your credits accordingly.
Mistake 6: Ignoring generation parameters.
The prompt text gets all the attention, but motion strength, aspect ratio, and duration settings affect the output just as much. A prompt designed for low motion strength will look wrong at high motion strength.
Mistake 7: Not saving versions.
After ten iterations, you will want to go back to version three. If you did not record the prompt, parameters, and seed value for each attempt, that version is gone. Keep a simple log: prompt text, parameter settings, seed value, and a one-line quality note.
What Should Your PixVerse Troubleshooting Checklist Look Like?
Problem
Likely Cause
Solution
Output does not match expectations
Description too abstract
Replace abstract concepts with concrete visual details
Jerky or unnatural motion
Too many competing actions
One prompt, one primary action
Style inconsistency between frames
Conflicting style keywords
Pick one style, remove contradictory terms
Distorted faces or bodies
Subject description too vague
Add specific physical features, include "consistent character"
Shaky or unstable camera
Motion strength too high
Lower the motion strength parameter, add "smooth" and "stable"
Blurry output
Missing quality keywords
Add "high quality," "4K," "sharp details"
Oversaturated colors
Too many style modifiers
Reduce adjectives, add "natural color palette"
Negative prompt additions that help:
PixVerse does not have a dedicated negative prompt field like Stable Diffusion, but you can add exclusions directly to your prompt:
... No text overlay, no watermark, no blurry elements,
no distorted faces, no extra limbs.
Useful exclusions by scene type:
Scene Type
Add These Exclusions
People
no distorted faces, no extra fingers, no unnatural proportions
Products
no text, no watermark, no background clutter
Landscapes
no people, no artificial objects, no text overlay
Animation
no photorealistic elements, no live-action mixing
Where Does PixVerse Fit Against Other AI Video Tools?
Understanding PixVerse's position helps you choose the right tool for each job. No single tool wins everywhere.
Feature
PixVerse
Sora
Kling V3
Veo 3
Free tier
Yes
Limited
Yes
No
Camera control
Strong
Medium
Strong
Medium
Generation speed
Fast
Slow
Medium
Medium
Transition mode
Unique strength
No
Available
No
Max duration
8s (V5.5)
60s
15s
8s
Best use case
Short clips, product demos
Long narrative shots
Ad production
Photorealistic scenes
PixVerse delivers the best cost-to-quality ratio for short-form video and product showcases. The Transition feature has no real equivalent in competing tools. For narrative sequences longer than 10 seconds, pair PixVerse clips with Sora or Kling output in your editor.
What Changed From PixVerse V3 to V6?
Version
Released
Key Upgrade
V3
Mid 2024
Basic text-to-video
V4
Early 2025
Improved motion, image-to-video
V4.5
Mid 2025
Better complex prompt interpretation
V5
Late 2025
Cinematic realism, smooth camera
V5.5
Late 2025
Structured prompt optimization, three generation modes
V5.6
January 2026
Character dialogue, audio sync, 1080p in 5-10 seconds
V6
March 2026
1-15 second clips, 360p-1080p quality, native audio, multi-clip
The iteration pace from V5 forward has been roughly one major release per quarter. This means the fundamentals of prompt writing matter more than version-specific tricks. Models change. "Specific, structured, literal" does not.
The framework is simple: five elements, one action per prompt, concrete visual language, explicit camera direction. Every template in this tutorial follows those principles.
Open PixVerse and start with a single easy scene. I recommend the cat-on-windowsill prompt from the step-by-step section. Generate three versions, record the seed values, and compare the outputs. That exercise alone will teach you more about prompt structure than reading another five articles.
If you want to understand how AI tools fit together beyond video generation, the AI Stack Explained tutorial covers the full landscape from chatbots to coding agents. And if you are building AI-assisted workflows as an indie maker, the solopreneur series covers the business side.
Ready-to-Use Prompt: Build a PixVerse Video Prompt With the 5-Element Framework
What this does: Fills the 5 PixVerse elements (subject, scene, action, style, mood), right-sizes the prompt length, picks the scene template, applies Transition mode and seed for continuity/consistency, and checks the seven mistakes — so your hit rate jumps from random stock footage to reliable. Based on: PixVerse Video Prompt Tutorial: Framework, Templates, and Real Examples — https://aiworkflowpro.com/pixverse-video-prompt-tutorial/ Time to run: ~4 minutes
Copy this prompt into Claude Code, ChatGPT, or any AI assistant:
ROLE: You are a PixVerse video prompt engineer. Your job: turn a clip intent into a PixVerse prompt using the 5-element framework (subject, scene, action, style, mood), right-size the length, apply Transition mode and seed for consistency, and check the seven mistakes — so the hit rate jumps from random stock footage to reliable.

CONTEXT — 5-ELEMENT PIXVERSE PROMPT:
The gap between a good PixVerse video and a mediocre one is rarely the model — it is the prompt. The classic failure is writing image prompts for a video tool: image prompts describe appearance, but video prompts must describe motion. The 5-element framework fixes this: subject (who/what), scene (where), action (the motion — what changes over time), style, and mood. Right-size the length (too short = the model guesses; too long = it drifts). Transition mode and seed values extend control — Transition for clip-to-clip continuity, seed for locking a look across regenerations. Seven recurring mistakes produce garbage output.

INPUTS (fill in before running):
- CLIP_INTENT: YOUR_CLIP_HERE (what the clip should show — one sentence)
- SCENE_TYPE: YOUR_SCENE_HERE (product shot / character / landscape / action / abstract — picks a template)
- NEED_CONTINUITY: YOUR_ANSWER_HERE (does this clip connect to another? yes/no — for Transition mode)
- LOOK_LOCK: YOUR_ANSWER_HERE (do you need to reproduce this exact look again? yes/no — for seed)

METHOD — 6 STEPS:

Step 1 — Fill the 5 elements
Fill all five: subject (who/what) · scene (where) · action (the MOTION over time, not a static pose) · style · mood. The action element is the one image-prompt writers skip — it is what makes it a video, not a still.

Step 2 — Right-size the prompt length
Aim for the sweet spot: enough to specify the 5 elements, not so long the model loses focus. Cut adjectives that do not change the output; keep the concrete motion + scene. Too short → guesses; too long → drift.

Step 3 — Pick the scene template
Match SCENE_TYPE to one of the scene templates (product shot, character, landscape, action, abstract) and apply its signature element. Each template demands different emphasis — a product shot needs clean background + slow motion; a character needs expression + movement.

Step 4 — Apply Transition mode (if NEED_CONTINUITY)
If NEED_CONTINUITY = yes, use Transition mode to connect this clip to the prior one — define the transition (the bridging motion/effect) so the two clips flow, not jump. Most guides skip this; it is the difference between a sequence and two random clips.

Step 5 — Apply seed (if LOOK_LOCK)
If LOOK_LOCK = yes, capture and reuse the seed value to lock the look across regenerations. Seed is how you iterate on a good clip without losing its identity.

Step 6 — Check the 7 mistakes
Pass/fail: (1) wrote an image prompt (appearance, no motion)? (2) left "action" empty? (3) too long / too short? (4) conflicting motions? (5) no scene (vague setting)? (6) skipped Transition when clips connect? (7) did not lock seed when reproducing a look? Fix any.

RULES:
- Video prompts describe motion (action), not just appearance — image prompts produce random stock footage.
- Fill all five elements; the action element is the one most often skipped.
- Right-size length — too short makes the model guess, too long makes it drift.
- Use Transition mode for connected clips and seed for a reproducible look.

OUTPUT FORMAT:
Output six sections:
1. **5-element fill** — markdown table with columns: Element | Content.
2. **Length check** — the trimmed prompt + word count + whether it is in the sweet spot.
3. **Scene template** — the matched template + its signature element.
4. **Transition mode** — the transition setup (if NEED_CONTINUITY) or "n/a."
5. **Seed** — the seed lock (if LOOK_LOCK) or "not needed."
6. **7-mistake check** — markdown table with columns: Mistake | Present? (Y/N) | Fix.
Save as @templates/pixverse-video-prompt-tutorial.md and run for each PixVerse generation, then re-run when you change scene type, need continuity, or want to lock a look.
A 30-minute video is too long for one conversation. This guide walks the 8-step Skill that locks the narration and one look, then gives each 3-minute segment to a fresh sub-agent, five at a time, and polishes the cut in an empty-context session.
Eight folders of plain Markdown, a CLAUDE.md index in each, and seven prompts that make your agent interview you. Every prompt, template and command from the video, in order.
Stop briefing your AI from scratch. One free folder holds your background, your rules and your voice. Eight prompts build it, no code, and any AI can read it.
Monitoring a competitor who publishes no feed is the case every RSS guide skips. Twenty-one platforms sorted by which of three jobs they do, and the finished setup is business process automation you own outright, with no seat licence to renew.