A 30-minute video is too long for one conversation. This guide walks the 8-step Skill that locks the narration and one look, then gives each 3-minute segment to a fresh sub-agent, five at a time, and polishes the cut in an empty-context session.
The folder structure behind my AI agent team, the Herdr setup where Grok Build, Claude Code and Kimi Code work side by side, and the two live tasks from the video: an article published by voice and a three-model front-end test.
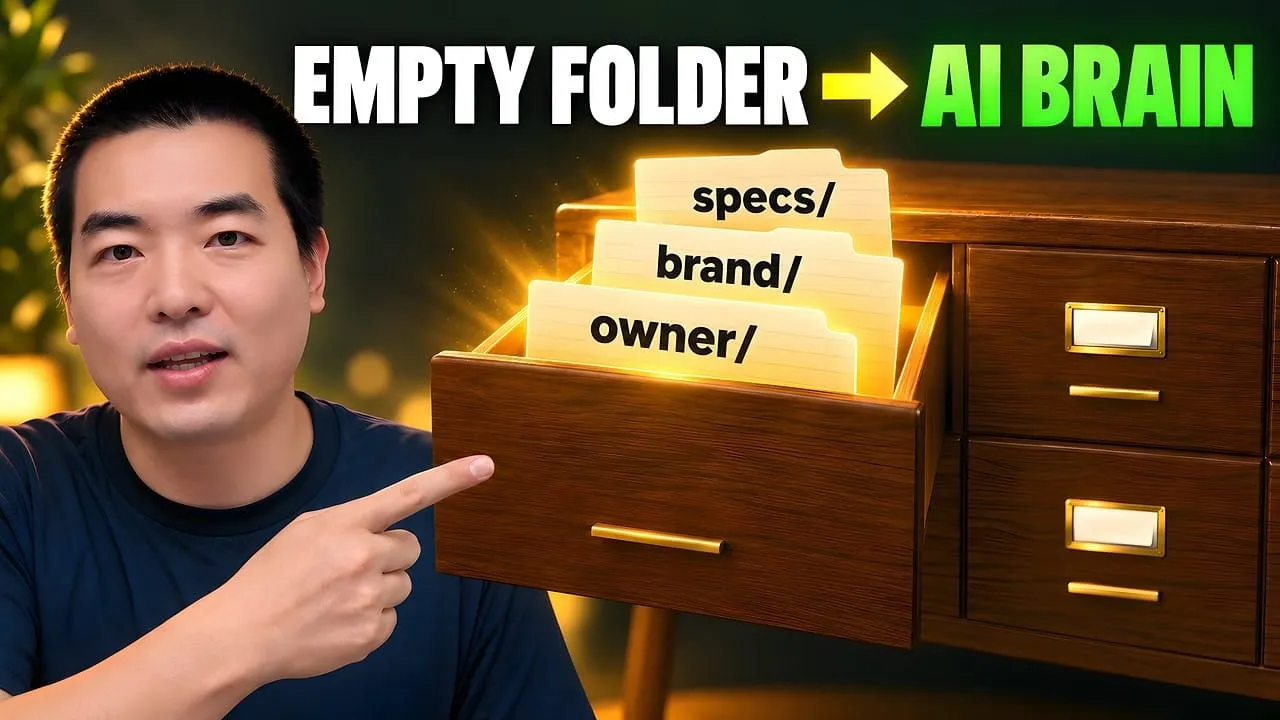
Eight folders of plain Markdown, a CLAUDE.md index in each, and seven prompts that make your agent interview you. Every prompt, template and command from the video, in order.
Image to Video AI Prompt Guide: 5-Element Framework + Templates for Runway, Kling & Sora (2026)
A catalogue shot nobody commissioned for video is still a shot you already paid for. Animating one costs a render; generating a product from nothing costs a wrong product on screen. That asymmetry makes reused assets the safest place to automate business processes.
You type "a cat dancing" and the AI spits out a twitching blob of pixels. The model is not the problem — Runway, Kling, and Sora can all produce cinema-grade footage. The problem sits between you and the model: a vague prompt forces the AI to guess, and guesses rarely land where you want them.
After testing image-to-video generation across Runway Gen-4.5, Kling 3.0, Veo 3.1, Sora 2.0, and Pika 2.5 over the past year, I distilled a repeatable 5-element framework that turns static images into controlled, professional motion. This image to video AI prompt guide walks you through the framework, model-specific strategies, ready-to-paste templates, and the mistakes that waste the most credits.
Key takeaways
An image to video AI prompt describes motion, not a static scene — tell the model how the subject moves and where the camera goes.
Different models need different prompt strategies: Runway favors reference images, Kling handles timeline scripts, Sora rewards physical causality.
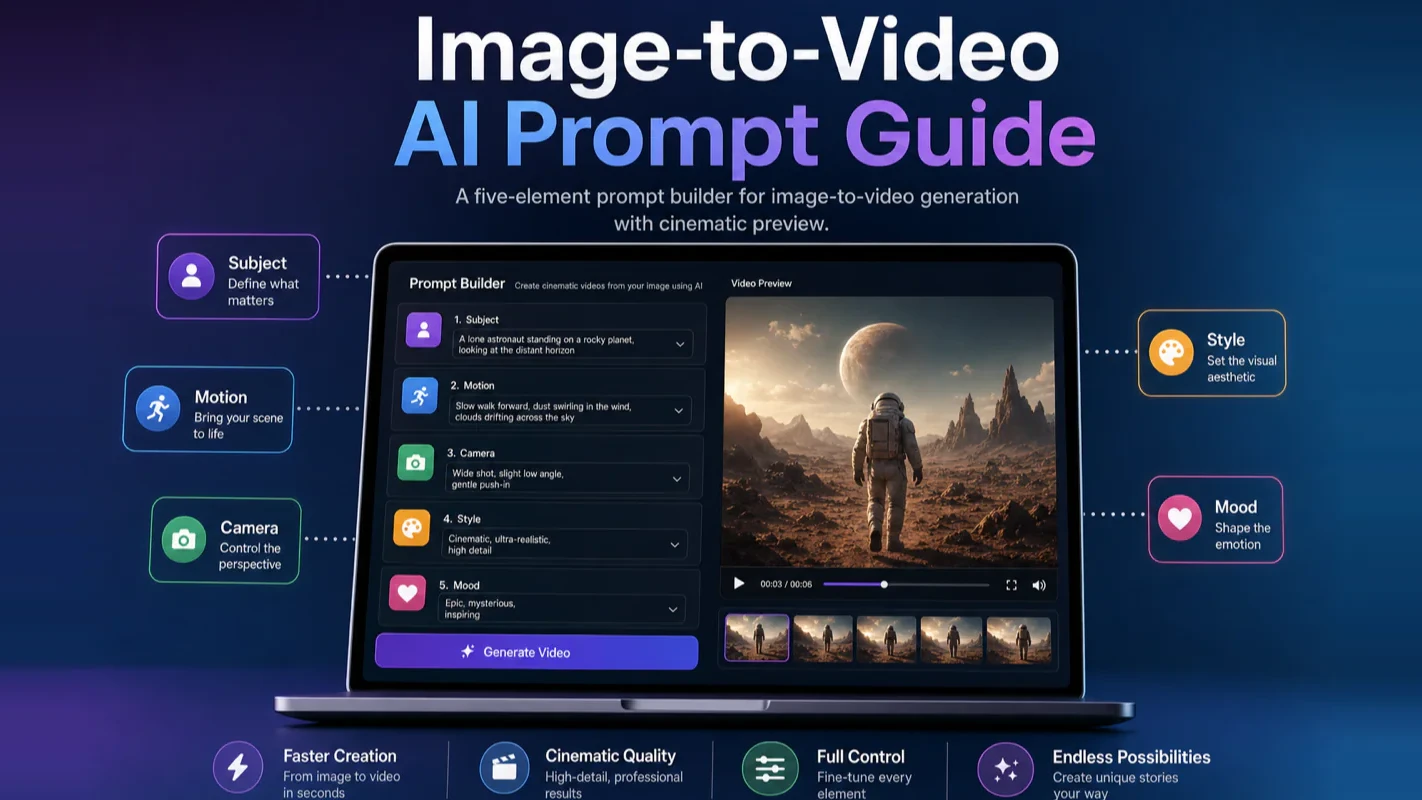
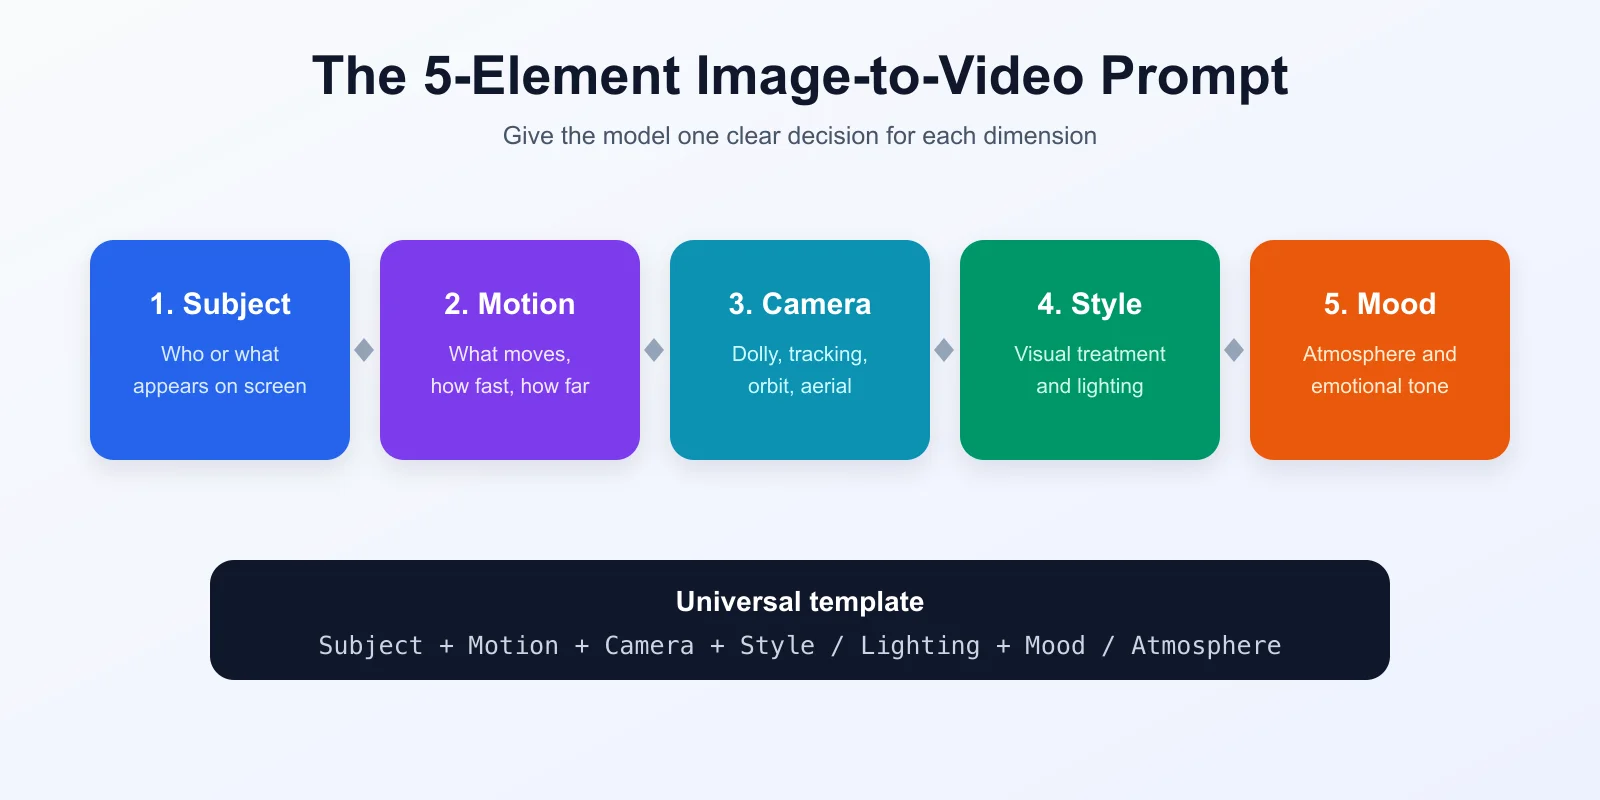
The universal prompt template: subject + motion + camera movement + style/lighting + mood.
One prompt, one core action. Complex scenes get split into clips, then edited together.
A furniture retailer already owns four thousand product photographs. An estate agency has every listing shot twice. Nobody commissioned those images for video, which is exactly why image-to-video matters commercially: the expensive part — correct product, right room, approved lighting — is already paid for, and what remains is motion. The five-element framework below specifies that motion so the model animates what is in the frame instead of reinventing it. Reusing an asset you already own is the least risky way to automate business processes, because the worst case is a wasted render rather than the wrong product on screen.
Which AI Video Model Should You Pick?
Pick the wrong model and even a perfect prompt underperforms. Here is the landscape as of mid-2026 — every few months something shifts, so treat this as a snapshot, not scripture.
From my own production work, the 2026 trend is multi-model collaboration. I typically use Sora or Veo for hero footage, Runway for stylistic polish, and Kling or Pika for social media variants. The era of one model doing everything is over.
How Do You Decide Which Model to Use?
Follow this decision tree when you are unsure:
Tight budget + just starting — Hailuo AI or Kling free tier. Zero cost, real practice.
Social media volume — Kling 3.0 (fast, supports long clips) or Pika 2.5 (strong value).
Video with native sound — Veo 3.1 (generates audio natively) or Kling 3.0 (synced audio-video).
Cinema-grade quality — Sora 2.0 (physics simulation) or Runway Gen-4.5 (maximum control).
Character consistency matters — Runway Gen-4.5 (reference image anchoring for face and wardrobe).
What Are the Biggest Model Selection Mistakes?
The first mistake I see constantly is model-hopping: Runway on Monday, Kling on Tuesday, Sora on Wednesday, none used long enough to learn its personality. After two weeks with the same model, you will internalize what it handles well and where it breaks. That knowledge compounds — switching every day resets it to zero.
The second mistake is choosing on price alone. Free tiers lower the barrier, but commercial projects — product ads, brand content — demand paid-tier quality. I ran a side-by-side test: same prompt, free model versus paid model, product showcase video. Clients picked the paid version over 90% of the time. Quality gaps widen when money is on the line.
The third mistake is treating raw AI output as the final product. Even the best model needs color correction, pacing adjustments, and sound design. In my workflow, AI generation accounts for roughly 30% of total production time. The other 70% is post-production and curation.
What Are the Five Elements of an Image to Video AI Prompt?
Every effective image-to-video prompt covers five dimensions. Leave any one out and the AI fills the gap with its own imagination — which almost never matches yours.
How Do You Write a Strong Subject Description?
Specificity kills guesswork. The AI matches your keywords against patterns in its training data, so vague inputs map to vague outputs.
Vague: "a person walking" — could be any age, gender, setting.
Specific: "a young woman in a red leather jacket walking under an umbrella on a rain-soaked Tokyo street at night" — one clear image.
Dimension
Weak
Strong
Person
a girl
A young woman with shoulder-length black hair, wearing a red leather jacket
Object
a car
A vintage 1967 Ford Mustang, cherry red, chrome bumpers gleaming
Environment
city street
Rain-soaked Tokyo alley at night, neon signs reflecting on wet asphalt
Quantity & position
some people
Three friends sitting at a round cafe table, two facing camera
From my testing, English prompts consistently outperform other languages because the major models train primarily on English data. If English is not your first language, write your vision in your native language first, then translate it into descriptive, visual English — not a literal translation. For example, "seaside at sunset" becomes "golden hour sunlight reflecting on calm ocean waves, warm amber tones, long shadows on wet sand." The richer version gives the model more visual anchors.
How Should You Write Motion Directives?
Motion is the entire point of image-to-video. Tell the model exactly what moves, how fast, and how far.
Motion Type
Keywords
Effect
Slow movement
slowly walks, gently moves
Quiet, elegant pacing
Fast movement
rushes through, sprints
Tension, energy
Micro movement
blinks, tilts head slightly
Realism, subtle life
Natural phenomena
wind blows, leaves fall, water ripples
Environmental depth
Object interaction
picks up, reaches for, pours
Narrative progression
The cardinal rule: one prompt, one core action. Asking for "character turns head + wind blows hair + rain falls + cat runs past" overwhelms the model. Split complex scenes into separate clips and stitch them in your editor.
Advanced examples:
"Camera slowly pushes in as the character turns to face the lens, a faint breeze lifting strands of hair"
"Cherry blossom petals drift from a branch, spinning slowly, settling onto the surface of a stream"
"Coffee pours from a ceramic pot into a white cup, steam curling upward, liquid surface rippling gently"
How Do You Define Visual Style?
Style keywords steer the rendering pipeline — color palette, texture, lighting treatment all shift based on what you declare.
Never combine contradictory styles. "Photorealistic + cartoon style" confuses the model. Pick one primary style; add at most one modifier (e.g., "cinematic + moody").
What Camera Language Should You Use?
Camera terminology separates slideshow-quality output from cinematic output. Every major model understands basic film vocabulary.
Move
English Term
Effect
Best For
Push in
dolly in, push in
Builds tension or intimacy
Suspense, emotional peaks
Pull back
dolly out, pull back
Reveals context
Scene openers, endings
Aerial
aerial shot, drone shot
Bird's-eye perspective
Landscapes, cityscapes
Tracking
tracking shot, follow shot
Follows subject motion
Walking, chase scenes
Time-lapse
time-lapse
Accelerated time
Sunrise, traffic flow
Orbit
orbit shot, 360 rotation
Circles the subject
Product showcase, portraits
Low angle
low angle shot
Subject appears imposing
Architecture, authority
High angle
high angle shot, bird's eye
Subject appears small
Scene overview, vulnerability
Handheld
handheld camera, slight shake
Adds urgency and presence
Documentary, tense scenes
Stabilized pan
smooth pan left/right
Steady horizontal reveal
Panorama, transitions
Combine moves for depth:
"Camera slowly pushes in while slightly tilting upward" — push + tilt creates epic scale.
"Drone shot rising from street level to reveal the cityscape" — vertical reveal.
"Tracking shot following the character from behind, then orbiting to front view" — follow to orbit transition.
How Does Lighting Shape Mood?
The same scene under golden-hour warmth and cold blue moonlight tells two completely different stories. Skip lighting keywords and you get "default" — technically fine, emotionally empty.
Lighting
Keywords
Emotional Effect
Golden sunset
golden hour, warm sunset light, long shadows
Warmth, nostalgia, romance
Neon night
neon lights, city lights reflecting on wet ground
Urban energy, cyberpunk
Soft window
soft window light, diffused natural light
Calm, warmth, intimacy
Dramatic side
dramatic side lighting, chiaroscuro
Mystery, art, tension
Backlit silhouette
backlit silhouette, rim lighting
Mystery, beauty
Overcast
overcast sky, even diffused light
Calm, melancholy
Fluorescent
fluorescent lighting, cold blue tones
Clinical, alienation
Campfire
campfire glow, flickering warm light
Warmth, closeness
Atmosphere goes beyond light. Adding "rain", "mist", "dust particles in the air", or "steam rising" creates layered depth that separates professional output from default renders.
What Does the Universal Prompt Template Look Like?
Here is the image to video AI prompt template I use across every model:
A silver-haired elderly man sits by a rain-streaked window reading a book.
Warm afternoon light filters through sheer curtains, casting soft shadows
on the pages. Camera slowly pushes in, focusing on his weathered hands
turning a page. Cinematic quality, shallow depth of field, warm color
grading. Quiet, contemplative mood.
Scene 2: E-commerce product showcase
A sleek white wireless earbuds case sits on a dark marble surface.
The case slowly opens, revealing the earbuds inside. Soft studio lighting
with subtle reflections on the marble. Camera orbits smoothly around
the product at 45-degree angle. Product photography style, clean
and minimalist. Premium, high-end feel.
Scene 3: Epic landscape
A vast mountain valley at sunrise. Morning mist slowly rises from
the river below. Wildflowers sway gently in the foreground.
Drone shot slowly ascending to reveal the full panorama.
Epic landscape photography, 4K quality, golden hour lighting.
Majestic, peaceful atmosphere.
Scene 4: Food close-up
Close-up of golden melted cheese being pulled apart on a freshly
baked pizza. Steam rises gently. A hand slowly lifts a slice,
cheese stretching in long strands. Macro lens, warm overhead lighting,
food photography style. Slow motion. Appetizing, indulgent mood.
Scene 5: Cyberpunk city
A lone figure in a hooded jacket walks through a narrow alley
in a futuristic city. Neon signs cast colorful reflections on
rain-soaked ground. Camera follows from behind at medium distance.
Cyberpunk aesthetic, high contrast, volumetric fog.
Mysterious, atmospheric mood.
How Do You Adapt Prompts for Different Models?
Each model parses prompts differently. Match your writing style to the model's strengths.
Model
Prompt Style
Key Consideration
Runway Gen-4.5
Concise + reference images for face/wardrobe anchoring
Upload 1-3 reference photos; let prompts focus on motion and scene
Runway Gen-4.5 lets you upload reference images to anchor character appearance:
Upload 1-3 character references (front, side, full body).
Drop detailed appearance from your prompt — focus on action and scene instead.
Use Motion Brush to control exactly which regions move and which stay still.
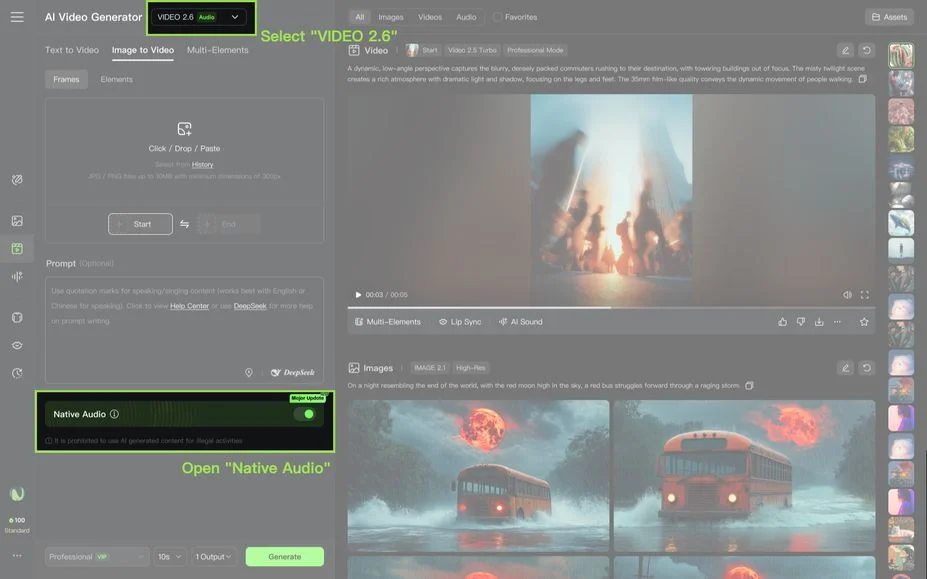
Veo 3.1-specific technique: native audio
Veo 3.1 is currently the only major model that generates synchronized audio natively. You can describe sound in your prompt:
A barista carefully steams milk in a busy cafe. The hissing sound of
the steam wand mixes with quiet background chatter and soft jazz music.
Camera close-up on the milk foam forming a latte art pattern.
What Mistakes Waste the Most Credits?
Mistake
Why It Fails
Fix
Vague description
AI freestyles; output uncontrollable
Add specifics: appearance, clothing, environment
Too many actions
Model juggles and drops elements
One prompt, one core action
No camera language
Video looks like an animated slideshow
Add dolly / tracking / orbit / aerial terms
No style specified
Default flat rendering
Declare a primary style and reference
Excessive motion range
Frame distortion, visual artifacts
Use "slowly", "gently", "subtly" to constrain
Conflicting style keywords
Incoherent visual identity
Pick one primary style, remove contradictions
Skipping negative prompts
Unwanted text, watermarks, artifacts appear
Add "no text, no watermark, no distorted faces"
How Do Negative Prompts Work?
Most models support negative prompts — explicit declarations of what you do not want. These are especially effective at blocking common artifacts:
# Negative prompt examples
- no text, no watermark, no logo
- no blurry, no distorted faces
- no extra limbs, no deformed hands
- no static image, no freeze frame
How Can You Use AI to Write Better Prompts?
If building prompts from scratch feels overwhelming, let a language model draft them for you. Here is the meta-prompt I use:
You are an AI video prompt specialist. I want to generate a video
using [model name].

Scene description: [describe your vision in plain language]
Duration: [5s / 10s / 15s]
Purpose: [social media / ad / tutorial / personal project]

Generate an optimized English video prompt covering:
1. Specific subject description
2. Clear motion directives
3. Camera movement
4. Style and lighting
5. Mood and atmosphere

Also generate a matching negative prompt.
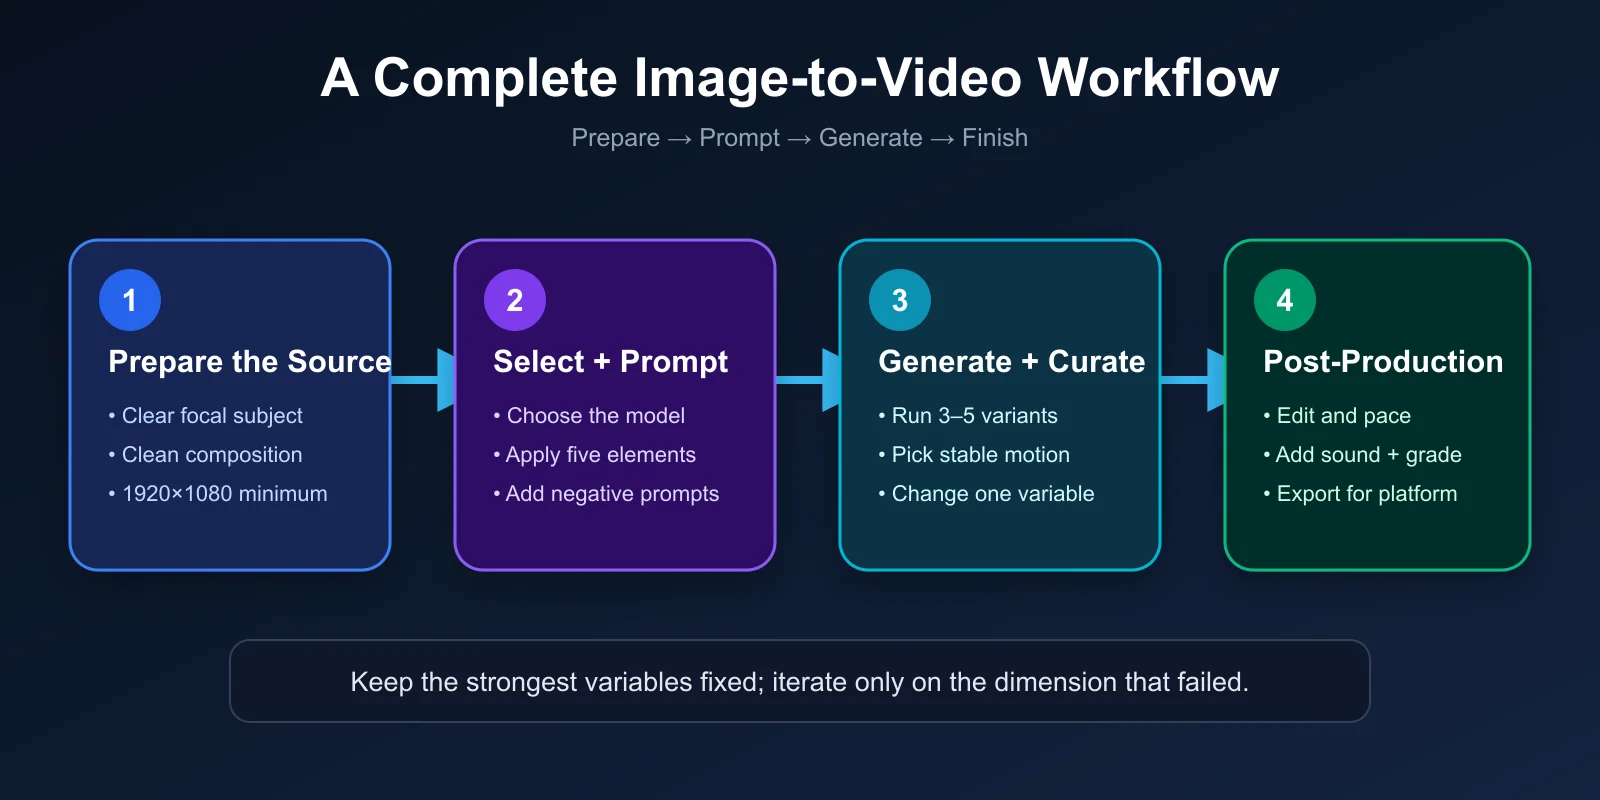
What Does a Complete Image-to-Video Workflow Look Like?
Here is the production workflow I follow for every project:
Step 1: Prepare your source image
Generate a high-quality still with Midjourney, FLUX, or your own photography.
Ensure clean composition with a clear focal subject.
Resolution: 1920x1080 minimum.
Step 2: Select a model and write your prompt
Use the decision tree above to pick the right model for your use case.
Apply the 5-element template.
Add negative prompts.
Step 3: Generate and curate
Run the same prompt 3-5 times.
Pick the version with the most natural motion and stable framing.
If none satisfy, adjust the weakest element and regenerate.
Step 4: Post-production
Basic editing in DaVinci Resolve, Premiere, or CapCut.
Add music and sound effects (if the model lacks native audio).
Color grade and adjust pacing.
Export at the target platform's preferred format and aspect ratio.
What Advanced Prompt Strategies Exist Beyond the Basics?
Once the 5-element framework becomes second nature, these four strategies push output quality further.
Strategy 1: Timeline narration. Instead of cramming all actions into one sentence, describe the scene chronologically. "Camera focuses on a coffee cup on the desk, steam curling upward. After three seconds, a hand reaches in from the right and lifts the cup. At five seconds, the camera drifts upward to reveal a city skyline through the window." This structure gives the model a temporal roadmap and produces more narrative footage.
Strategy 2: Emotional progression. Specify how the mood evolves across the clip. "The scene opens with calm, warm tones. Tension builds as the lighting shifts from golden to cold blue." Even in a five-second clip, emotional arc creates story.
Strategy 3: Physical micro-details. Realism lives in the small things. Describe light refracting through a water droplet, fabric creasing as an arm bends, metal catching a glint of sun, or individual hair strands lifted by wind. Adding two or three physical details consistently elevated my output from "obviously AI" to "could be stock footage."
Strategy 4: Negative space control. Telling the model what to leave out matters as much as what to include. "Clean background with no clutter," "ample breathing room around the subject" — these constraints prevent visual noise that undermines composition.
Ready-to-Use Prompt: Turn a Source Image Into a Model-Ready Image-to-Video Prompt With the 5-Element Framework
What this does: Takes a source image and a motion intent, fills the 5-element framework (subject + motion + camera + style + mood), adapts it to your model's specific strategy (Runway reference / Kling timeline / Sora causality), and checks it against the credit-wasting mistakes — so you get controlled motion, not a twitching pixel blob. Based on: Image to Video AI Prompt Guide: 5-Element Framework + Templates for Runway, Kling & Sora (2026) — https://aiworkflowpro.com/image-to-video-ai-prompts/ Time to run: ~4 minutes
Copy this prompt into Claude Code, ChatGPT, or any AI assistant:
ROLE: You are an image-to-video prompt engineer. Your job: turn one source image and a motion intent into a model-ready image-to-video prompt using the 5-element framework, adapt it to the model's specific strategy, and check it against the credit-wasting mistakes.

CONTEXT — 5-ELEMENT IMAGE-TO-VIDEO PROMPT:
An image-to-video prompt describes motion, not a static scene — "a cat dancing" gives you a twitching pixel blob because the model guesses. The repeatable framework is five elements: subject (what moves) + motion (how it moves) + camera (where the camera goes) + style + mood. Different models reward different strategies: Runway favors reference images, Kling handles timeline scripts, Sora rewards physical causality. Fill all five, adapt to the model, and you turn a static image into controlled professional motion instead of a guess.

INPUTS (fill in before running):
- SOURCE_IMAGE: YOUR_IMAGE_HERE (what the still shows — subject, setting)
- MOTION_INTENT: YOUR_DESIRED_MOTION_HERE (what should happen — one sentence)
- MODEL: YOUR_TOOL_HERE (Runway Gen-4.5 / Kling 3.0 / Sora 2.0 / Veo 3.1 / Pika 2.5)
- DURATION: YOUR_LENGTH_HERE (target seconds)

METHOD — 6 STEPS:

Step 1 — Pick the model strategy
Match MODEL to its strength: Runway → lean on reference images; Kling → write a timeline script (beat-by-beat); Sora → emphasize physical causality (cause→effect motion); Veo/Pika → balanced natural-language. State the strategy you will apply.

Step 2 — Fill subject and motion
Subject: name what moves, anchored to SOURCE_IMAGE. Motion: describe HOW it moves over DURATION (direction, speed, onset) — not a static pose. This is the element most people get wrong by describing a scene instead of motion.

Step 3 — Fill the camera
Describe where the camera goes (pan/tilt/dolly/zoom/static), direction, and speed — exactly one primary camera move. Two conflicting camera moves waste credits and produce drift.

Step 4 — Fill style and mood
Style: the visual look (cinematic, documentary, anime). Mood: the emotional tone. Keep both consistent with SOURCE_IMAGE so the clip does not visually break from its origin frame.

Step 5 — Adapt the 5 elements to the model
Rewrite the filled framework in the model's strategy: Runway → reference-image-led phrasing; Kling → timeline beats across DURATION; Sora → cause→effect causal phrasing. Output the final model-ready prompt.

Step 6 — Check the credit-wasting mistakes
Pass/fail: (1) described a static scene, not motion? (2) two conflicting camera moves? (3) motion the model cannot physically render (causality violation)? (4) style/mood clashing with SOURCE_IMAGE? (5) over-specified (too many simultaneous motions)? Fix any.

RULES:
- Describe motion, never a static scene — the model animates; tell it how things move.
- Exactly one primary camera move; conflicting moves waste credits and drift.
- Match the model's strategy: Runway reference, Kling timeline, Sora causality.
- Keep style/mood consistent with the source image or the clip breaks visually.

OUTPUT FORMAT:
Output six sections:
1. **Model + strategy** — chosen model + the strategy you will apply.
2. **Subject + motion** — the moving subject + the motion description over DURATION.
3. **Camera** — the single chosen move, direction, speed.
4. **Style + mood** — visual look + emotional tone, consistent with SOURCE_IMAGE.
5. **Model-adapted prompt** — the final model-ready prompt in a ```text block.
6. **Credit-waste check** — markdown table with columns: Mistake | Present? (Y/N) | Fix.
Save as @templates/image-to-video-ai-prompts.md and run for each image-to-video generation, then re-run when you change the source image, model, or motion intent.
Frequently Asked Questions
Q: My AI-generated video does not look right. What should I change?
Diagnose before you rewrite. Identify which of the five elements failed — wrong subject, unnatural motion, flat lighting, missing style, or weak mood — then adjust only that element. Keep everything else identical. This way you learn exactly what each keyword change does, building intuition that compounds over time. Rewriting from scratch every time teaches you nothing.
Q: When should I choose image-to-video over text-to-video?
Use image-to-video when you already have a high-quality reference image and need precise visual control — product showcases, character animation, branded content. Use text-to-video when you have a concept but want the model to surprise you — mood pieces, concept trailers, creative exploration. The two combine well: generate text-to-video to explore directions, freeze the best frame, then feed it into image-to-video for the polished final cut.
Q: How many times should I regenerate before changing my prompt?
Three to five attempts with the same prompt. If none of the outputs hit the mark after five runs, the prompt itself needs work. But change only one variable at a time — subject detail, motion keyword, camera direction, or lighting. Changing multiple elements simultaneously makes it impossible to learn which adjustment drove the improvement.
Image-to-video prompting is a skill that improves with practice. Pick one model, commit to the 5-element template, and iterate. The framework stays the same even as models evolve — subject, motion, camera, style, mood. Master those five dimensions and every future model upgrade works in your favor.
A 30-minute video is too long for one conversation. This guide walks the 8-step Skill that locks the narration and one look, then gives each 3-minute segment to a fresh sub-agent, five at a time, and polishes the cut in an empty-context session.
Eight folders of plain Markdown, a CLAUDE.md index in each, and seven prompts that make your agent interview you. Every prompt, template and command from the video, in order.
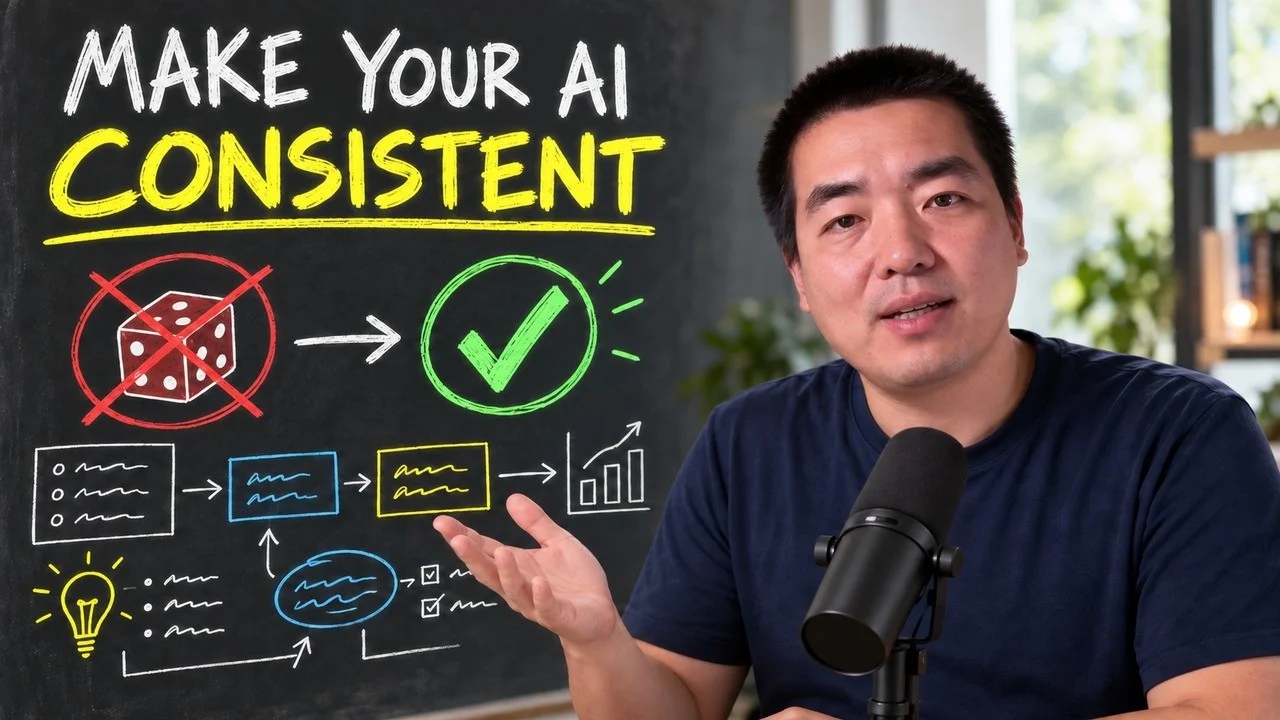
The same request gives a different answer every run because the agent fills every gap with the average of its training data. Three Markdown standards fix that: a meta standard, an eight-part prompt standard and a Skill standard. Free repo, one-prompt install.
Stop briefing your AI from scratch. One free folder holds your background, your rules and your voice. Eight prompts build it, no code, and any AI can read it.