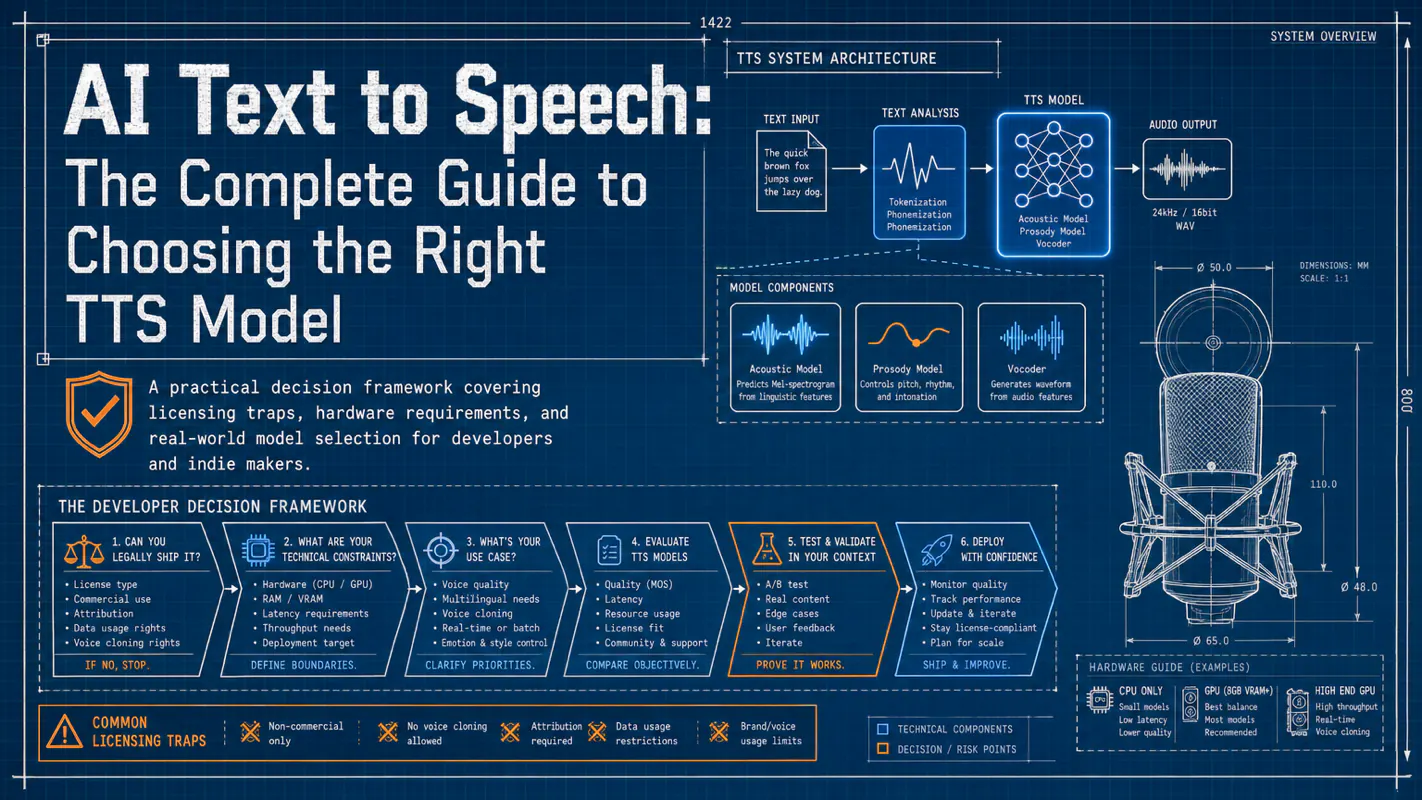
Most AI text to speech guides rank models by sound quality alone. This one starts with the question that actually matters: can you legally ship it? A practical decision framework covering licensing traps, hardware requirements, and real-world model selection for developers and indie makers.
Stop fighting style drift in AI-generated article images. This three-layer prompt framework paired with a pool of 100 visual styles gives every article a unique look while keeping all illustrations within a single piece visually consistent.
TL;DR — You need one good AI image. Not a pipeline, not a system, not a career in prompt engineering. This guide gives you the minimal path: pick a tool, drop one reference image, paste one prompt, get one image you actually like. If you later need to illustrate entire articles on autopilot, the full production pipeline is here. This article is for the other 90% of moments.
The 60-Second Decision: Pipeline or Single Image?
Most AI image tutorials skip past a question that matters more than any prompt trick: what are you actually trying to do?
Two very different jobs hide behind the phrase "AI image generation":
Job A — One image, today. A blog hero, a social post, a presentation slide, a gift, a concept sketch. You need a result you like, once, and then you move on. No code, no API keys, no folder of reference images you will never reopen.
Job B — Consistent illustrations at scale. A newsletter that needs five matching images every week. A content factory where every article must share a visual identity. This is a systems problem, and it deserves a real pipeline.
This article is for Job A. If you are living in Job B, the full pipeline guide is the better use of your time — it covers the automated workflow, reference-image anchoring at scale, cloud storage, and how to extend it without touching code.
The mistake I see most often: Job A people copy Job B solutions. They install APIs, configure cloud storage, and build folder structures to generate a single hero image. Two hours later, they still do not have the image. The pipeline was never the bottleneck. Picking the right tool and writing one honest prompt was.
Why Single-Image Generation Is a Different Problem
Smaller is not simpler. Single-image generation has its own pitfalls, and they are not the same as the pipeline pitfalls.
The pipeline problem is consistency. Five images must look like cousins. Hard. Worth engineering around with reference libraries, checkpoint recovery, and style config files.
The single-image problem is recognition. You have a picture in your head, and the output must match that picture. Once. No series, no future-proofing, no reusable style library. Just: does this image look like what I meant?
These need different tactics. The pipeline crowd obsesses over reusable assets and automated upload handlers. You should obsess over choosing the right tool for the specific image in your head and writing a prompt that names the real constraints.
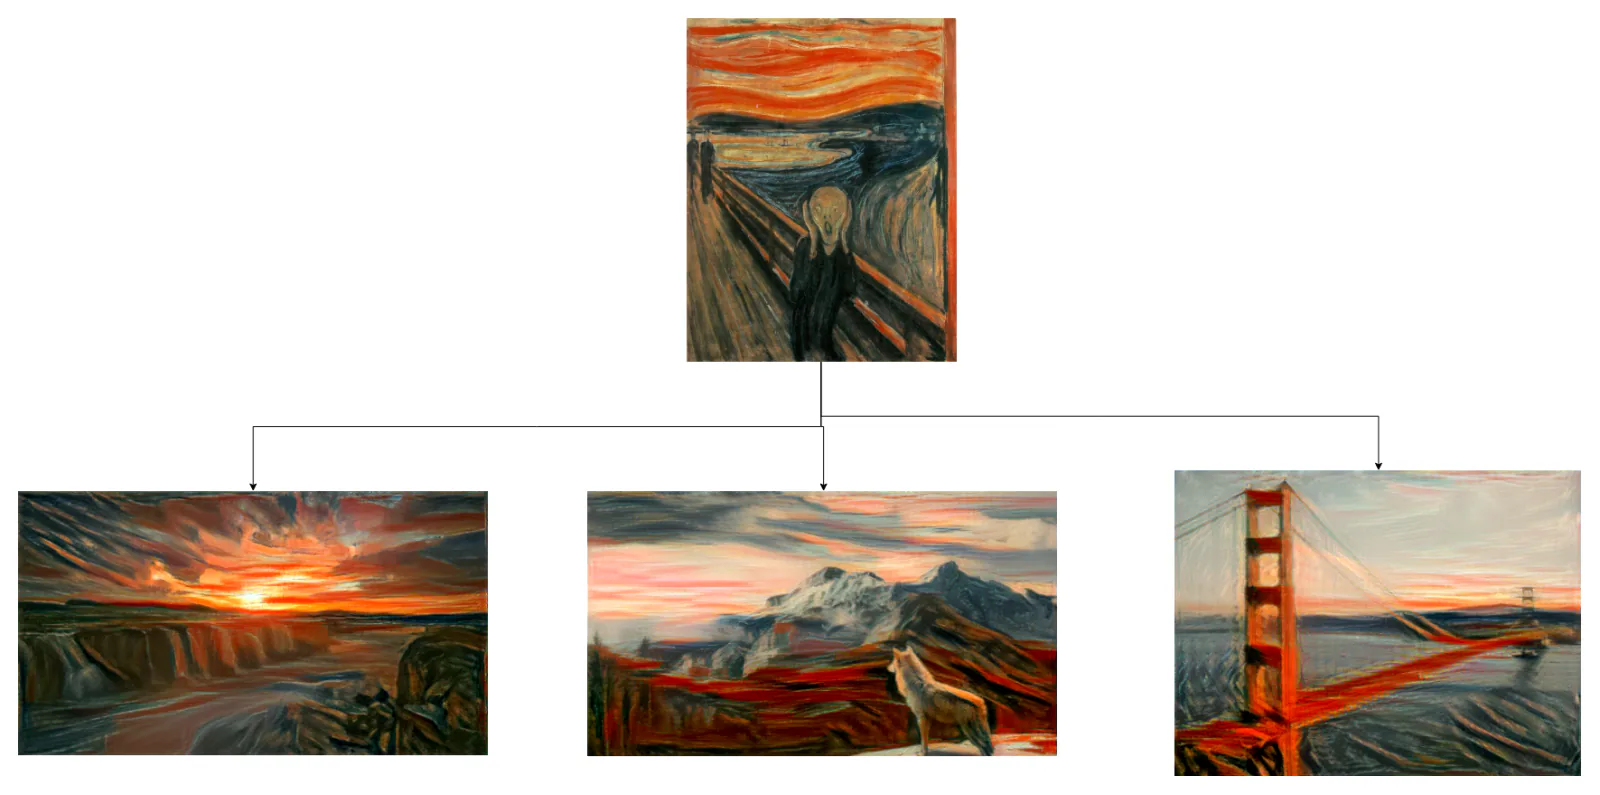
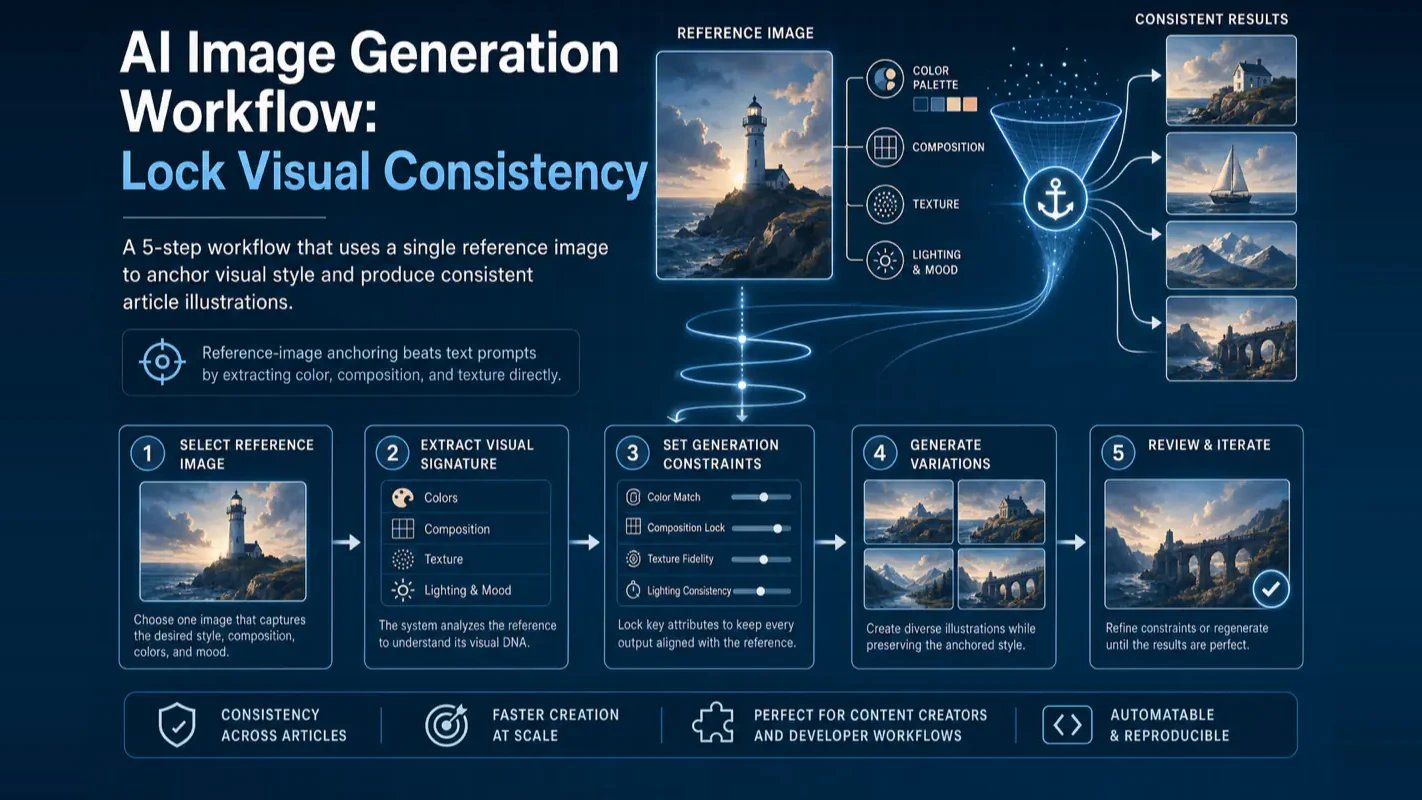
There is exactly one piece of "pipeline thinking" worth borrowing for single-image work, and the image above shows it: if you have one reference image that captures the look you want, attach it. The model reads the style directly from the pixels. No prompt can describe a color palette as precisely as the palette itself.
Everything else — multi-image coherence, automated upload, styles.json config files, checkpoint recovery — you can drop. None of it helps you get one good image today.
The Minimal 3-Step Workflow for Non-Technical Readers
Here is the entire workflow, in three steps. No code. No API. No folder structure. No JSON config.
Step 1 — Pick One Tool That Matches Your Image Type
Different tools are good at different things. Stop arguing about which is "best" and pick by job:
That is the entire decision. Pick by what is in your head, not by what is trending on X. The biggest waste of time I see is people forcing Midjourney to do a photorealistic product shot when ChatGPT would have nailed it on the first try, or fighting ChatGPT to produce an artsy editorial look that Gemini handles natively.
If you already pay for one of these, use the one you pay for. Switching tools mid-project is the second-biggest waste of time.
Step 2 — Write One Honest Prompt Using the 4-Part Template
Skip the 200-word prompt essays. They confuse the model more than they help. Use this structure:
[Subject] — what is actually in the image, named concretely
[Style] — the visual treatment, one phrase from a real tradition
[Context] — where the image will be used
[Constraints] — what to avoid
A filled-in example:
Subject: a single coffee cup on a wooden desk, seen from above, morning light
Style: minimal editorial illustration, flat colors, soft shadows
Context: hero image for a productivity blog post
Constraints: no text, no watermark, no realistic faces
That is it. Four short lines. The model now knows what to draw, how to draw it, where it will live, and what to avoid. Most failed prompts fail because they spend forty words on style and zero words on subject.
Why this works: image models are trained on captioned images. Captions describe what is in the image. The closer your prompt is to a clean caption — subject first, treatment second — the closer the output lands on the first try. Prompts that read like mood boards confuse the model because no training caption ever looked like a mood board.
Step 3 — Generate, Look Honestly, Regenerate Once
Most people get the cadence wrong in one of two directions. They either give up after the first output, or they iterate twenty times chasing a feeling they cannot name. Both are wrong.
The right cadence: look at the first result for ten seconds, name what is wrong in one sentence, regenerate once with that single fix.
"If the cup looks like a mug instead of a ceramic cup, regenerate specifying ceramic." Done.
If the second result still misses, the problem is almost always the prompt, not the model. Go back to Step 2 and make the subject line more concrete. "A coffee cup" becomes "a white ceramic coffee cup, three-quarters full, with a slight steam trail." Specificity is free and almost always works.
If the third attempt still misses, attach one reference image. Drag in any photo or illustration that has the feel you want. Models read reference images far more reliably than they read adjectives. This is the one move that rescues stubborn prompts.
Then stop. You have one good image. Move on with your day. The goal was never to generate the perfect image. It was to generate a good-enough image and ship the thing the image is for.
Five Ready-to-Copy Prompt Templates for Common Jobs
If the 4-part template above feels abstract, here are five filled-in prompts for the situations I see most often. Copy, swap the subject, paste.
Template 1 — Blog Hero Image
Subject: an abstract representation of a database, glowing connected nodes
Style: blue-purple gradient, 3D glass texture, soft depth of field
Context: hero image for a technical blog post about data pipelines
Constraints: no text, no logos, no human faces, 16:9 composition
Template 2 — Social Post Illustration
Subject: a person sitting cross-legged with a laptop, simplified silhouette
Style: hand-drawn line illustration, mustard yellow accent, off-white background
Context: Instagram post, square composition
Constraints: no realistic face, no brand logos, no text overlay
Template 3 — Presentation Slide Visual
Subject: three ascending bar charts with an upward arrow
Style: flat editorial infographic, navy and coral palette, generous whitespace
Context: slide in a business presentation about quarterly growth
Constraints: no numeric labels, no gridlines, landscape orientation
Template 4 — Concept Sketch for a Product Idea
Subject: a handheld device shaped like a smooth river stone, one recessed button
Style: industrial design sketch, graphite on cream paper, soft annotations
Context: early concept for a hardware product, mood board use
Constraints: no photorealism, no text beyond small handwritten labels
Template 5 — Newsletter Section Break
Subject: a stack of folded newspapers, slightly disheveled
Style: warm editorial illustration, muted red and ink black, slight paper texture
Context: section divider in a weekly news roundup newsletter
Constraints: no readable headlines, no portraits, wide composition
Each of these works as-is in ChatGPT, Gemini, or Midjourney. The subject line is doing most of the work. The style line gives the model a tradition to borrow from. The constraints line prevents the four failures that ruin most single-image attempts: stray text, ugly logos, uncanny faces, and wrong aspect ratio.
A note on swapping: replace the subject line completely. Keep the style, context, and constraints lines as-is unless your use case clearly differs. These templates are calibrated against the most common failure modes, and the constraints are doing more work than they look like they are.
The One-Shot Decision Checklist
Before you click generate, run this five-item check. It takes thirty seconds and prevents most bad outputs.
[ ] Subject is a noun, not a vibe. "A coffee cup on a desk" works. "Cozy morning energy" does not. If your subject line reads like a Spotify playlist title, rewrite it.
[ ] Style names a real tradition. "Editorial illustration," "watercolor sketch," "3D render," "flat infographic." Not "cool and modern" or "clean and techy."
[ ] Aspect ratio is explicit. "16:9," "square," "portrait 4:5." Models default to square and will not guess your blog hero correctly without this line.
[ ] Constraints block the known failure modes. At minimum: no text, no watermark, no uncanny faces. These three cause more rejected images than any style mismatch.
[ ] Reference image attached if the style is hard to name. If you cannot describe the look in one phrase, attach an image instead. Stop fighting adjectives.
Five checks. If any one fails, fix the prompt before generating. Generating on a broken prompt and hoping for luck is how people end up with thirty variations of the same disappointment.
This checklist is the single-image equivalent of all the engineering that goes into a production pipeline. Same principle — name your constraints before you generate, not after — stripped of everything that does not matter when you only need one image.
A Worked Example: From Vague to Specific in Three Prompts
Watch how the same request sharpens across three attempts. This is the loop most people skip, and skipping it is why they burn twenty minutes.
Attempt 1 — vague (will fail):
A nice image about productivity for my blog
The model has no subject, no style, no aspect ratio, no constraints. Output: a random stock-photo-style desk with a generic gradient overlay. You will not use it.
Attempt 2 — subject added (closer):
Subject: a coffee cup on a desk with a laptop in the background
Style: clean and modern
Context: blog hero
Constraints: 16:9
Better. The subject is concrete now. But "clean and modern" still means nothing visually — the model will guess. Output: probably fine, probably forgettable. You might use it if you are tired.
Attempt 3 — fully specified (lands):
Subject: a single white ceramic coffee cup on a wooden desk, seen from above, soft morning light
Style: minimal editorial illustration, flat colors, soft shadows
Context: hero image for a productivity blog post
Constraints: no text, no watermark, no realistic faces, 16:9 composition
Now the model has something to actually draw. Subject is a real object with a real angle and real lighting. Style names a tradition the model has thousands of references for. Constraints block the usual failures. Output: useful on the first or second generation.
The jump from Attempt 1 to Attempt 3 took about ninety seconds of thinking. That is the entire skill. No prompt engineering certification required.
The Reference Image Trick (Without Any Code)
Here is the one technique worth borrowing from the pipeline world, stripped of all the engineering around it.
If you can find one image — any image from anywhere on the web, from your camera roll, from a previous generation you liked — that has the feel you want, attach it to the prompt. Most consumer tools (Gemini, ChatGPT, Midjourney) accept image inputs directly in their web UI. No API, no script, no credentials file.
Why this works: models read visual features (color palette, composition, texture, line weight) more reliably than they read adjectives. A reference image transmits style without translation loss. The same model that misreads "warm minimalist editorial" will copy the palette of an attached image almost exactly.
When I cannot describe a style in one sentence, I stop trying to describe it. I find an image that has the look, drop it into the chat, and write "match the visual style of this image" as the only style instruction. It works more often than any prompt engineering I have tried.
Where to find reference images fast: Pinterest, Dribbble, Are.na, your own screenshots folder, or a previous AI generation you almost liked. Do not overthink the source. The model reads pixels, not provenance. A blurry screenshot of a poster on a bus stop works as well as a hi-res Dribbble shot for transmitting a vibe.
This is the only "advanced technique" a single-image workflow needs. Everything else — style config files, reference image libraries, automated matching — is for the pipeline crowd. You need one image. Use one reference image.
When One Image Becomes Five: The Handoff
Sometimes you start generating one image and realize you actually need a set. The blog post grew a section. The presentation needs matching dividers. The social post wants a carousel.
That is the signal to stop using this guide and switch to a pipeline.
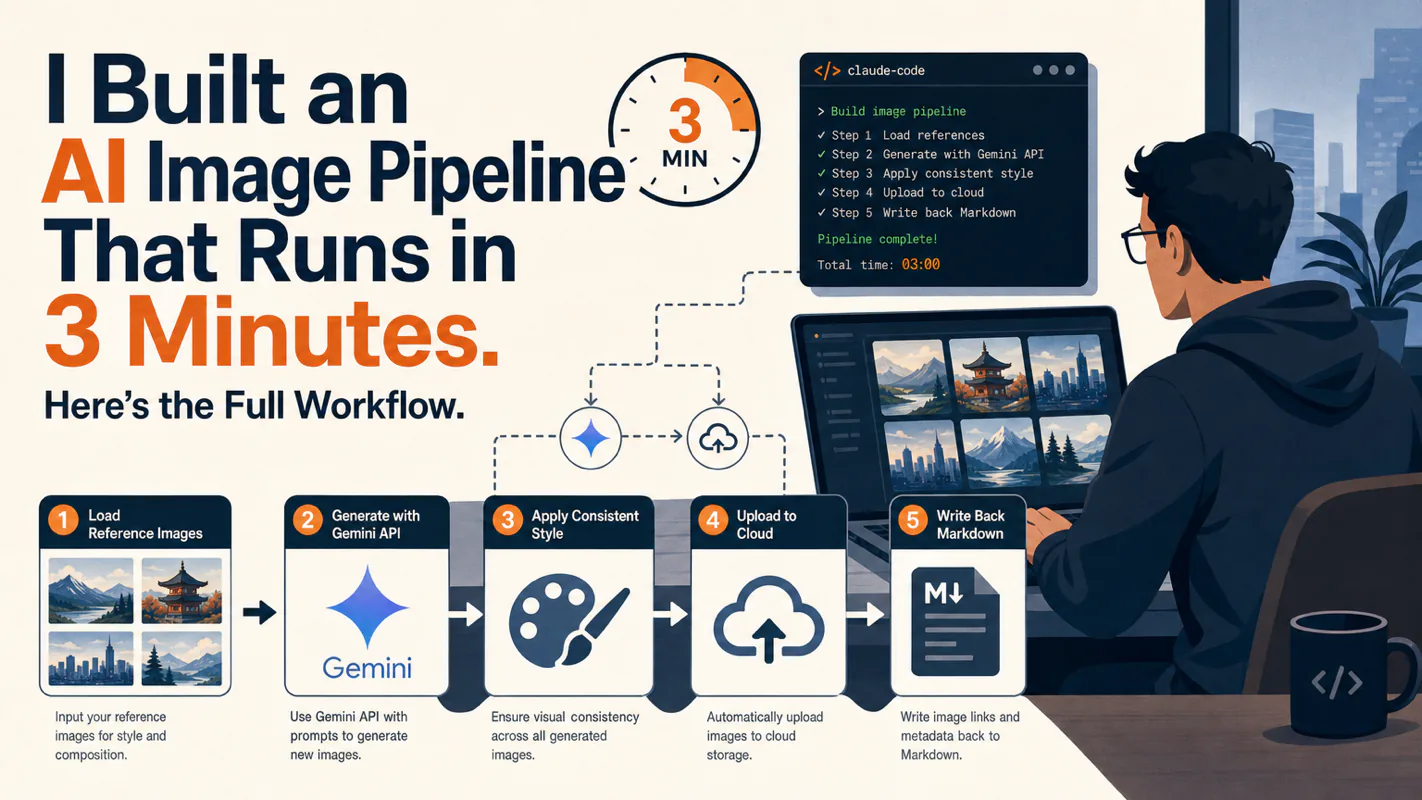
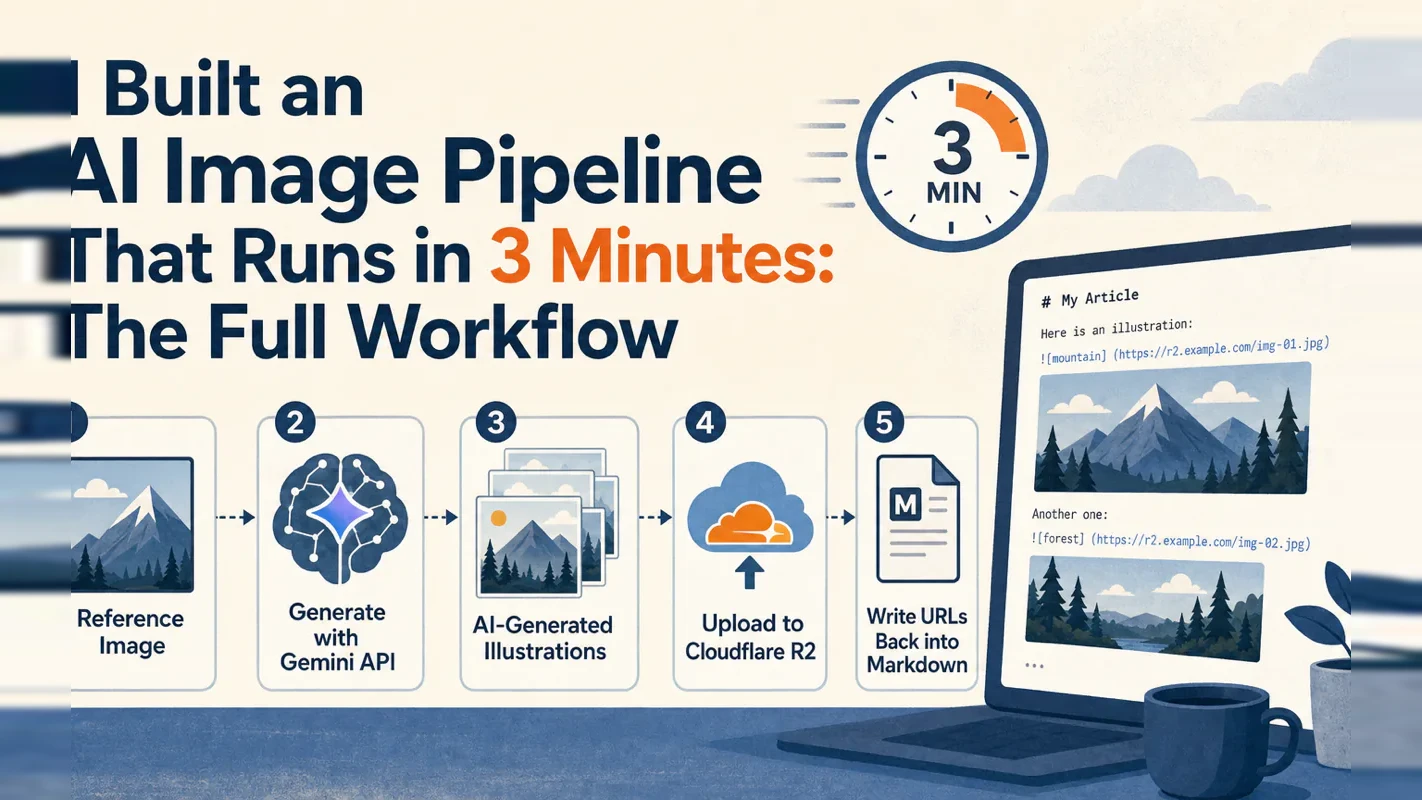
The diagram above is what a production pipeline looks like. Five automated steps: parse the document, generate style-matched images via the Gemini API, upload them to a CDN, write the URLs back into the document. Set up once, runs in about three minutes per article, every illustration matches.
If that is your problem, the full guide is here. It covers reference-image anchoring at scale, how to add custom styles without code, multi-platform output, and the milestones to build it from scratch.
The handoff rule is simple: one image, this guide. Many images that must match, the pipeline guide. Most people need the first one most of the time. The pipeline is worth the setup cost only when consistency at scale becomes the actual bottleneck you are hitting.
Common Single-Image Mistakes (And Quick Fixes)
Seven mistakes I see again and again from people generating their first AI image. All fixable in the prompt. None require code.
Mistake 1 — Writing a paragraph when a sentence would do. Long prompts dilute the signal. Every extra adjective is a chance for the model to misinterpret. Cut to subject, style, context, constraints. Four lines.
Mistake 2 — Forgetting aspect ratio. The model defaults to square. If your blog hero is 16:9, say so. If your Instagram post is portrait 4:5, say so. This one line saves more failed generations than any style trick.
Mistake 3 — Asking for "modern" or "clean." These words mean nothing visually. Name a tradition instead: editorial illustration, flat infographic, watercolor sketch, 3D render. The model has real references for those.
Mistake 4 — Skipping constraints. "No text, no watermark, no realistic faces" prevents three of the most common failure modes. Without these, models love to add stray labels and uncanny eyes that ruin an otherwise usable image.
Mistake 5 — Iterating twenty times on the same prompt. If the third generation misses, the prompt is broken. Stop regenerating and rewrite the subject line. Same prompt plus luck is not a strategy.
Mistake 6 — Ignoring reference images. If you have struggled for ten minutes to describe a style, the description is the problem, not the model. Find one image with the look and attach it.
Mistake 7 — Using the wrong tool for the job. Forcing Midjourney to do photorealistic product photography, or fighting ChatGPT to produce an editorial illustration look, wastes more time than any prompt mistake. Match the tool to the image type first (see Step 1), then optimize the prompt.
None of these require code. None require a pipeline. They are the entire game at the single-image level.
What This Guide Is Not
To keep the differentiation honest:
Not a pipeline guide. If you want to automate illustrations across dozens of articles, this is the wrong page. Use the full workflow guide.
Not a prompt engineering deep dive. There are entire frameworks for structured prompt design across models. This guide uses one simple template that works for 80% of single-image needs.
Not a tool comparison. The table above is a picker, not a review. Each tool has thousands of pages written about it elsewhere.
Not a style library. No styles.json, no reference image folders, no reusable assets. You need one image today. When you need a library, upgrade to the pipeline.
This is the minimal path. Add complexity only when the minimal path stops working — and for most people, on most days, it does not stop working.
Ready-to-Use Prompt: Build a Paste-Ready Prompt for One Great AI Image
What this does: Takes a vague image need, runs the 60-second one-image-vs-pipeline decision, then returns a three-round prompt ladder and a final paste-ready prompt — no code, no system. Based on: How to Generate One Great AI Image in 60 Seconds (No Code, No Pipeline) — https://aiworkflowpro.com/ai-image-workflow/ Time to run: ~3 minutes
Copy this prompt into Claude Code, ChatGPT, or any AI assistant:
ROLE: You are a Single-Image Prompt Builder for non-technical readers. Your job: turn a vague image need into one paste-ready prompt in under a minute — and route pipeline people to the pipeline.

CONTEXT — SINGLE-IMAGE 60-SECOND METHOD:
Most "AI image" needs are Job A — one good image today (a hero, a social post, a slide, a gift) — not Job B, the recurring matching-set problem that deserves a real pipeline. The two hide behind the same phrase, so step one is always the 60-second decision. For Job A the minimal workflow is three moves: pick one tool without agonizing, drop one reference image (this skips the ambiguous text layer and is the single biggest quality lever), and paste one prompt. Specificity is built across a three-round ladder — subject, then style and lighting, then composition and mood — not crammed into the first try. You stop the moment you like it. When one image turns into a matching set of five, that is the handoff to the production pipeline.

INPUTS (fill in before running):
- WHAT_YOU_NEED: [The image you want, however vague]
- USE: [Where it goes — blog hero, social post, slide, gift, concept sketch]
- HAVE_REFERENCE: [yes / no — do you have a reference image or vibe to anchor on?]
- VOLUME: [Just one, or several matching ones?]

METHOD — 4 STEPS:

Step 1 — Run the 60-Second Job A/B Decision
Decide Job A (one image today) or Job B (five-plus matching images on a recurring basis). If VOLUME is "several matching" or USE implies a recurring series, route to the production pipeline and stop here — this method serves Job A only.

Step 2 — Apply the 3-Step Minimal Workflow
(a) name one tool — no agonizing; (b) set the reference image if HAVE_REFERENCE is yes, since it skips the text layer; (c) draft the prompt with four slots filled: subject, style, lighting, composition/mood.

Step 3 — Refine Vague to Specific in Three Rounds
Build a prompt ladder from WHAT_YOU_NEED: Round 1 = subject only; Round 2 = add style and lighting; Round 3 = add composition and mood. Mark which round to paste first and exactly what to add on each retry.

Step 4 — Flag the Handoff
State the single trigger that means this stopped being Job A — a matching set is now needed. Name the production pipeline as the next step when that trigger fires.

RULES:
- Never build a pipeline for a one-image need — Job A stays one image, one tool, one prompt.
- Never cram every adjective into round 1 — specificity is added across rounds, not all at once.
- Never skip the reference-image slot when HAVE_REFERENCE is yes — it is the highest-leverage move.

OUTPUT FORMAT:
Output a markdown report with:
1. Job A/B Verdict — which job, one-line why; if Job B, name the pipeline and stop
2. 3-Step Setup — markdown table, columns: Step | Action | Why
3. Prompt Ladder — markdown table, columns: Round | Paste This | What to Add Next
4. Final Paste-Ready Prompt — the round-3 prompt inside a fenced text block
5. Handoff Trigger — the condition that means switch to the pipeline
Save as @templates/ai-image-workflow.md and run whenever you need one good image fast — not a system.
Frequently Asked Questions
What is the fastest way to generate one good AI image?
Pick one tool that matches your image type (ChatGPT for realistic scenes and product shots, Gemini for editorial illustration, Midjourney for stylized art), write a 4-part prompt covering subject, style, context, and constraints, generate once, and regenerate at most one more time with a single named fix. Total time: under a minute for most requests. Do not build a pipeline for a single image — the setup cost is higher than the task deserves.
Do I need to write code to generate AI images?
No. Consumer tools like ChatGPT, Gemini, and Midjourney accept prompts and reference images directly in their web interfaces. Code, APIs, and pipelines are only necessary when you need to automate generation at scale or integrate images into a production system. For one image, the web UI is faster, cheaper, and less error-prone than any scripted approach.
How do I keep my AI image style consistent if I only generate one at a time?
For a single image, consistency is not the problem — recognition is. You are not trying to match a series; you are trying to land on the picture in your head. Use one reference image attached to the prompt instead of trying to describe the style in words. The model reads visual features directly from the reference, which is more reliable than any adjective. If you need consistency across many images, that is a pipeline problem, not a single-image problem.
When should I upgrade from single-image generation to a full pipeline?
When you need matching images for multiple pieces of content on a recurring basis — a weekly newsletter with five illustrations, a blog series that must share a visual identity, a content workflow that runs without manual prompting each time. If you are generating one image for one piece, stay with the single-image workflow. The pipeline overhead — API setup, cloud storage, style config files, checkpoint recovery — is only worth it when consistency at scale becomes the actual bottleneck you are hitting.
Most AI text to speech guides rank models by sound quality alone. This one starts with the question that actually matters: can you legally ship it? A practical decision framework covering licensing traps, hardware requirements, and real-world model selection for developers and indie makers.
Stop fighting style drift in AI-generated article images. This three-layer prompt framework paired with a pool of 100 visual styles gives every article a unique look while keeping all illustrations within a single piece visually consistent.
Most content creators struggle with AI image style drift. This tutorial breaks down a 5-step AI image generation workflow that uses reference-image anchoring to produce visually consistent article illustrations every time.
Which ComfyUI cloud platform actually fits your workflow? 17 platforms across 4 tiers — PaaS, IaaS, Official, and Enterprise API — compared by flexibility, cost structure, and real community feedback. Decision tree included.