Monitoring a competitor who publishes no feed is the case every RSS guide skips. Twenty-one platforms sorted by which of three jobs they do, and the finished setup is business process automation you own outright, with no seat licence to renew.
Blaming the content is the reflex when a post underperforms, and it is usually the wrong diagnosis. A second reader decides distribution before any human sees the post, and most of what it checks is mechanical enough to automate business processes around, on five platforms at once.
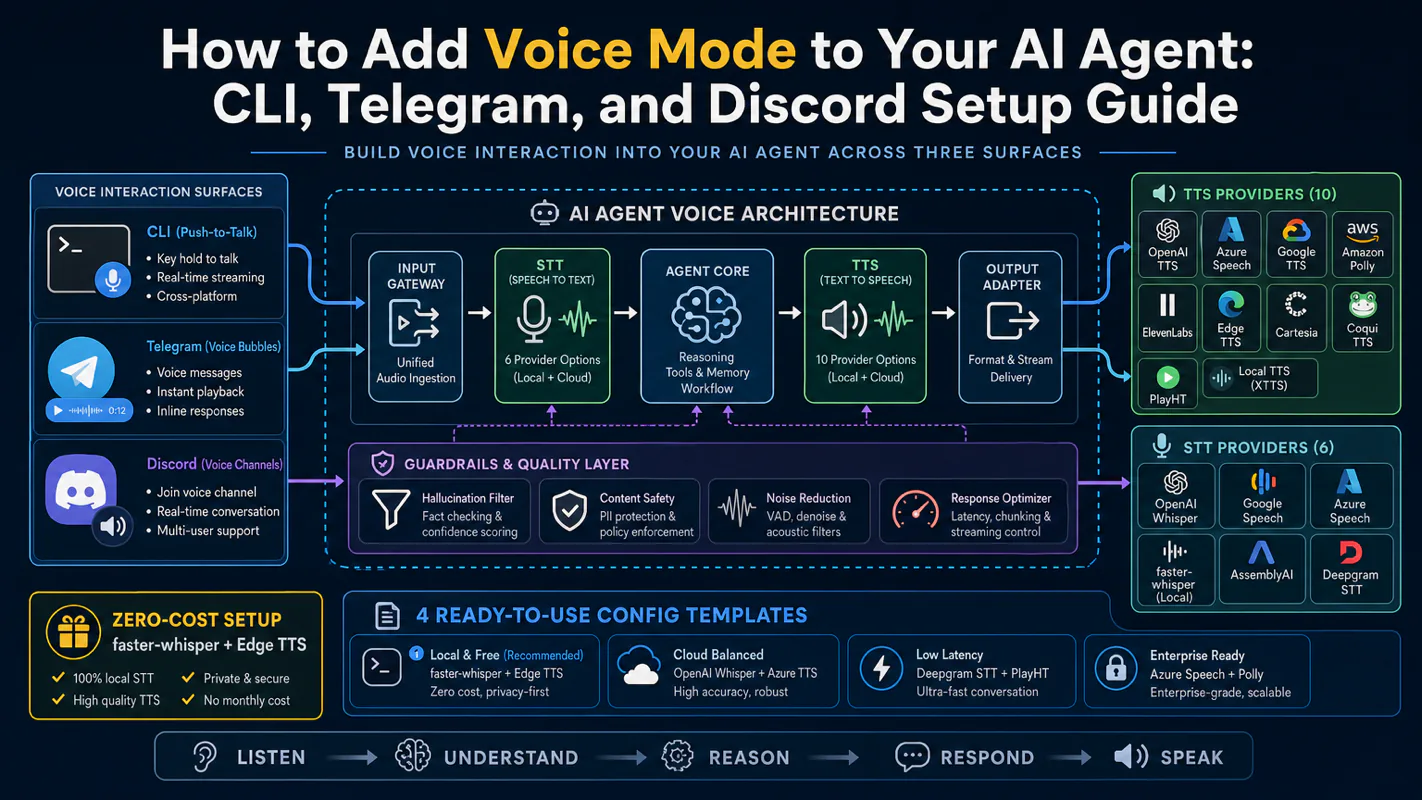
Gloves on, tape measure in hand — nobody types a query. Three voice surfaces for ai automation tools (terminal, Telegram, Discord), 10 TTS and 6 STT providers compared on cost and latency, plus a setup that costs nothing.
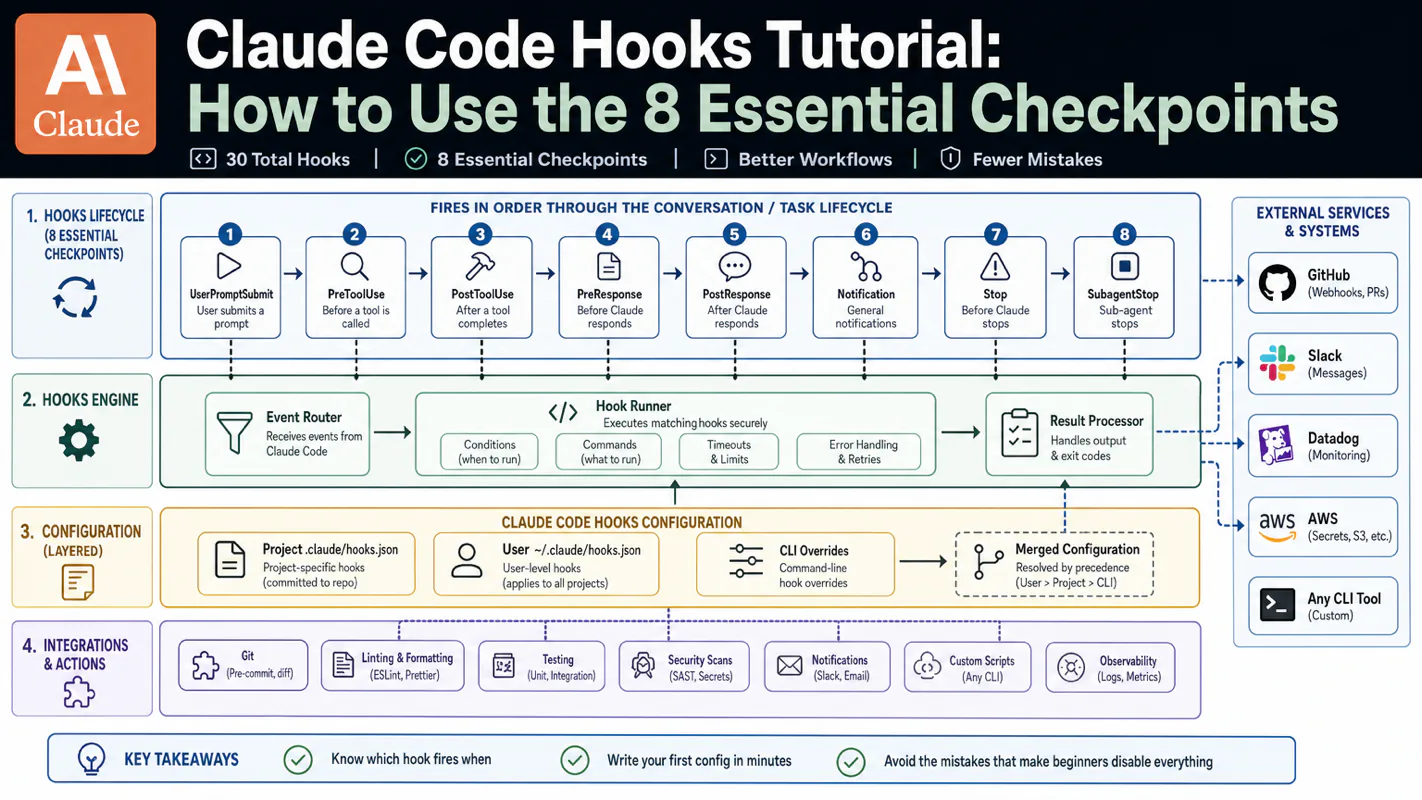
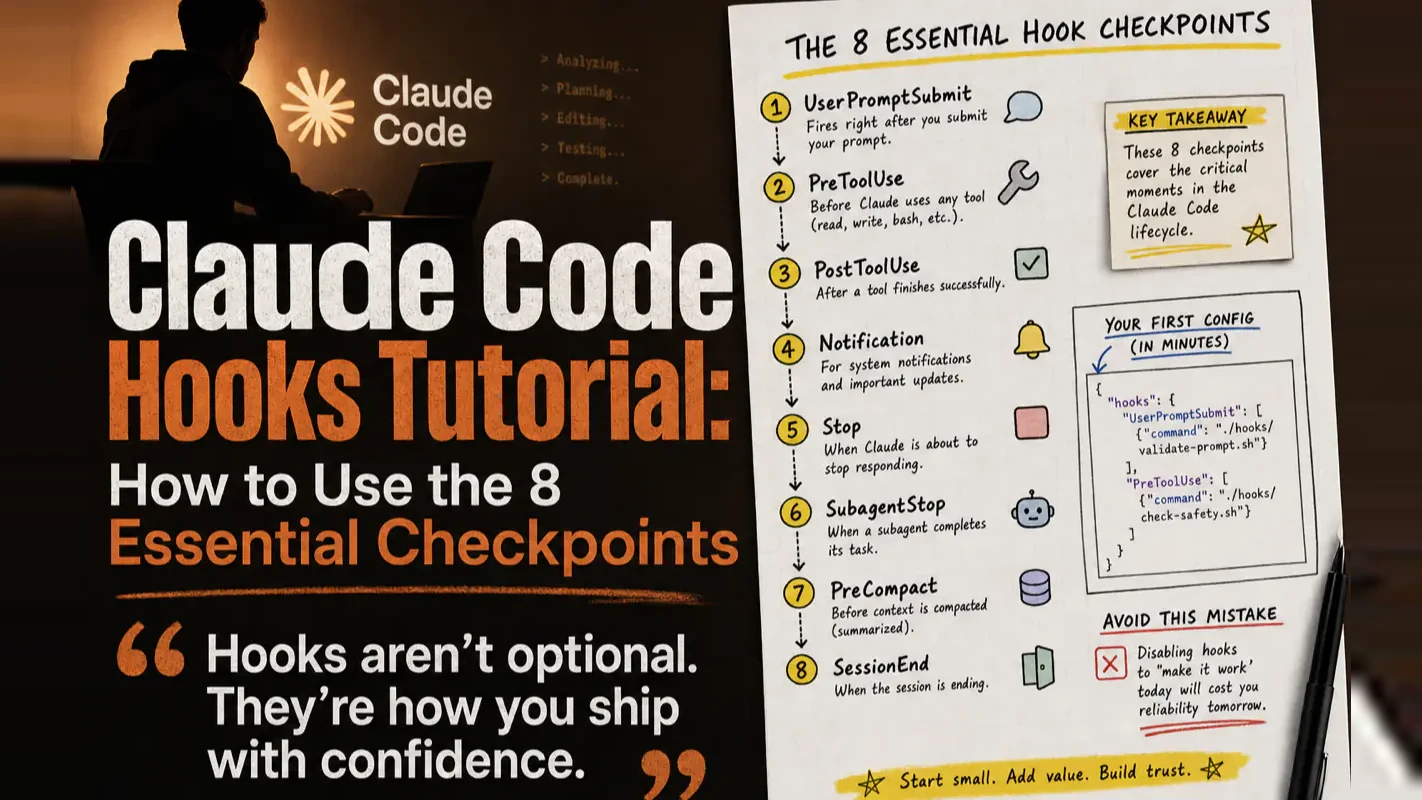
Claude Code Hooks Tutorial: How to Use the 8 Essential Checkpoints
A written instruction depends on the model remembering; a checkpoint does not. Eight lifecycle moments where your script fires automatically, where the config lives, how to write one that blocks dangerous commands, why three is the ceiling, and how to debug workflow automation software hooks.
Walk any production floor and the checks that exist are scar tissue - each one traces back to a specific bad afternoon. A dental lab weighs every case before it ships because of one remake that cost four hundred dollars in 2019. Software work rarely gets this treatment: teams give their workflow automation software a written instruction not to touch production data and hope it holds through a long session. Instructions depend on memory; a checkpoint does not. This tutorial covers the eight moments where a script can fire automatically, how to write the first one, and why three is usually the right ceiling.
Claude Code hooks are commands that fire automatically at fixed moments during a session. They do not make the AI smarter. They make critical actions predictable. This tutorial walks through every checkpoint, shows you how to write your first hook, and covers the debugging sequence that prevents hours of guessing.
I have been running hooks across multiple production knowledge-base projects for months. The single most useful lesson: start with one hook that addresses your biggest real fear, not ten hooks that look impressive in a config file.
What Are Claude Code Hooks and Why Do Checkpoints Matter?
During a Claude Code session, scripts can execute at predetermined lifecycle moments — before a tool runs, after a file edit, when a session opens or closes. Each moment is a checkpoint where your script decides whether to allow, block, or log what happened.
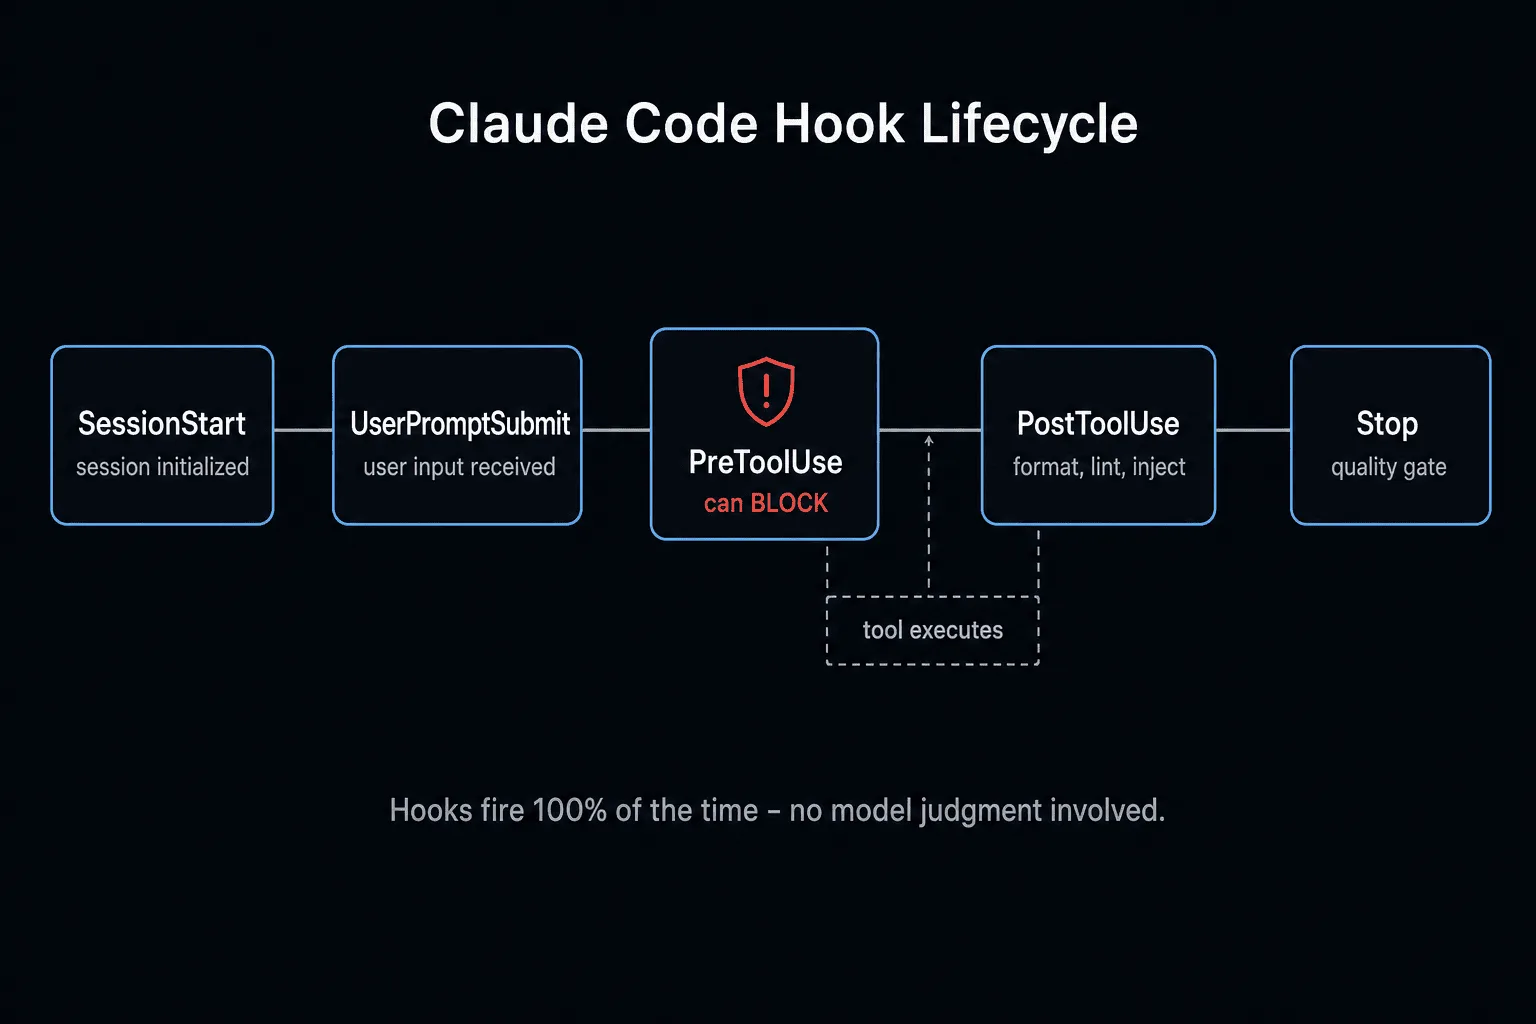
The critical distinction from prompt instructions: hooks are deterministic. A prompt like "never delete production files" depends on the model remembering. A PreToolUse hook that checks every Bash command for rm -rf fires every single time, regardless of context window pressure or conversation length.
Anthropic's documentation frames it this way: hooks provide "deterministic control, ensuring certain operations always happen rather than relying on the model choosing to run them."
From my experience, the mistake most beginners make is treating hooks as an intelligence upgrade. They are a control upgrade. That difference shapes every decision you will make about what to hook and what to leave as a prompt instruction.
Start with two checkpoints: PreToolUse (block risky actions before they happen) and PostToolUse (verify results after they happen). Master those before touching anything else.
How Do the 8 Essential Lifecycle Checkpoints Map to a Session Timeline?
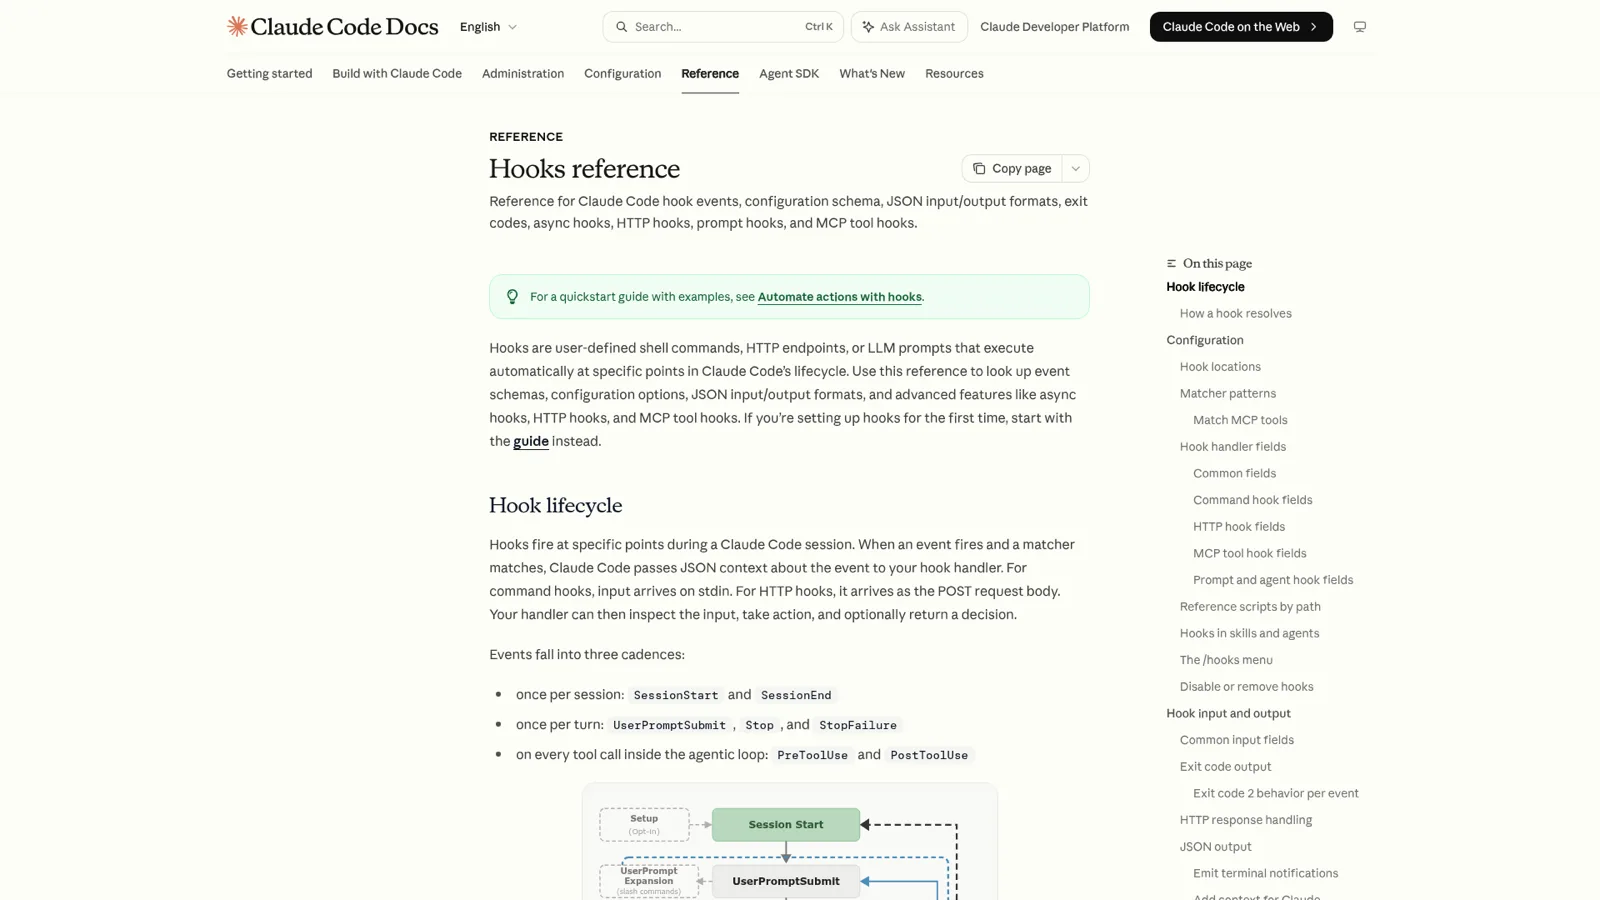
Claude Code exposes 30 lifecycle events in total (official Hooks reference). This tutorial focuses on the 8 most commonly used ones — the checkpoints that cover day-to-day safety and quality concerns. Place them on a timeline from session start to session end, and each one becomes obvious.
When it fires
Checkpoint
Purpose
Beginner priority
Session opens
SessionStart
Inject project context, remind directory rules
Medium
User submits a prompt
UserPromptSubmit
Append context or block inappropriate requests
Low
Claude picks a tool
PreToolUse
Block dangerous actions (most important)
High
Tool finishes
PostToolUse
Verify output, auto-format changed files
High
Claude finishes responding
Stop
End-of-turn sanity check
Low
Subagent completes
SubagentStop
Post-process subagent results
Low
Context compaction starts
PreCompact
Preserve critical info before compression
Low
Session closes
SessionEnd
Clean temp files, write logs
Low
Day-one focus: PreToolUse is the guard at the gate. PostToolUse is the inspector at the exit. Set up those two posts and leave the rest for later.
The timeline model also prevents a common configuration mistake: choosing the wrong checkpoint. If your problem happens before Claude acts, a PostToolUse hook cannot help. If your problem happens after edits, a SessionStart hook fires too early. Match the moment to the problem.
Where Should You Put Your First Hook Config?
Put your first hook at the project level, not globally. The config file is .claude/settings.json in your project root.
Four configuration layers exist, from broadest to narrowest:
Config location
Scope
Git-trackable
Managed policy (enterprise)
Entire organization
Admin-controlled
~/.claude/settings.json
All your projects
No (local machine)
.claude/settings.json (project root)
Current project only
Yes
.claude/settings.local.json
Current project only
No (excluded from repo)
Why project-level first? A hook that runs a slow linter in one project should not drag down every other project on your machine. Project-level hooks are easy to observe, easy to delete, and easy to share with teammates via git. Promote a hook to global only after you confirm it belongs everywhere.
A minimal hook config looks like this. It auto-formats any file Claude edits:
Three nesting layers: the outer hooks object groups entries by event name (PostToolUse). Each entry uses matcher to target specific tools (Edit|Write means only file-editing tools). The inner hooks array holds the actual commands — here, jq extracts the edited file path and passes it to Prettier.
Use /hooks inside Claude Code to verify registration. This command is read-only (it cannot edit hooks), but it confirms whether your JSON was parsed correctly.
How Do You Write a Hook That Blocks Dangerous Commands?
Start with the action you fear most. For most developers, that is an accidental rm -rf or a DROP TABLE running against a real database.
When a PreToolUse event fires, Claude Code pipes the operation data into your script as JSON via stdin. For Bash commands, the command string lives at tool_input.command. This script reads it, checks for danger keywords, and blocks if matched:
#!/bin/bash
# Block high-risk commands before Claude executes them
INPUT=$(cat)
COMMAND=$(echo "$INPUT" | jq -r '.tool_input.command')

if echo "$COMMAND" | grep -qE 'rm -rf|drop table'; then
  echo "Blocked: high-risk command detected. Review manually before executing." >&2
  exit 2   # exit 2 = block this operation
fi

exit 0     # exit 0 = no opinion, proceed with normal permission flow
Exit codes are the entire decision vocabulary:
Exit code
Meaning
exit 0
No objection. Operation proceeds through normal permission checks.
exit 2
Block this operation. stderr content is returned to Claude as the reason.
Any other
Operation continues, but the terminal shows a hook error notice.
What happens when a hook script fails? The behavior depends on the exit code. Exit 0 means no objection. Exit 2 blocks the operation. Any other exit code (including 1) is treated as a non-blocking error: Claude Code shows a hook error notice in the transcript with the first line of stderr, then continues execution. If the hook script is not found or lacks execute permission, the error notice appears but can be easy to overlook in a busy session. Hooks are not silently skipped — there is always a visible notice — but the notice does not stop execution for most events.
Save the script to .claude/hooks/block-danger.sh, make it executable (chmod +x), and register it under PreToolUse with a Bash matcher in .claude/settings.json.
I have run a version of this script across three different project types. The pattern that works best for beginners: do not hard-block everything on day one. Use exit 2 with a clear message like "This command affects a wide scope — please confirm the target path." You still approve manually when appropriate. The hook ensures nothing slips past unnoticed.
Focus on three categories initially: bulk file deletion, system directory modifications, and commands that send data to external services.
Why Should You Limit Yourself to Three Hooks or Fewer?
Every hook adds latency. Claude checks for matching hooks before and after each tool call. Ten hooks with broad matchers turn a fast workflow into a sluggish one. Most beginners who configure a dozen hooks disable all of them within a week.
The debugging problem is worse than the speed problem. With many hooks active, you cannot tell whether Claude skipped a command because it decided to, or because a hook blocked it silently. Tracing unexpected behavior through a stack of hook scripts wastes more time than the hooks save.
A practical ceiling: keep individual hooks under one second of execution time, and keep the total count under ten. In the first week, three or fewer is the right number. Add a fourth only when you answer "yes" to this question: without this hook, would I make this mistake regularly?
If a hook fires and you do not bother reading its output, it is noise. Good hooks resemble a red traffic light — rare, but you pay attention every time.
When Should You Use Prompt Instructions Instead of Hooks?
Prompt instructions shape understanding. Hooks enforce execution. The dividing line: can you tolerate the action occasionally not happening?
Need
Where to put it
Why
Shorter answers, conclusion-first style
CLAUDE.md (prompt instructions)
Expression preferences work through understanding
Project context, test commands, directory conventions
CLAUDE.md
Long-lived working habits; one miss is not catastrophic
Run tests after every file edit (Claude keeps forgetting)
PostToolUse hook
Reminders are unreliable — upgrade to deterministic execution
Never delete production data, never log secrets
PreToolUse hook
Red lines with high cost of failure need hard boundaries
The escalation path is practical: start every rule in CLAUDE.md. When you notice Claude forgets a rule repeatedly and the consequence matters, promote that rule to a hook. Not every rule deserves a hook, and not every hook replaces a prompt instruction. The best setups use both: CLAUDE.md explains the reasoning, and the hook enforces the boundary.
From running this pattern in production: the rules I promote to hooks most often are "run tests after edits" and "do not write to the deployment directory." Everything related to tone, format, or communication style stays in prompt instructions permanently.
How Do Async and HTTP Hooks Extend the System?
Async hooks run in the background without blocking Claude. Add "async": true to any hook config entry, and it fires without making Claude wait for the result.
Use async for:
Writing logs
Sending monitoring alerts
Running slow secondary checks
Keep synchronous for:
Blocking or allowing an action (PreToolUse decisions)
Injecting content into the context window
Any hook whose result must influence the next step
The principle: if Claude can safely continue without the result, make it async.
HTTP hooks send event data to a remote endpoint instead of running a local script. Set type to http and provide a url. The event payload arrives as a POST request, and the remote service returns the decision.
HTTP hooks suit teams that need centralized validation, audit logging, or compliance checks. For solo developers and small teams, local command hooks are simpler and more reliable — a remote service outage blocks your entire Claude session.
How Do You Debug a Hook That Does Not Fire?
Follow three checks in order: registration, timing, weight. Most failures resolve at step one or two. Diving into script logic before confirming registration wastes time.
Check order
What to verify
How
First
Is the hook registered?
Run /hooks in Claude Code. Many failures are JSON typos or misplaced files.
Second
Is the checkpoint correct?
Blocking before execution needs PreToolUse. Verifying after edits needs PostToolUse. Wrong checkpoint = correct script at the wrong moment.
Third
Is the script too heavy?
Network calls, large file scans, and slow linters drag the session. Keep hooks light.
Common failure modes and fixes:
command not found: Use an absolute path or $CLAUDE_PROJECT_DIR prefix. Relative paths break depending on where Claude Code launches.
jq: command not found: Install jq (brew install jq on macOS, apt install jq on Linux).
Script never executes: Missing executable permission. Run chmod +x on the script file.
Hook registered but no visible effect: The matcher does not match the tool name. Edit|Write catches the Edit and Write tools only — Bash tool edits (via sed, >, >>) require a separate Bash matcher.
Anthropic recommends a manual test: pipe sample JSON into your script from the terminal and inspect the exit code and output. This catches logic errors faster than repeatedly triggering Claude and guessing.
# Manual hook test
echo '{"tool_name":"Bash","tool_input":{"command":"rm -rf /important"}}' | bash .claude/hooks/block-danger.sh
echo $?  # Should output 2
What Does a Realistic Three-Day Setup Look Like?
This is the sequence I follow for every new project. Adapt the specific commands to your stack, but keep the pacing.
Day 1 — Dangerous command alerts only. Goal: feel comfortable letting Claude make small edits in the project. One PreToolUse hook on the Bash tool that flags rm -rf, DROP, and outbound curl to unfamiliar hosts.
Day 2 — Post-edit verification reminder. Goal: build the "edit then verify" rhythm. One PostToolUse hook on Edit|Write that prints a reminder to run the test suite. Not automated testing yet — just a visible nudge.
Day 3 — Session context injection (if needed). Goal: ensure Claude reads project-specific rules on every session start. One SessionStart hook that cats a summary of directory conventions into the context. Only add this if you notice Claude repeatedly ignoring project structure.
After three days, if nothing hurts, stop. Automation is not inherently better when there is more of it. The hooks that survive long-term are the ones tied to real mistakes you have actually made, not theoretical risks from a checklist.
A rule I enforce on myself: if I add a hook because it "looks professional" rather than because I have been burned, I remove it within the week.
Turn your project's biggest real risks into a minimal, working Claude Code hooks config — capped at three hooks — without reading any tutorial.
You are a Claude Code hooks architect. Your only job: turn my project's real risks into a minimal hook config — 3 hooks or fewer — that makes critical actions predictable. Hooks are deterministic scripts that fire at fixed lifecycle moments; they do not make the model smarter, they guarantee an action runs every time.

Here are the 8 available lifecycle checkpoints:
1. SessionStart — fires when a session opens
2. UserPromptSubmit — fires after I submit a prompt, before the model acts
3. PreToolUse — fires before EACH tool call (Bash, Edit, Write, etc.) — can block
4. PostToolUse — fires after each tool call completes
5. Notification — fires on Claude notifications
6. Stop — fires when the main agent finishes
7. SubagentStop — fires when a subagent finishes
8. SessionEnd — fires when a session closes

Follow this exact procedure:

STEP 1 — SURFACE FEARS. Read [MY_PROJECT_CONTEXT_HERE] and list the top 5 things that, if they happened, would cost me hours to recover from (e.g. deleting prod files, committing secrets, overwriting shared config, running destructive migrations, drifting from project conventions).

STEP 2 — RANK BY RISK. For each fear, score Likelihood (1-5) × Recovery cost in hours (1-5). Output a markdown table with columns: Fear | Likelihood | Recovery cost | Score | Suggested checkpoint.

STEP 3 — DECIDE HOOK VS PROMPT. For the top 3 fears ask: is this DETERMINISTIC and ENFORCEABLE — can a script ALWAYS catch it? If yes → hook. If it needs judgment or is a preference (e.g. "write clean code", "follow our style") → it belongs in CLAUDE.md prompt instructions, NOT a hook. Give a one-line reason for each decision.

STEP 4 — GENERATE THE CONFIG. Output a complete `hooks` block for `settings.json` with exactly 3 or fewer hooks. Each hook must include: event, a `matcher` (e.g. `Bash|Edit`), and a real shell command that blocks on exit code 2 (0 = allow, 2 = block with stderr shown to the model). Prefer a tiny external script over inline logic. Include the script file contents inline.

STEP 5 — DEBUG PLAN. Add a short "if a hook does not fire" checklist: confirm event name spelling, confirm matcher regex, confirm script is executable and writes to stderr, confirm config is in the correct file (`~/.claude/settings.json` vs project `.claude/settings.json`), and rerun with `--debug`.

HARD RULES: Start from my biggest fear, never from a pretty-looking config. Reject any hook whose own failure mode would be worse than the thing it prevents. If a fear is better handled by a prompt rule, say so and place the rule in CLAUDE.md instead of a hook.

[MY_PROJECT_CONTEXT_HERE]: (paste your project description, tech stack, directory layout, and the one outcome that scares you most)
Save as @templates/claude-code-hooks-tutorial-action.md and run it whenever you start a new project or want to audit your existing hook setup for dangerous gaps.
Frequently Asked Questions
Should I use exit codes or JSON permissionDecision to block actions?
Pick one. Exit code 2 is the simplest blocking mechanism — write the reason to stderr and exit. For cases where you need to choose between block, allow, and escalate, use JSON: exit 0 with a permissionDecision field set to deny, allow, or ask. Anthropic's documentation states that exit 2 causes Claude to ignore any JSON output. Using both simultaneously produces unpredictable behavior.
Why does my Edit|Write formatter miss files Claude modified via Bash commands?
The Edit|Write matcher only watches the Edit and Write tools. When Claude uses the Bash tool to run sed, pipe redirects, or any other shell command that modifies a file, that path bypasses your hook entirely. Fix: add a second hook entry with a Bash matcher, or add a Stop hook that scans the workspace at the end of each turn.
When should I use async hooks?
Whenever the hook does not need to influence the current operation. Logging, monitoring alerts, and slow background scans are async candidates. Any hook that must decide whether to block or inject content must stay synchronous.
Can teams share hooks through a centralized service instead of local scripts?
Yes. HTTP hooks replace local scripts with a remote endpoint: set type to http, provide a url, and the event data is POSTed to your service. This works for centralized audit, validation, and compliance. For solo developers, local scripts are more reliable — a service outage blocks your entire Claude session.
My hook config exists but Claude reports command not found — what is the fix?
First, run /hooks to confirm registration (it is read-only). If registered, switch to an absolute script path or use $CLAUDE_PROJECT_DIR. Install missing tools like jq. Ensure executable permission with chmod +x. The most reliable debug step: pipe a sample JSON payload into your script in a terminal and check the exit code and output manually.
Next Steps
You now understand where each checkpoint fires, how to write a blocking hook, and the three-check debugging sequence. The practical starting point: identify the single action you fear most in your current project, write one hook for it, and test it with a safe action in a temp directory before using it in production.
Gloves on, tape measure in hand — nobody types a query. Three voice surfaces for ai automation tools (terminal, Telegram, Discord), 10 TTS and 6 STT providers compared on cost and latency, plus a setup that costs nothing.
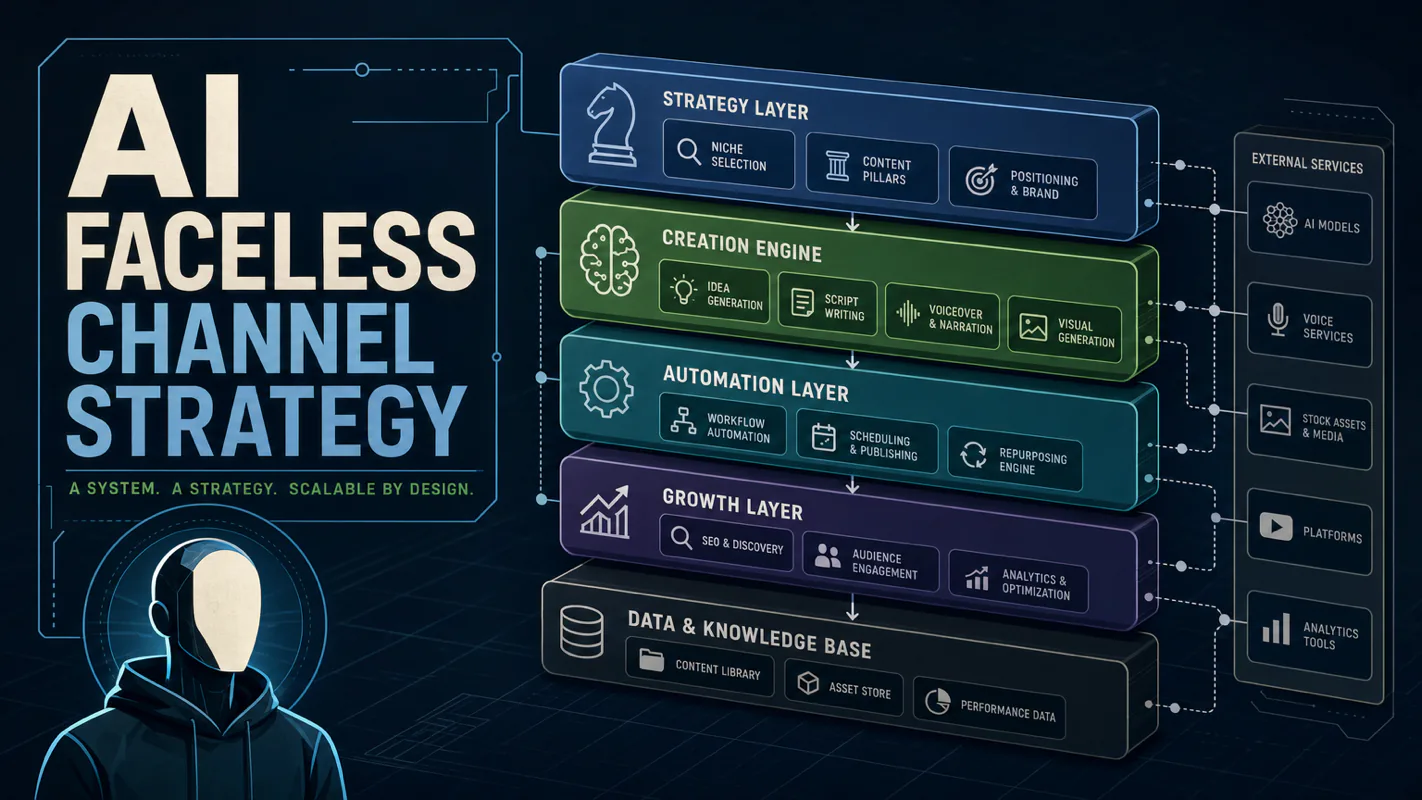
Nothing about month four is harder than month three. It is simply the month an unpaid channel starts to feel like proof of failure. Surviving it takes a cadence you can hold while earning nothing, which is a better reason to automate business processes than speed ever was.
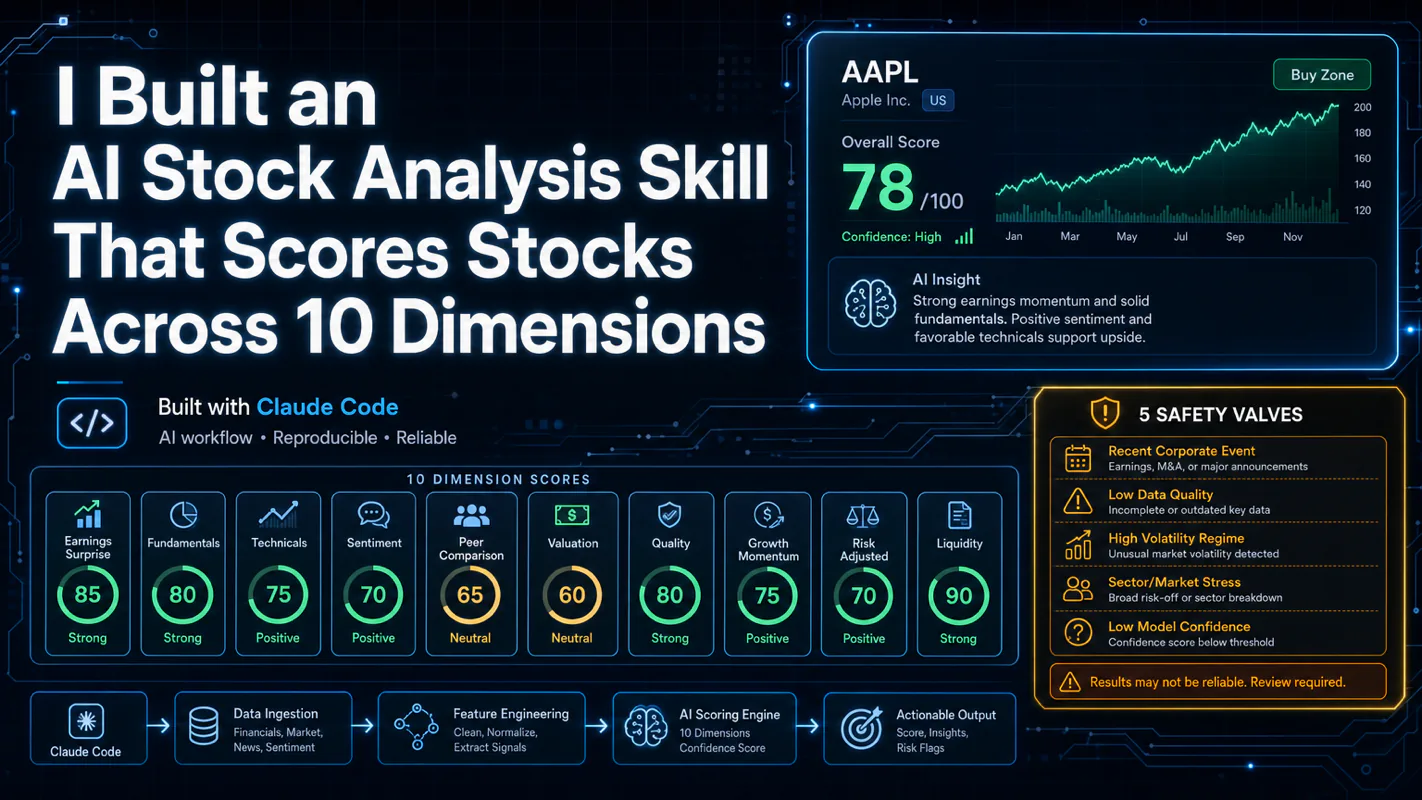
One number hides more than it shows. This Claude Code Skill scores US equities across 10 dimensions, from earnings surprise to peer comparison, with confidence scoring and 5 safety valves that flag thin data. A coding tutorial, not financial advice.
Publishing eats your week through research, SEO fields, images, and uploading — not writing. Here is the 10-step workflow automation pipeline that takes a topic to a published draft on one command, and the data contract that lets each step hand off cleanly to the next.